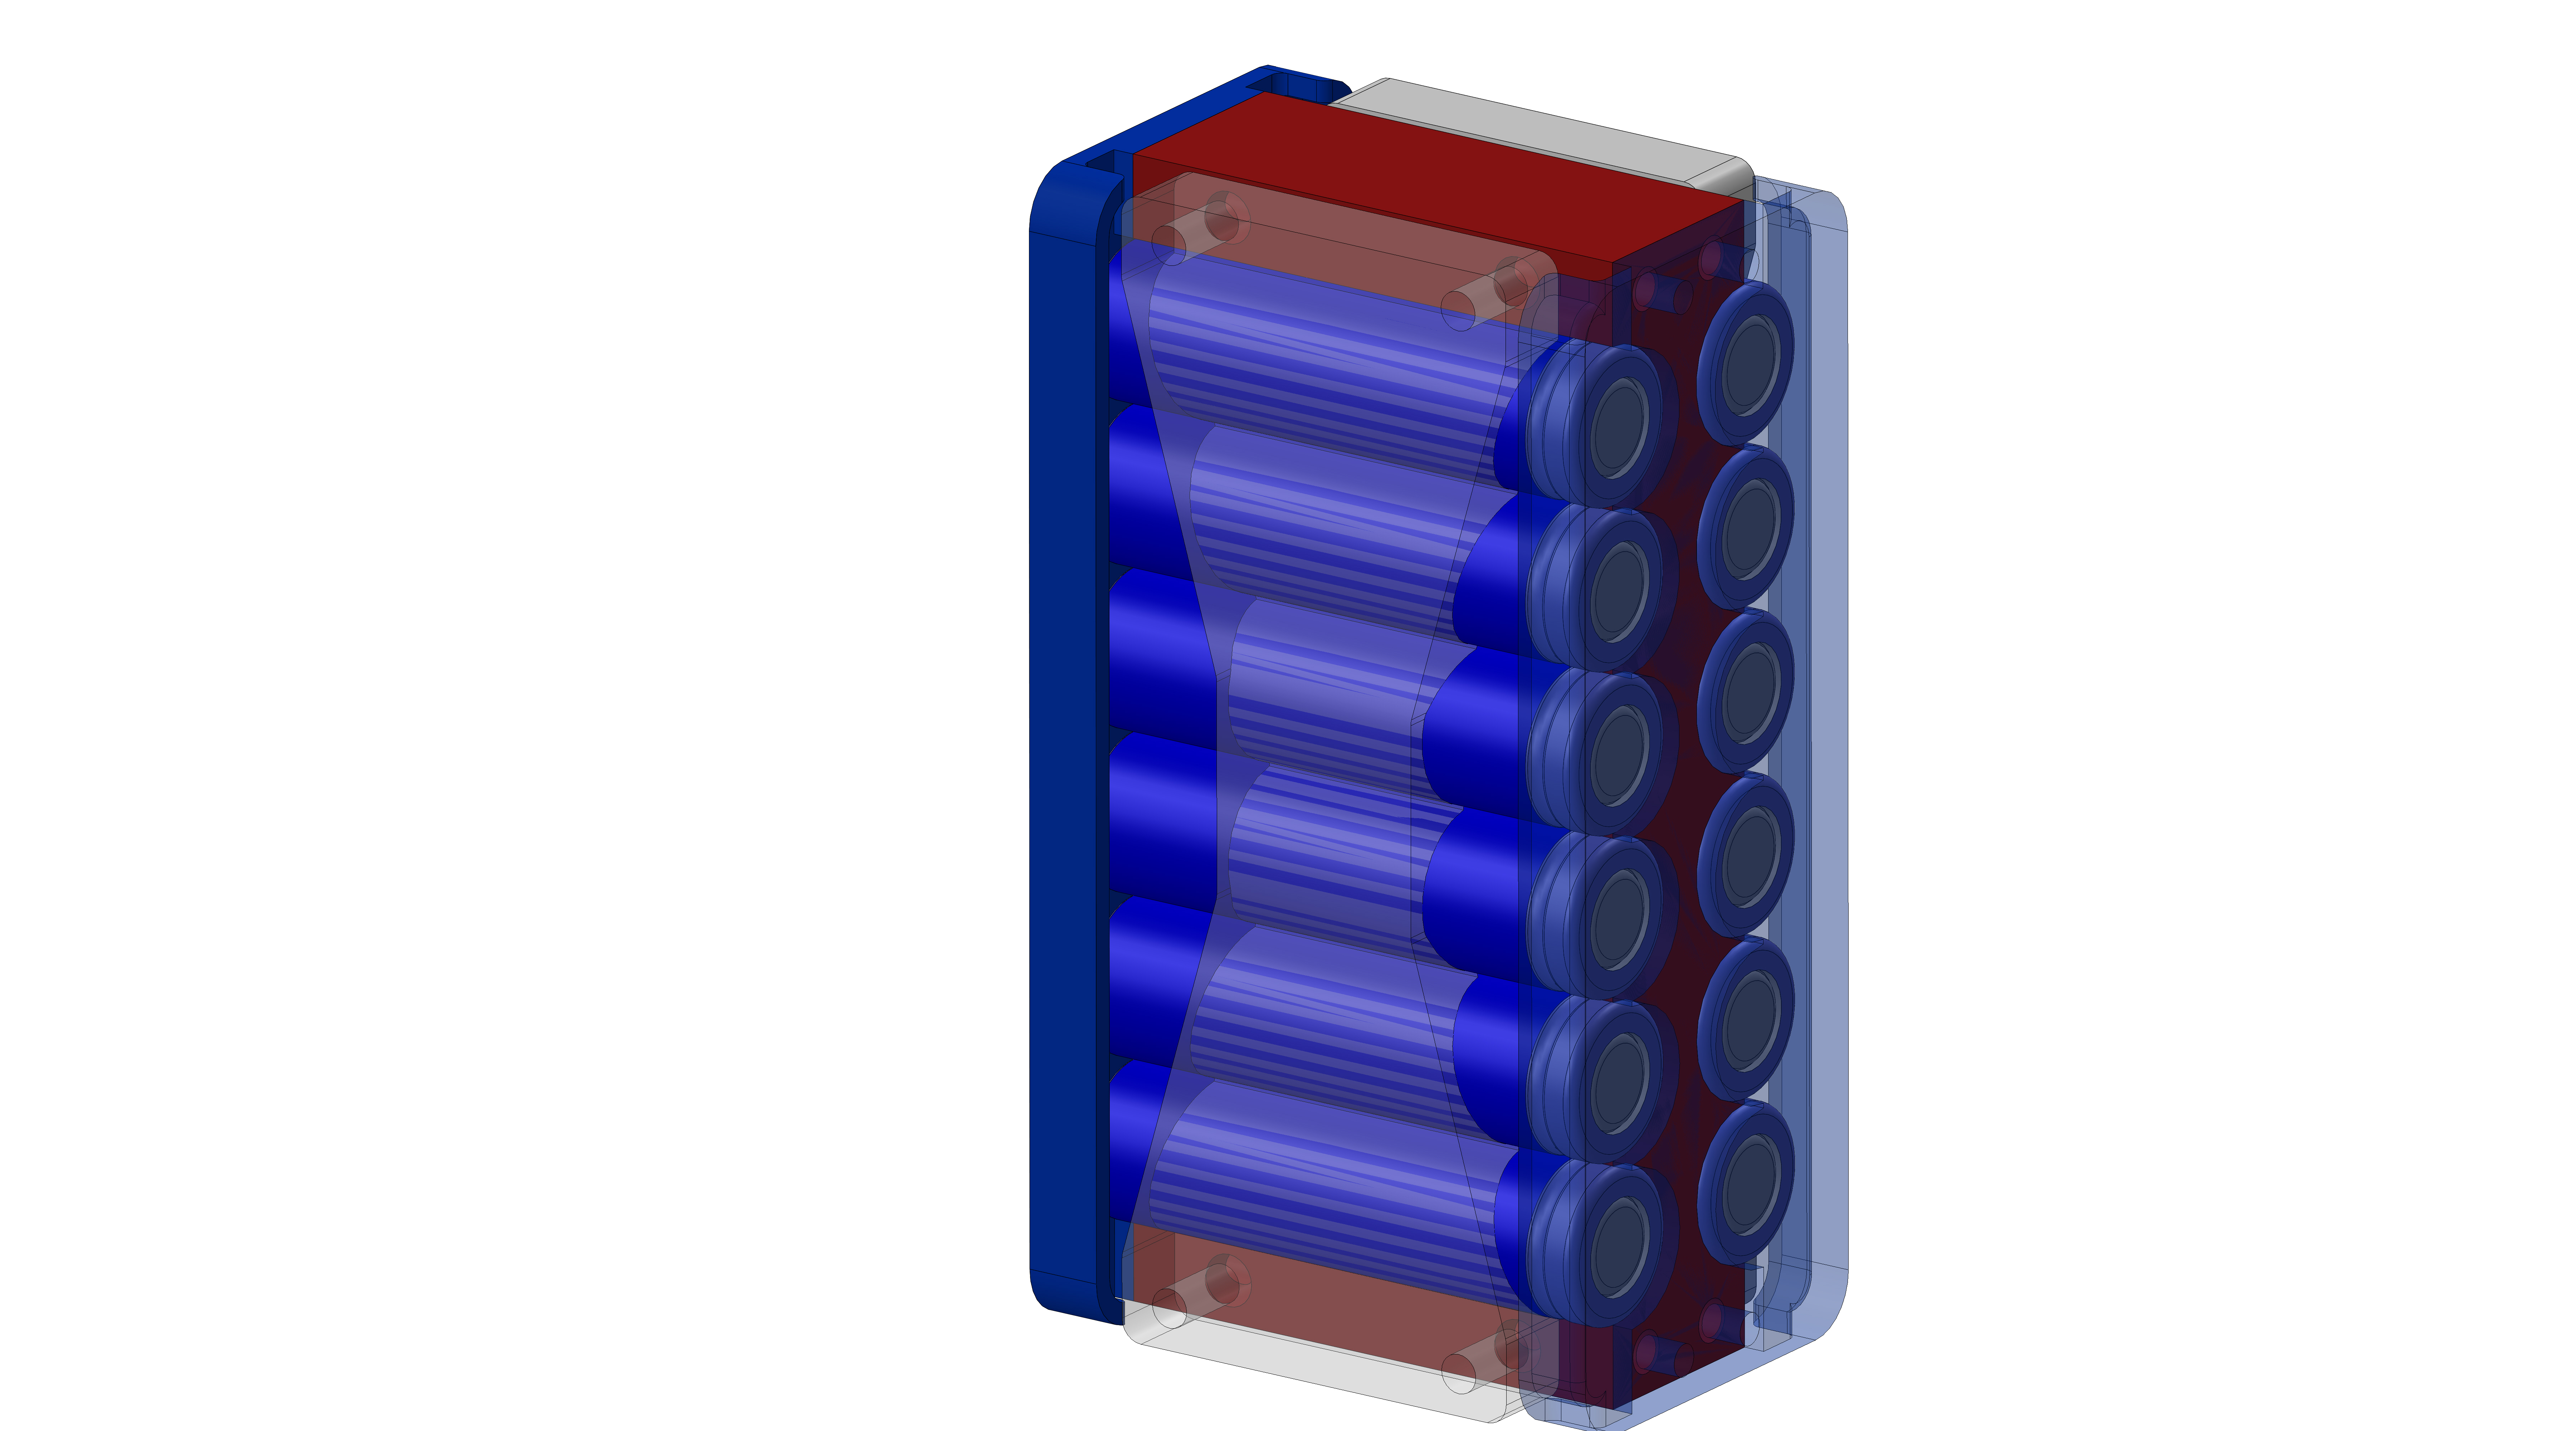
We need a lot of energy
storage, mostly to survive the northern winters. While we
have solar panels, the low light in the winters and the
likely-hood of snow piling up on the roof results in
having to rely on battery use as the primary energy source
between November and March. I debated hunting around for a
large single cell battery, but I have on hand a large
quantity of 2.75ah 18650's. While there are higher
capacity 18650's, they are increasingly expensive. With a
printed module we can fit ~12 cells fairly easily, with
the possibility of adding more by playing a bit of Jenga.
This nets us a 33Ah 1S12P lithium ion pack, or nominally a
120 watt-hour battery. If we can keep the monthly power
consumption below 25 watt-hours we should survive most
winters.
A see-thru image shows that the
battery module itself is actually 5 printed parts,
attached together with screws into thermal inserts.
Quick
spin around
The battery module cad shown
Attaching
thermal inserts to the base
The two bottom thermal inserts are M4. Off-screen just as
above I heated these with a hot air station, and held the
insert with a screw fully inserted. Note that due to space
constraints the channels for the inserts somewhat collide,
but their collision is not an issue due to screw length.
The two base screws mechanically attach the battery to the
base, so their stability is fairly key, and also prevents
issues if the birdhouse falls, or the like.
Battery
module base
With all the thermal inserts installed, we end up with
this base. Shown are both the M3 and M4 inserts. Note that
this base piece was printed with a fairly high infill,
mostly to make sure there was adequate structure to the
assembly. For the module cad, i opted to slightly oversize
the cell diameter, to allow for a small amount of glue to
hold the cell in place during assembly. Initially I was
going to opt for cell tab welding, but given that this is
an incredibly low discharge rate
application using thin wire to attach cells is actually a
better choice. Why use 28 awg wire? Great question. If a
single cell fails a 28-30 gauge wire will fuse-open when
currents approach only 10A. On a cell failure (lets say a
cell short) all the parallel cell groups will dump energy
into the failed cell. using 'fused' cell groups gets an
advantage of some extra safety. Soldering cells is not the
best option but for the purpose of this assembly it should
work well.
Did you notice the lack of advertisements or
Facebook nonsense? Consider sending a cup of coffee :]
 We need a lot of energy
storage, mostly to survive the northern winters. While we
have solar panels, the low light in the winters and the
likely-hood of snow piling up on the roof results in
having to rely on battery use as the primary energy source
between November and March. I debated hunting around for a
large single cell battery, but I have on hand a large
quantity of 2.75ah 18650's. While there are higher
capacity 18650's, they are increasingly expensive. With a
printed module we can fit ~12 cells fairly easily, with
the possibility of adding more by playing a bit of Jenga.
This nets us a 33Ah 1S12P lithium ion pack, or nominally a
120 watt-hour battery. If we can keep the monthly power
consumption below 25 watt-hours we should survive most
winters.
We need a lot of energy
storage, mostly to survive the northern winters. While we
have solar panels, the low light in the winters and the
likely-hood of snow piling up on the roof results in
having to rely on battery use as the primary energy source
between November and March. I debated hunting around for a
large single cell battery, but I have on hand a large
quantity of 2.75ah 18650's. While there are higher
capacity 18650's, they are increasingly expensive. With a
printed module we can fit ~12 cells fairly easily, with
the possibility of adding more by playing a bit of Jenga.
This nets us a 33Ah 1S12P lithium ion pack, or nominally a
120 watt-hour battery. If we can keep the monthly power
consumption below 25 watt-hours we should survive most
winters. 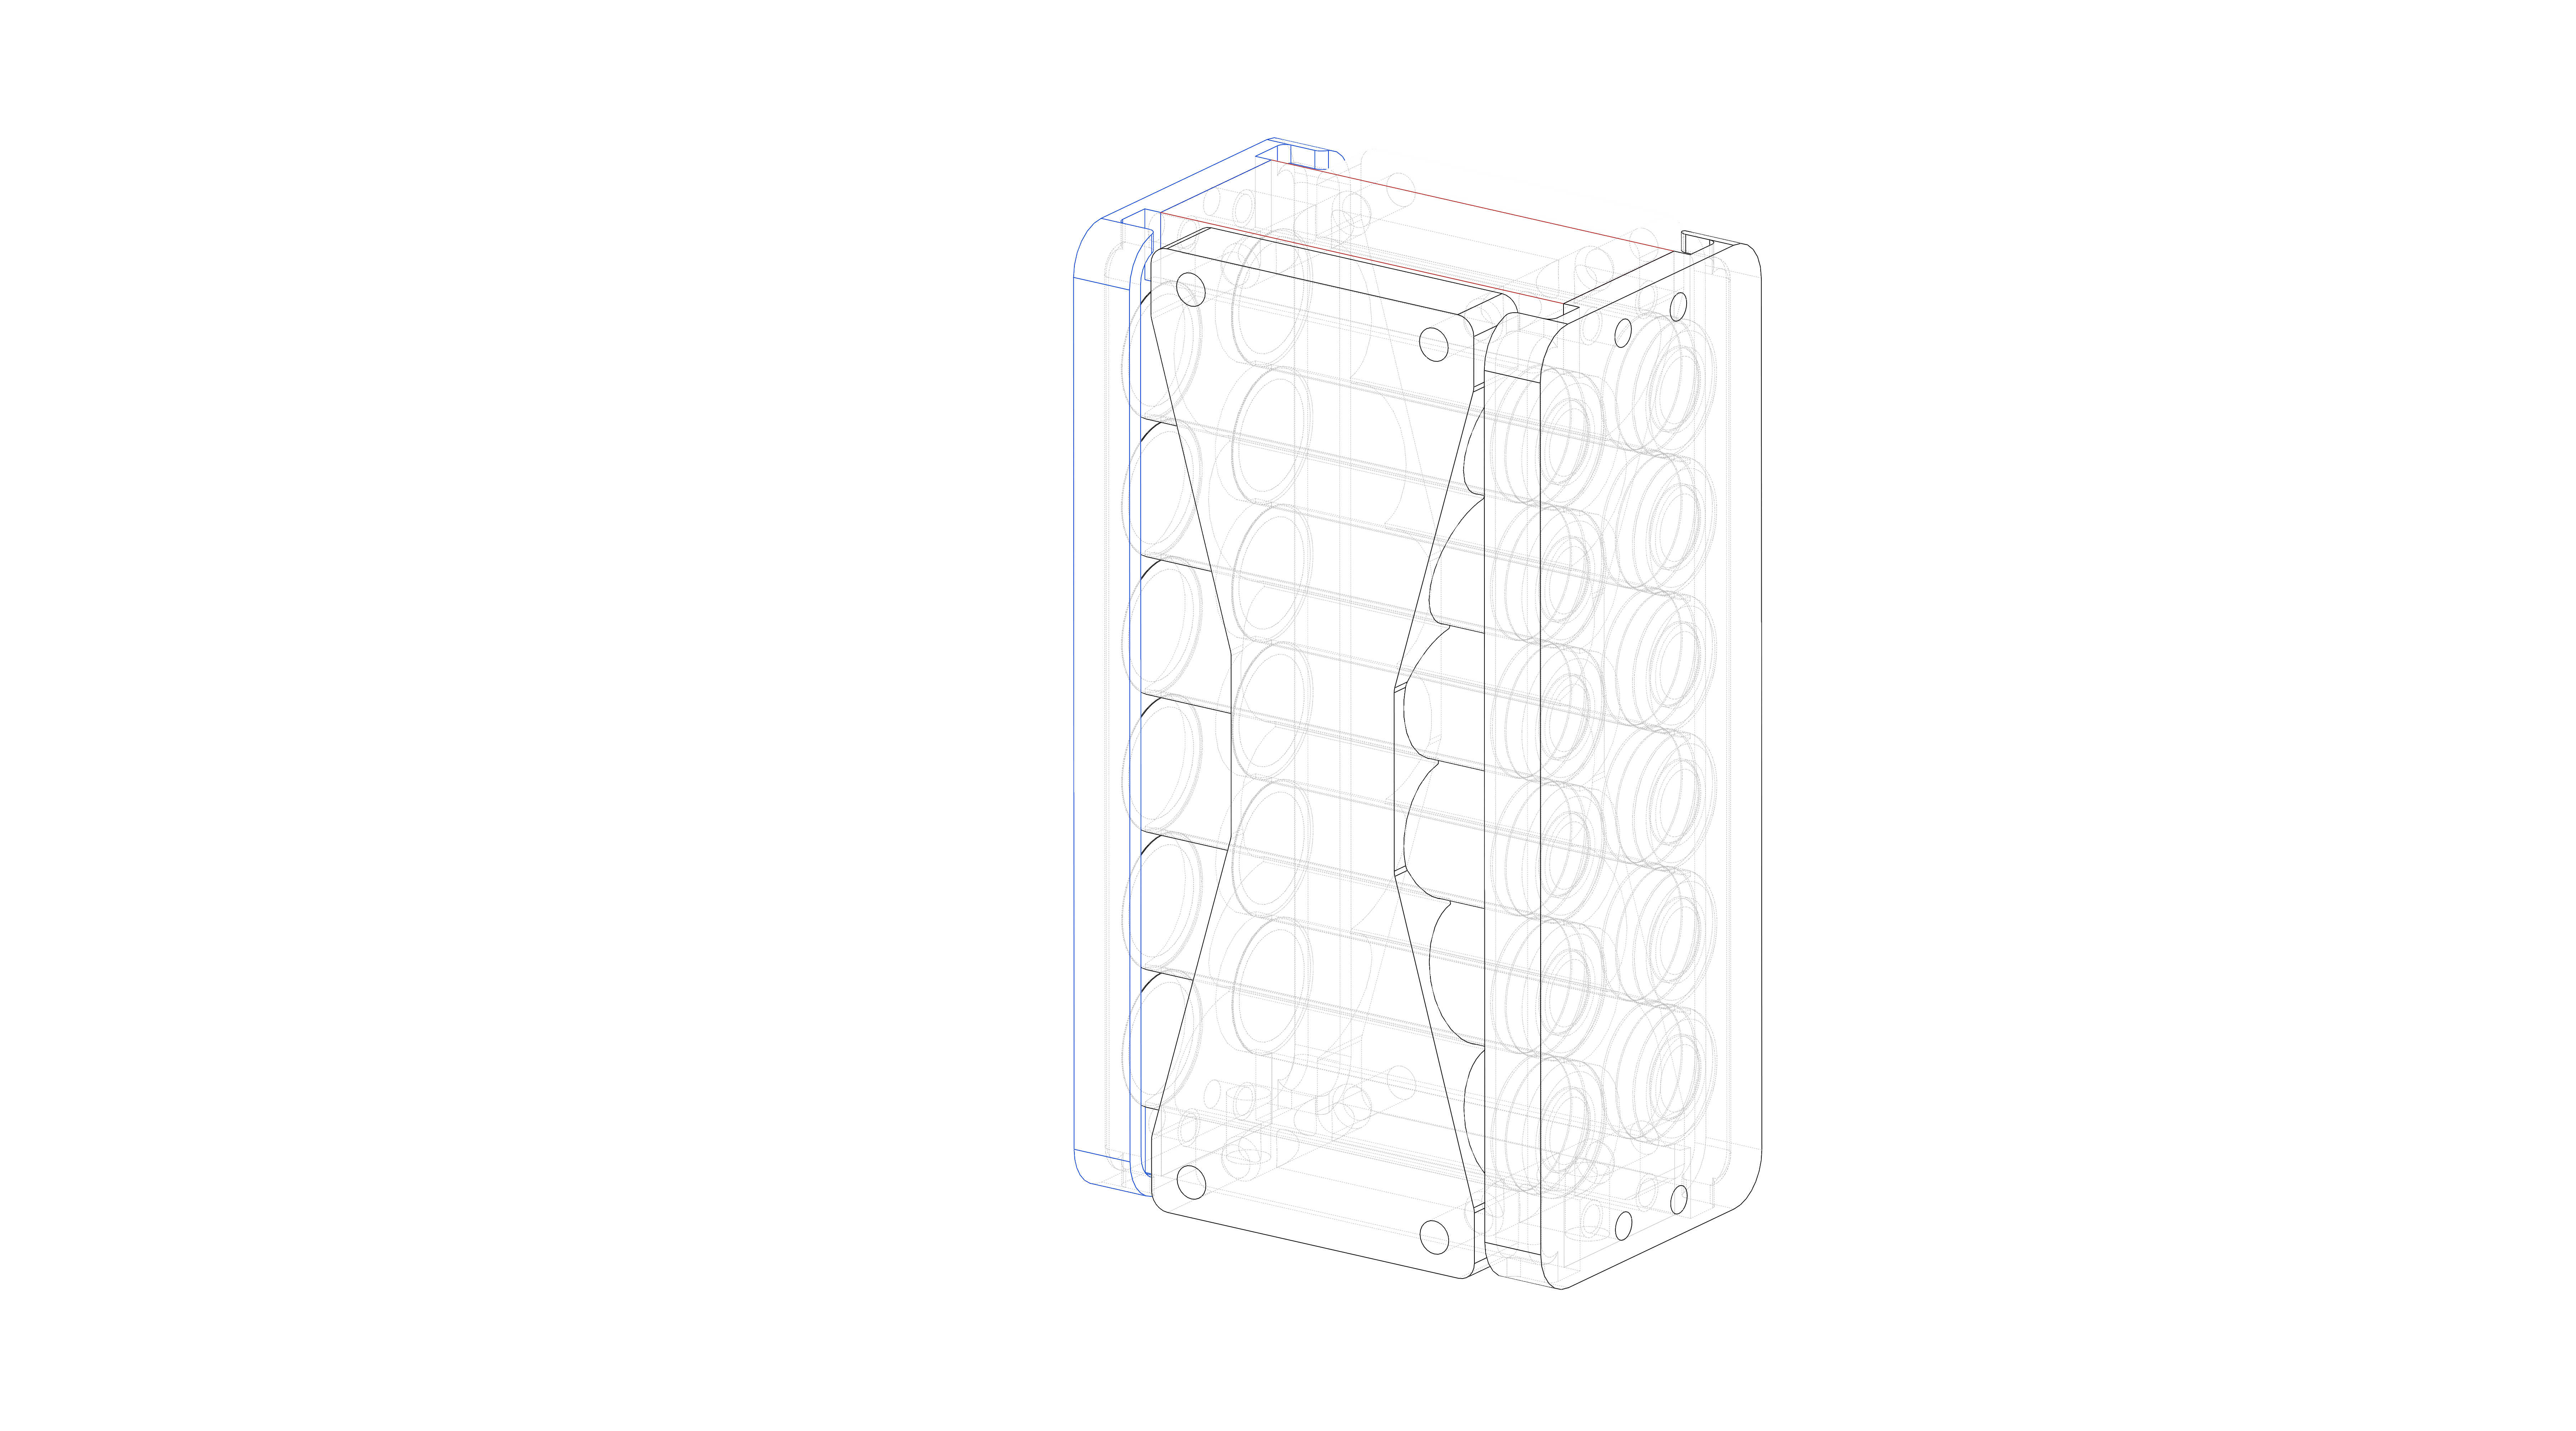 A see-thru image shows that the
battery module itself is actually 5 printed parts,
attached together with screws into thermal inserts.
A see-thru image shows that the
battery module itself is actually 5 printed parts,
attached together with screws into thermal inserts.