This project / writeup is in progress, check back for more soon!
Experiments in plating flowers in the home-lab
I never liked cut-flowers, its an odd gift both to receive or give, 'here's something that was alive and pretty, it will decay in a few days now'. I guess giving potted flowers as a gift is also somewhat onerous, 'here's some responsibility in gift format'. What if you could preserve the flower's visage for nearly eternity?
Enter heavy-metal flowers
The following details my experiments into processes for metal plating of various flowers. These make an interesting gift as the process is somewhat difficult to do on an industrial scale, but can be done flexibly at home, somewhat in an evening.
Electrochem at home?
My first test runs on roses as a proof of concept worked better than expected, I unfortunatley only loosely documented the process as it was a
late mothersday gift and the time available was short. The process was basically two steps: use leftover EMI paint to spray a few thin layers
onto the flower, then quickly get it into a plating bath before it rapidly dehydrated and wilted. There's a lot of issues with this method,
it's incredibly time sensitive. Almost all spray paints use acetone or a spicy solvent to allow it to fast-dry. The lower the vapor pressure of
the solvent the quicker it evaporates leaving the paint behind. Acetone also does a great job at attacking surfaces, which helps spray paint
adhere to things. When acetone based paints hit delicate leaves or flower pedals it starts the process of leeching any moisture that's left
inside out. Acetone atacks cell walls and eventiually all of the moisture which, in part, gives the plant its shape, evaporates away.
Once the process starts you're on the clock. Somewhat complicating the issue is time. The paint needs to fully cure before electroplating, but the longer it is left out the more wilting happens. If you put an unfinished painted part in the electroplating bath it will come out into
solution and be somewhat annoying to filter back out.
Attempts at Sunflowers
Lets go big and try and plate a whole sunflower. For the first test I got some cut flowers from a local farmers market, Idid not wake up early enough to get what I imagine the primo-grade ones were but these should work fine for some science-ing. Sunflowers are somewhat extra-difficult to plate as they are not vertically symmetric. For symmetric flowers its fairly easy to rotate them to get an even spray pattern, but for significantly non symmetric flowers its difficult to get an even coating. Vertically facing pedals are the biggest challenge as they are the first to loose structure and fall back down due to gravity. A rose held upside down, with all its pedals facing towards the floor, will maintain its shape, making the whole process significantly easier.
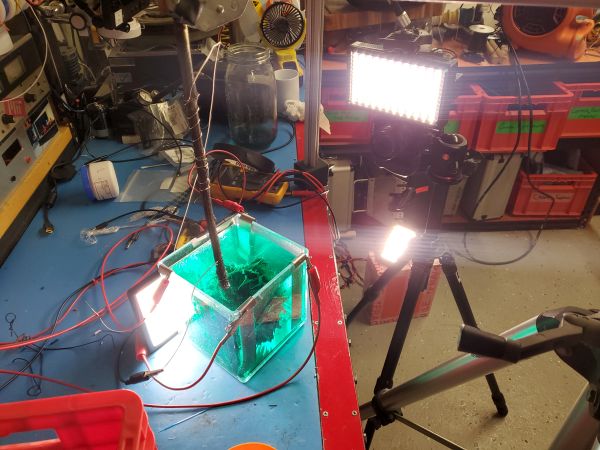
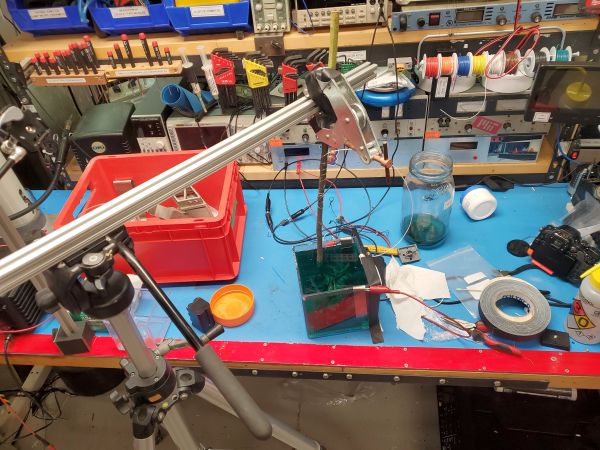
Its a very pretty sunflower. Note that the leaves were included in the intro spin-about video but given how absolutely massive this flower was I had to trim them off before plating as my container is only 5" cube. Because I wanted to film the plating process I opted for a flat-surface container, as a round surface (large glass jar) is both hard to illuminate and also difficult to film through as it optically distorts the contents. Going for a bigger container sounds great, but you do end up needing more chem-storage and as the container gets larger, having secondary containment becomes an increasingly better idea. Going from a 5" cube to an 8" cube translates from 125 cubic inches to 512 cubic inches, so 4X the chemical storage.
With the flower hanging overhead from a slow spinning dc gear motor it was time for a first pass spray painting. I used MG Chem nickel EMI spray [link] which is fairly expensive per can. You can almost immediately see how the acetone starts dehydrating the cut flower, and the added mass of the nickel paint weighs down any pedals that were facing up against gravity. Not looking great for sunflower success. I did notice that as i was rotating by the stem, making the flower off-set. If i had braced the rotating axis to keep the flower head facing parallel to the ground i might have had more success but it's fairly unlikely as the pedals were so thin. Even from a distance the pressurized air from the paint can flutters the pedals about.
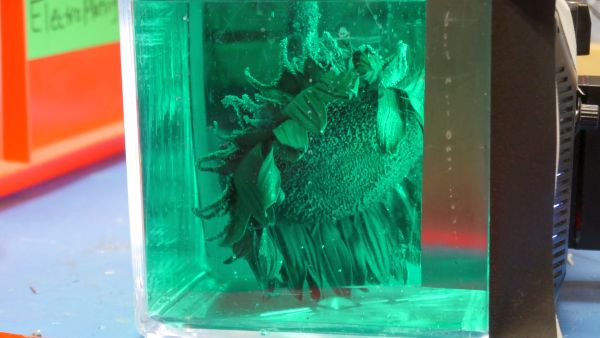
With how delicate this flower is we're already are seeing it wilt. It took three very light coats to get to a nearly fully covered surface to start the plating. To help speed up drying a fan was used while the flower was held vertically. The stem itself was very interesting, I had never really looked at how high surface area a sunflower stem was. There's a lot of small fibrous hairs making up the surface, which took a lot longer to spray coat than I had anticipated. For the plating process it's fairly important to make sure the stem itself is well coated as all of the plating current passes down into the liquid through the painted stem. As plating currents can reach 2-3 amperes, that is a lot going through what is effectively a few hundred microns of paint.
For the last coat i just opted to lay the flower down on the inside of a roll of tape and make sure I had a thick layer on the interface from the stem to the flower. Even in the heavily compressed video below you can see all the thin small hairs on the stem. Never quite noticed this but the paint would tend to clump up on the hairs and not quite make it to the actual base stem. Given that his transfers all the current it took a bit of paint to get everything covered.
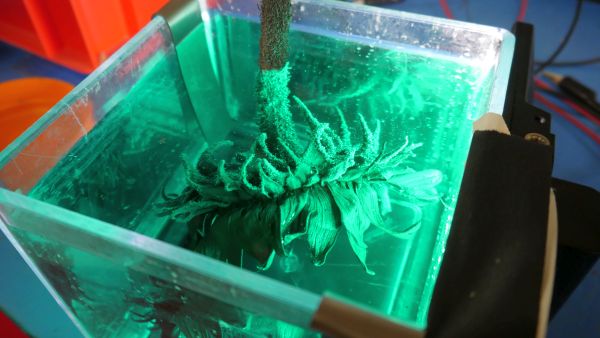
I rarely do vertical videos but the geometry here really dictates I do. Single conductor plated copper wire is wrapped around the stem as close as possible to the area that's going to get plated. Its fine to have this submerged, but it might leech copper out into the plating solution. I stripped back about a foot of 22gauge solid core wire and wrapped it loosely around the stem. The flower itself was suspended from a horizontal bar attached to a tripod. The z-axis of the tripod was used to lower the flower into the bath in a more controlled fashion. This is completely unnecessary but was a surprisingly good way to fixture the flower and adjust height to check how things were going. The bath uses nickel anode strips at the corners, attached to the supply positive and negative attached to the flower. A camera light was used to illuminate here as getting useful detail through plastic and through a fluid is not always straightforward
How long do you plate for and at what current?
This is where things start getting curious. The container is nominally too small to spin the flower around during plating. In an ideal case there would be a single strip electrode and the flower would rotate around in the chamber somewhat getting equal proximity between itself an the plating electrode. There was no way i could swing this about, so it sat in a fixed position. Unfortunately the sunflower has alot of area for small bubbles to form and stay in place, this became a problem as without fluid circulation or agitation the bubbles would stick around and act as a restive path for plating, concentrating plating to areas that did not have bubbles. As a result the surface became increasingly bumpy. To add insult to injury, as the container was too small, the mean distance between electrode and target (the flower) was very variable, so pointier spots would receive significantly more plating, exaggerating the issue.
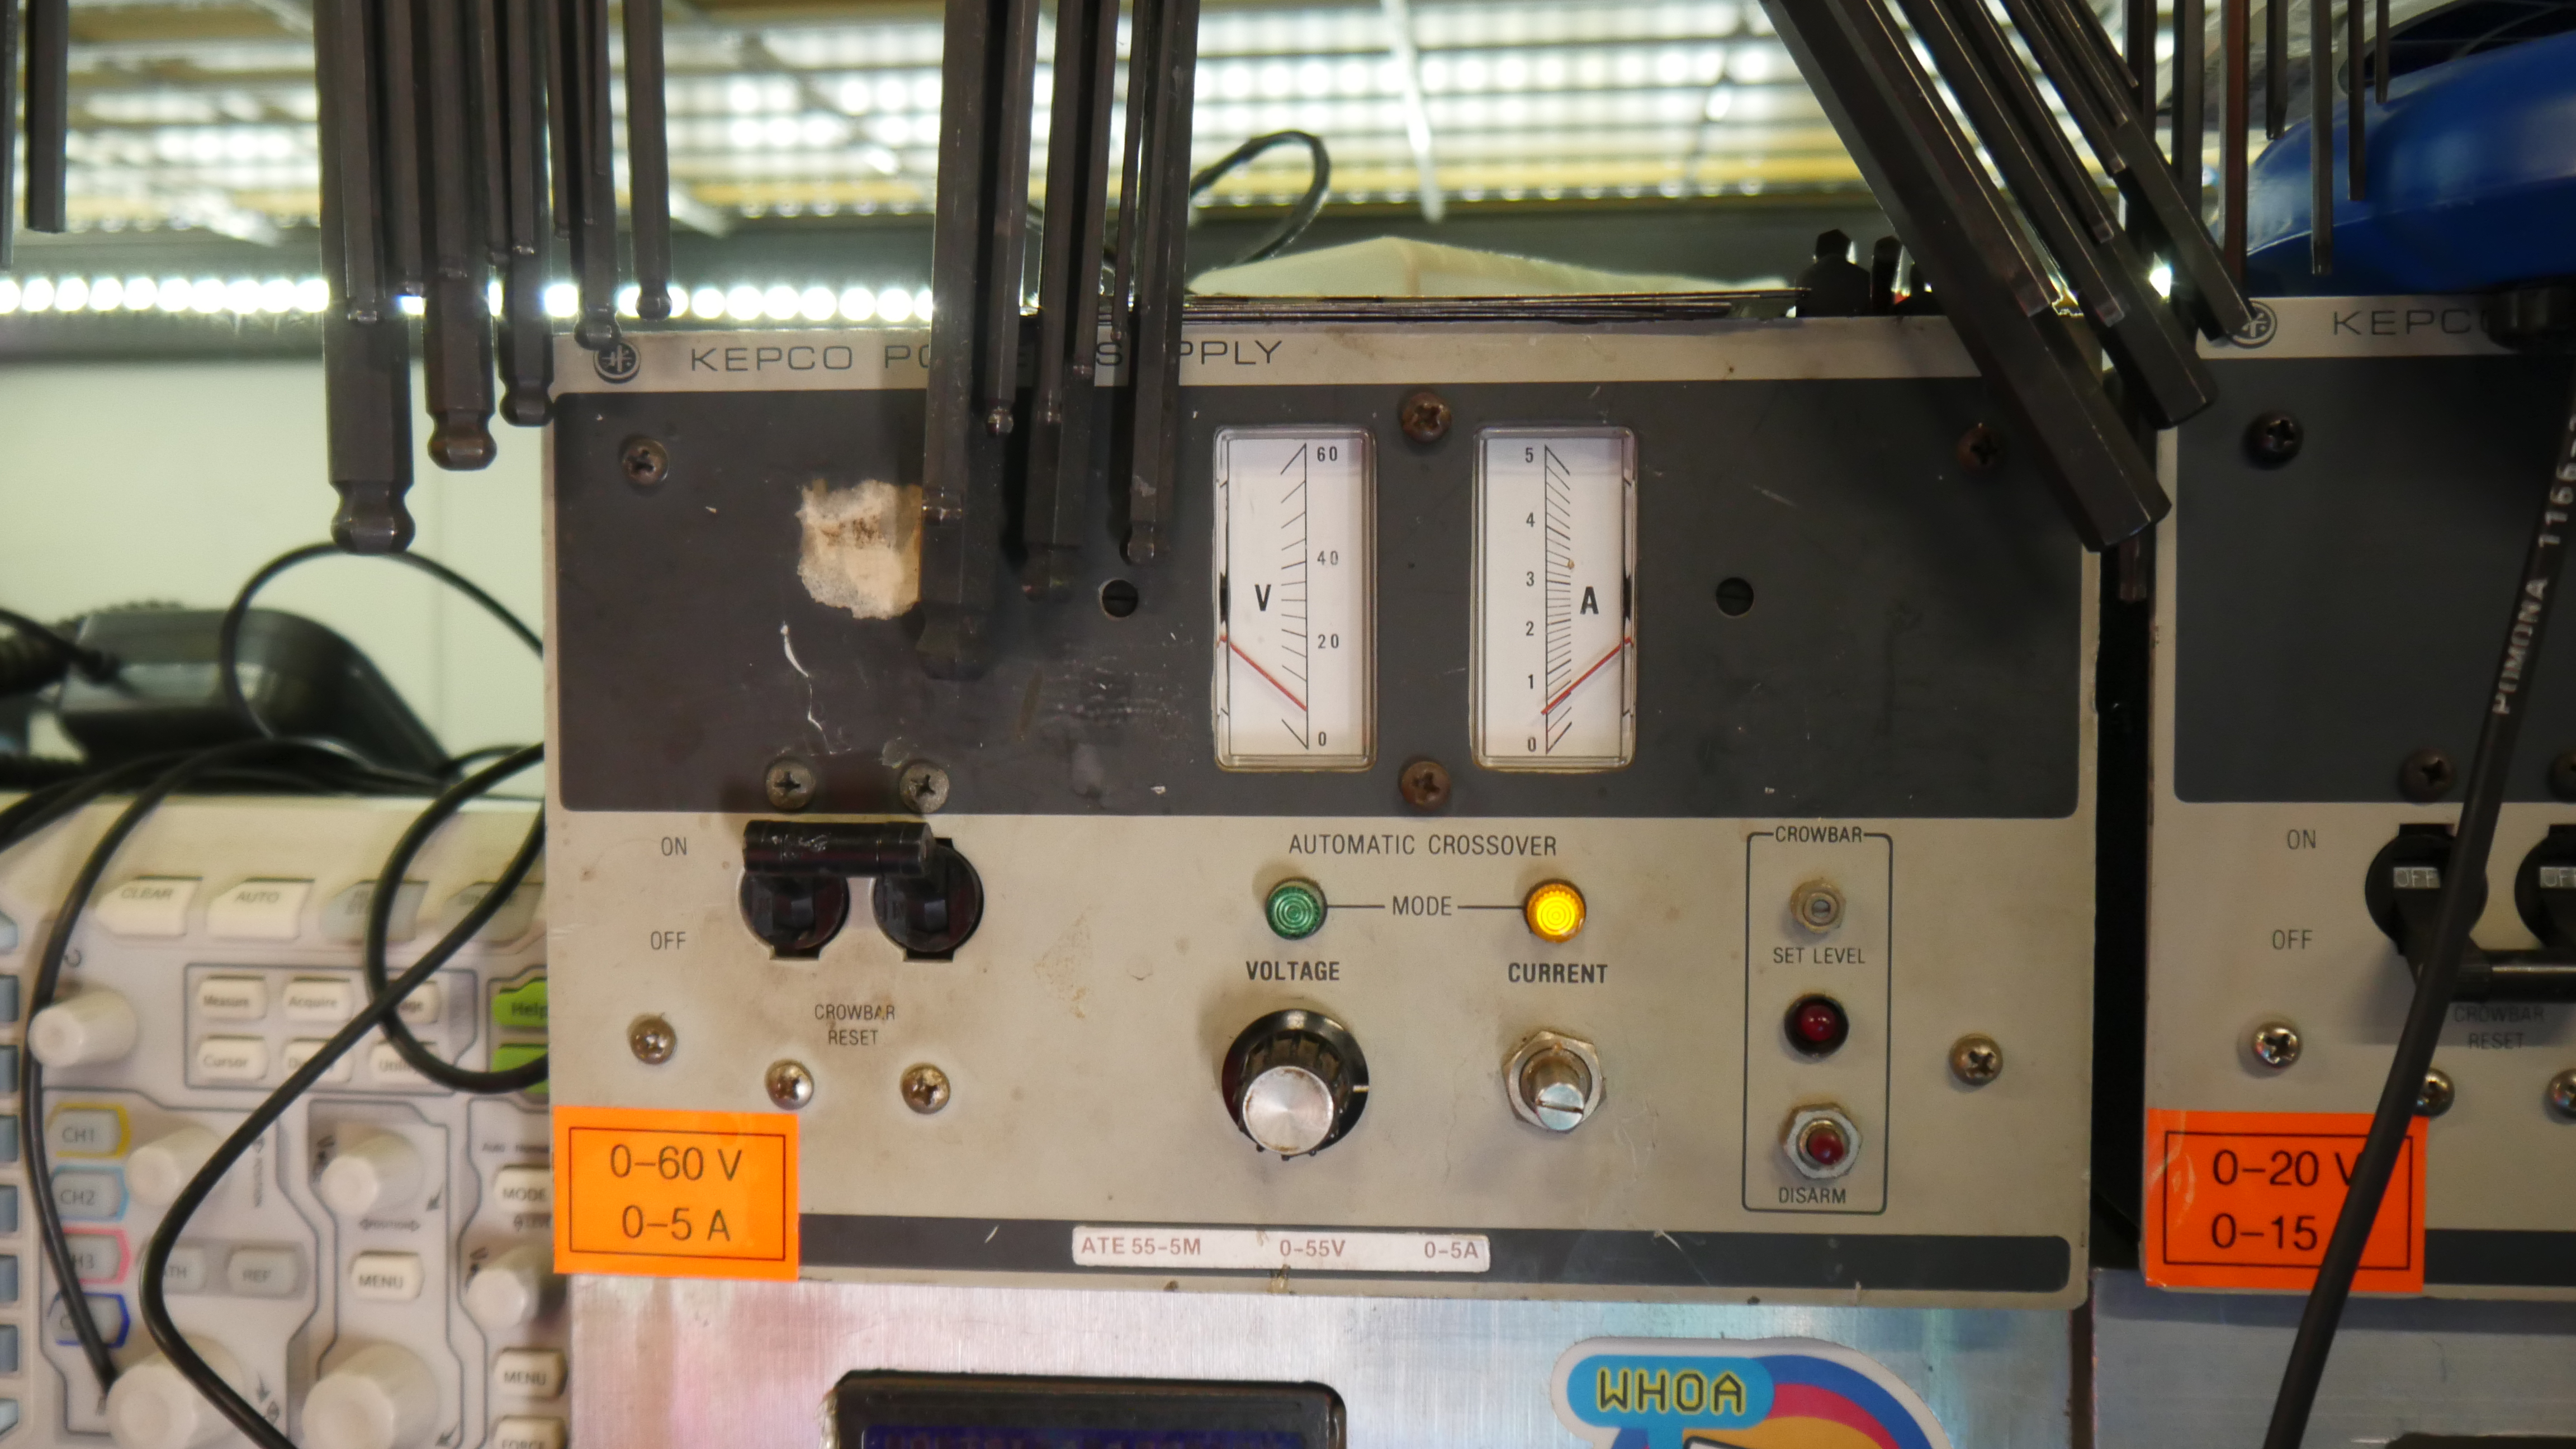
Back to the question at hand, plating is a purely current mode operation, as long as your power supply has current control you can electroplate. For this case, with 1" wide 6" long electrodes I had a maximum power supply voltage set to 10V and the current was adjusted throughout the plating process.
Current rates used:
Initial plating:
With just the thin layer of conductive spray paint on the surface you physically cannot pump more than a few hundred milliamperes. Starting off at 100mA will get you a pretty good foothold onto the part. What happens if you JUST SEND IT and set your supply to 5A? Generally the paint is too restive to carry that current, while the submerged conductive paint is activley cooled by the plating solution, the part that's exposed to air is not. Generally at the surface between the submerged plated part and the non submerged the paint just burns off and leaves you with a flower that is now no longer electrically connected.
As it's somewhat difficult to 'see' the early stages of plating, you can make a time based estimate by using some basic maths. We do not know the surface area of the flower, and it would be incredibly difficult to determine this accurately just using some surface dimensions, we do however know its volume, as the plating solution top surface changed its height as you submerged your target. We know that the surface area is only somewhat proportional to volume, but this is not an accurate activity so we can use it as a baseline. I found that for initial plating a maximum of 1mA per ml was a good place to start. The submerged flower displaced ~250mA , so anything between 100-250mA should work well to start the plating process. The lower the current the longer the process takes, but as a side benefit, the lower the current the further from the electrolytic side reactions you get. If you're seeing a huge amount of bubbling, your current set point is too high.
So Nominally:
For a rose, plate at 50mA for an hour before increasing
For a sunflower plate at 250mA for an hour before increasing
Shown below is what the initial plating can look like. With this macro lens you do see a small amount of bubbling forming, so it was likely my current set point was slightly high.
Bulk plating:
At this point you can raise the flower out of the plating solution and you will likely see, not very much. It should look very similar but somewhat feel (with gloves) a bit more sturdy. At this point a few microns of nickel is attached to the painted surface. Lets increase the plating rate as we're now going to start bulk plating. Given that this is ratiometric to the size of the plant, we can 4x the current at this point, so if you were at 100mA, you can now push 400mA. If you were at 250mA, you're now approaching an ampere. Its important to checkup on the thin wire wrapped around the stem and make sure it's in solution to help prevent a small area oncentrating the current down.
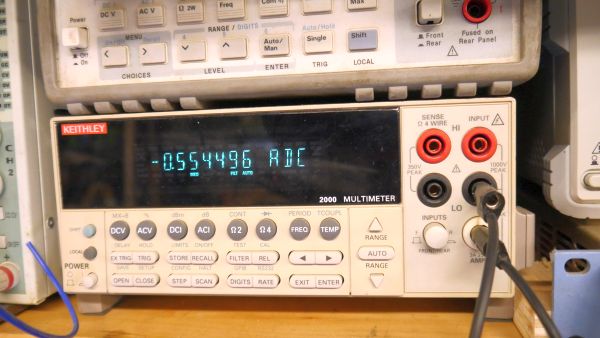
Again you do not need anything particularly fancy for a power supply, due to some limitations on the display of my older Kepco bench supply, I used an external multi-meter when I was adjusting down to a low current. Initially I started at slightly lower than 200mA, which was somewhat hard to see on the analog gauges of my bench supply.
Waiting around:
The maximum amount of plating that you can do is if you fully consume your electrodes. This is difficult to do as the electrodes will slowly disappear leaving a smaller sub section over time, you end up with little stubs that get progressively less useful. Lets estimate that you can use 80% of your electrodes before they become no longer useful. The common amazon electrode [link] is about 70 grams each. If you opt for four electrodes on the corners of your bath that's 280g max, but realistically ~225g of nickel attached to the flower. Thats nearly 1/2 of a lb of nickel, quite a heavy flower. Transferring that much nickel in solution is unfortunately just slow. You can somewhat accelerate things by observing the surface finish and adjusting your supply accordingly but this is one of those 'slow is better' type of projects.
This step will take at least 4 hours
A good way to check how things are progressing is not by observing the flower, but by pulling up your electrode and checking to see how much of it has been removed.
Here's the first test result. It's a bit rough : /
Have you noticed that there are no
advertisements or ridiculous pop ups?
No cookie banner or newsletter?
I'm trying to make a better web, feel free to support it.
Want More?
Here's a behind the scenes look at my work space and some of the images that did not make the cut to be included in the write-up:
If you have questions or comments, ask below or send an email