
Dane Kouttron
This project / write up is in progress, check back for more soon!
Project Started: 01/2024

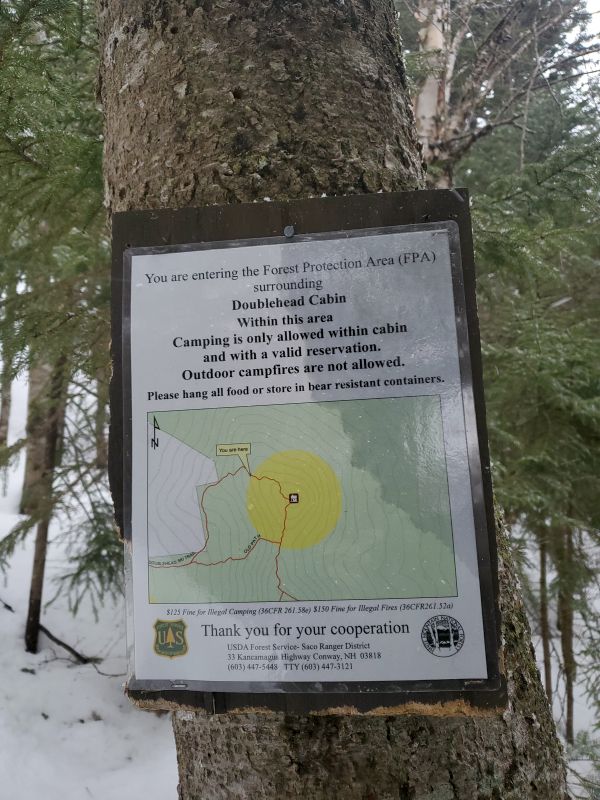
Notes from Doublehead CabinDoublehead Mountain has a tiny rent-able mountaintop cabin run by the department of parks located in NH, as of 3/2024 its 40$ / night. The following write up details my attempt to "work remotely" in the below freezing snowy wonderland that is Jackson NH. For some people a change in scenery is enough activation energy to unlock days of writing, reading and researching. A lot of the time this can be accomplished by visiting a coffee shop. Hiking to a remote mountaintop is a bit overkill but how hard could it really be to work for a week out of a hiking backpack? This is like budget air BNB where you get 4 walls, a roof and a wood stove. |
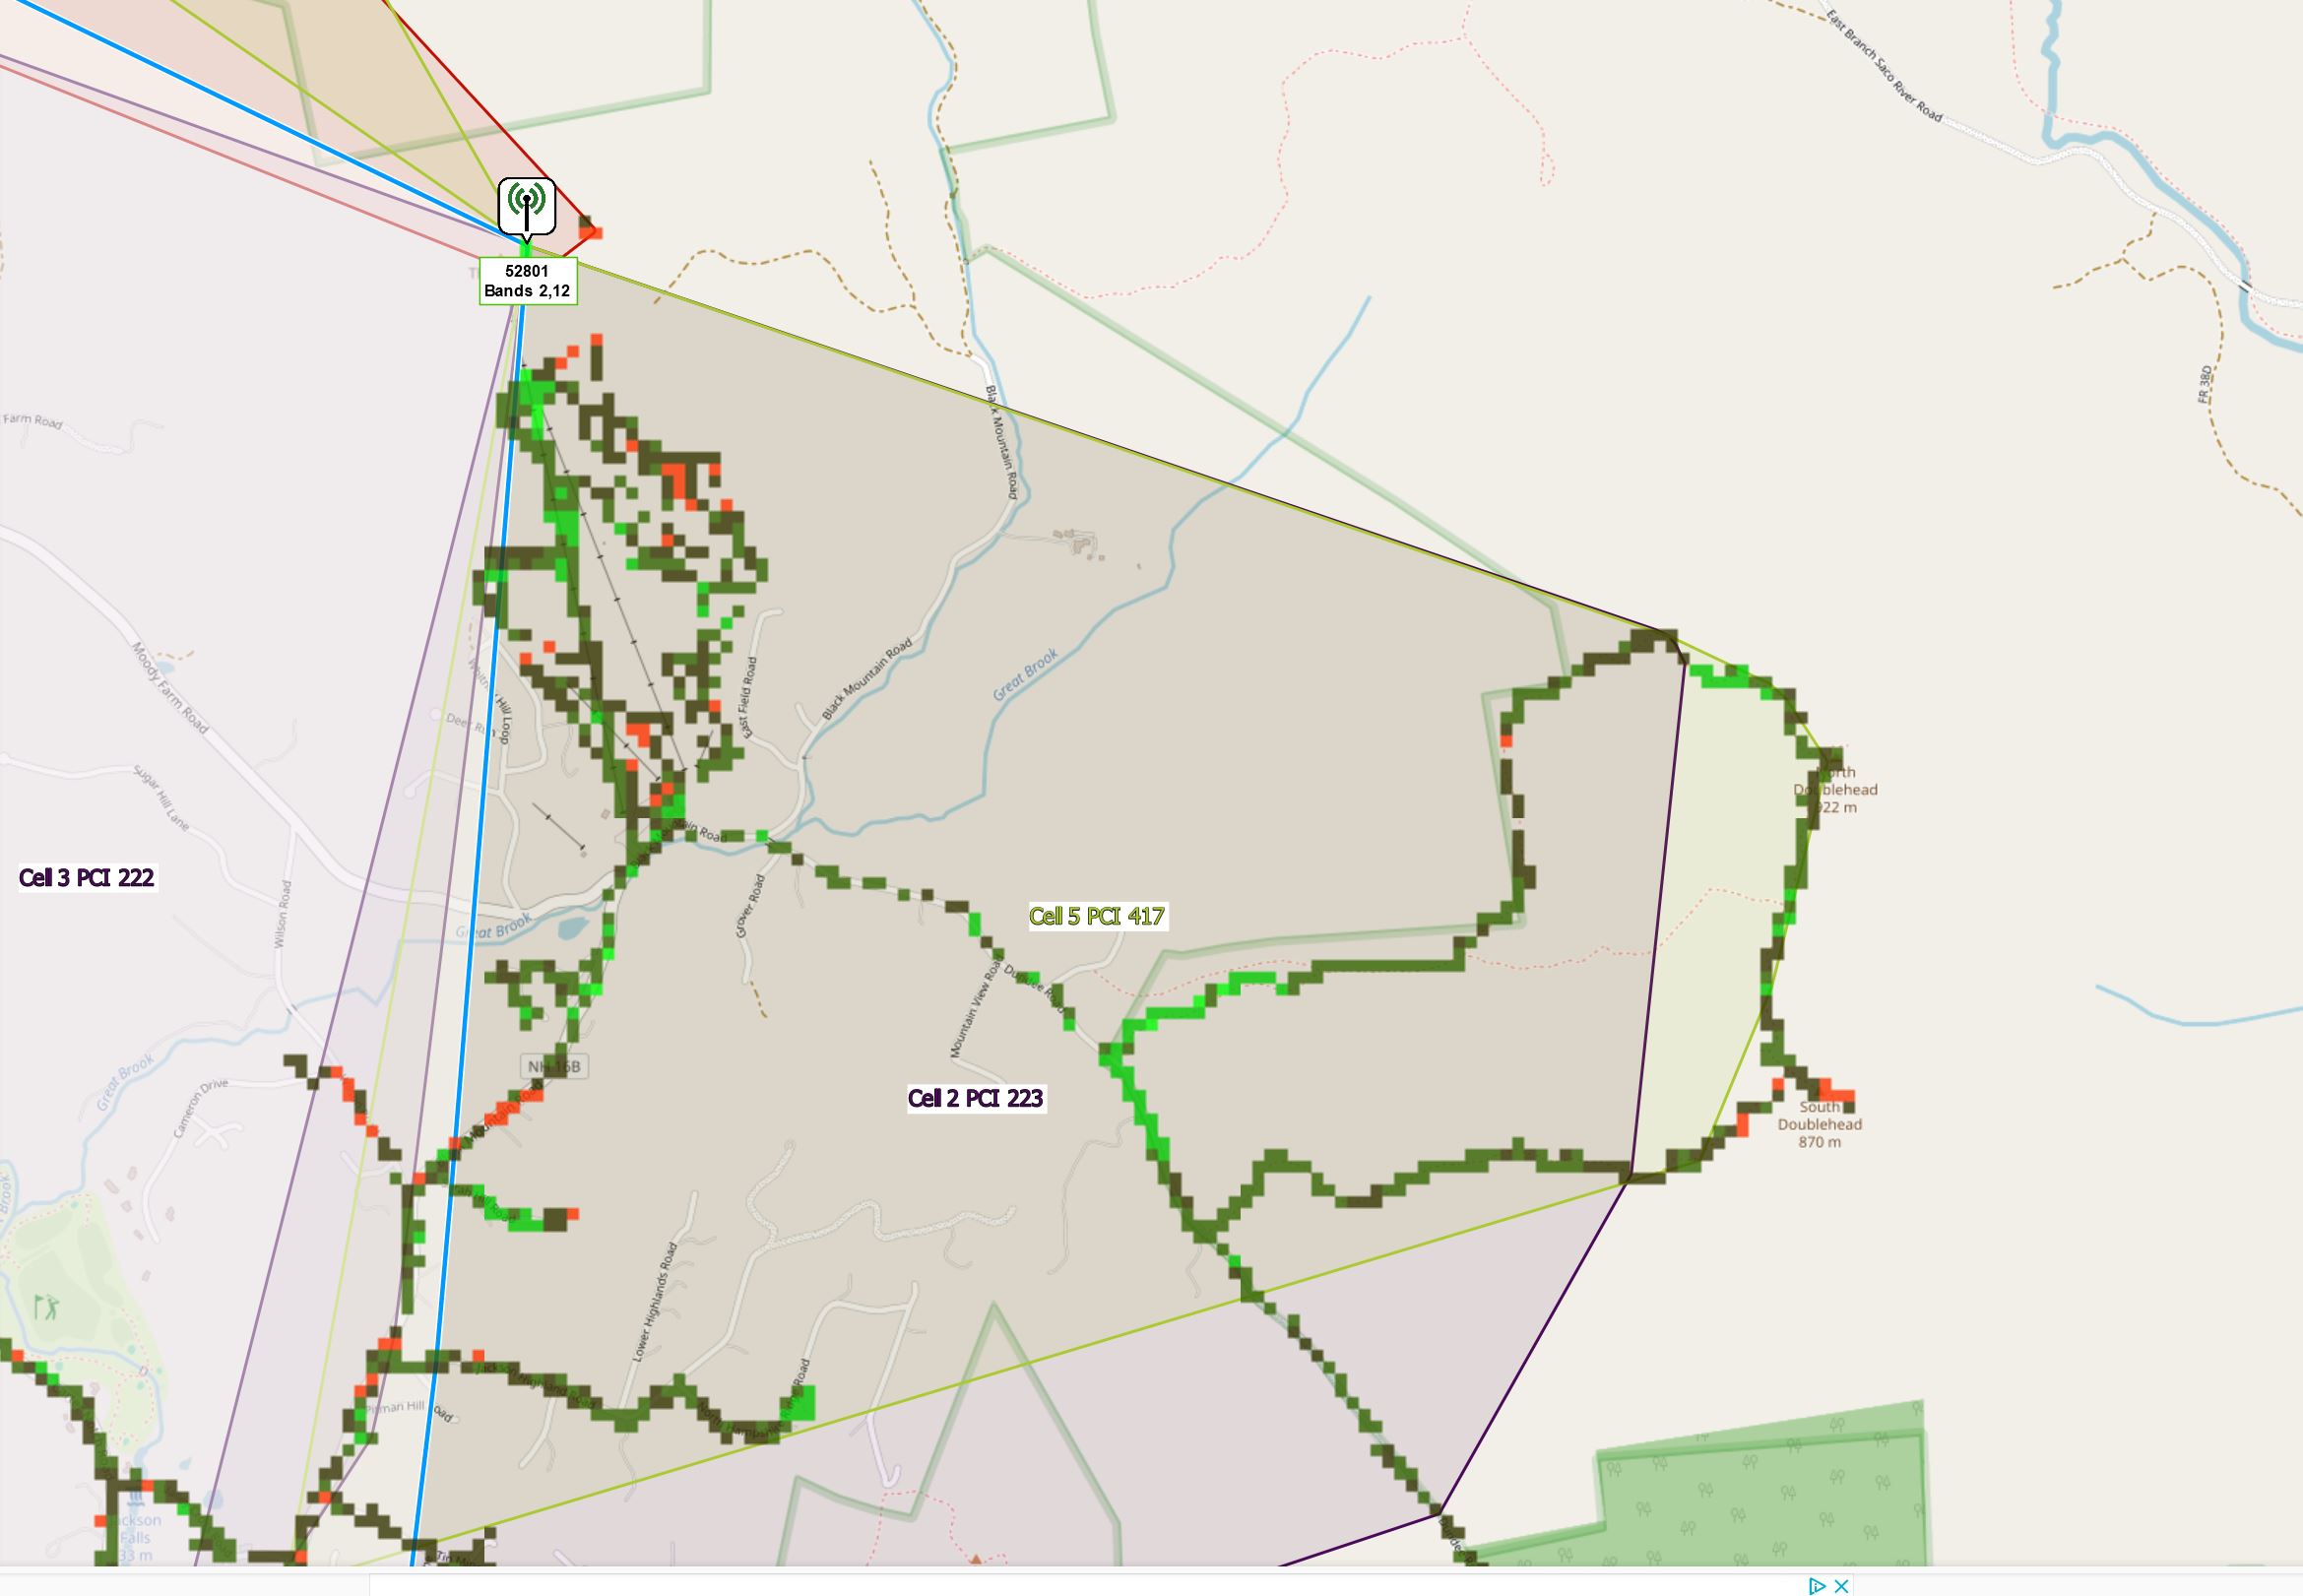
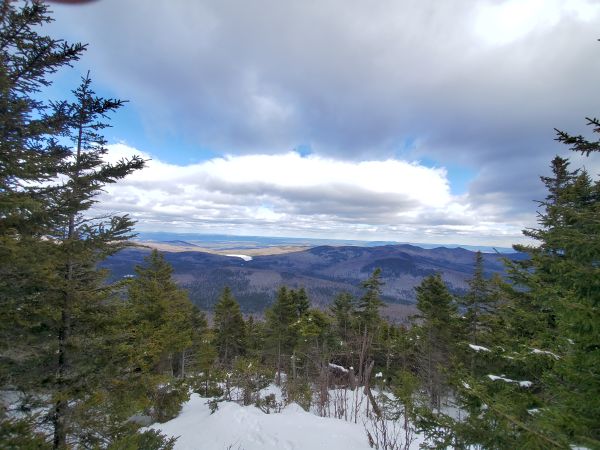
A beautiful climbDoublehead mountain is both remote and accessible, the barrier to entry is the ~2000 ft climb up a steep, snow-slush covered trail. The view and cabin is worth the hike, here's whats visible 30' from the cabin: Research TimeBefore heading out I did my homework, with the goal of finding everything I could about the hike / cabin and documenting it here. Are there any cellular towers nearby?So interestingly enough, cellmapper has some data from folks who have already hiked the trail! There is a tower roughly 3.5 miles away from the cabin, which is sufficient for normal 4G connectivity. Here's some data from cellmapper: [Cellmapper for Jackson NH ] Shown below is a screenshot of t-mobile specific service in the area. Both Verizon and AT&T do have a tower nearby but there are no directional antennas pointing at the Doublehill cabin or hike area. So it looks like the only service provider up there is t-mobile. 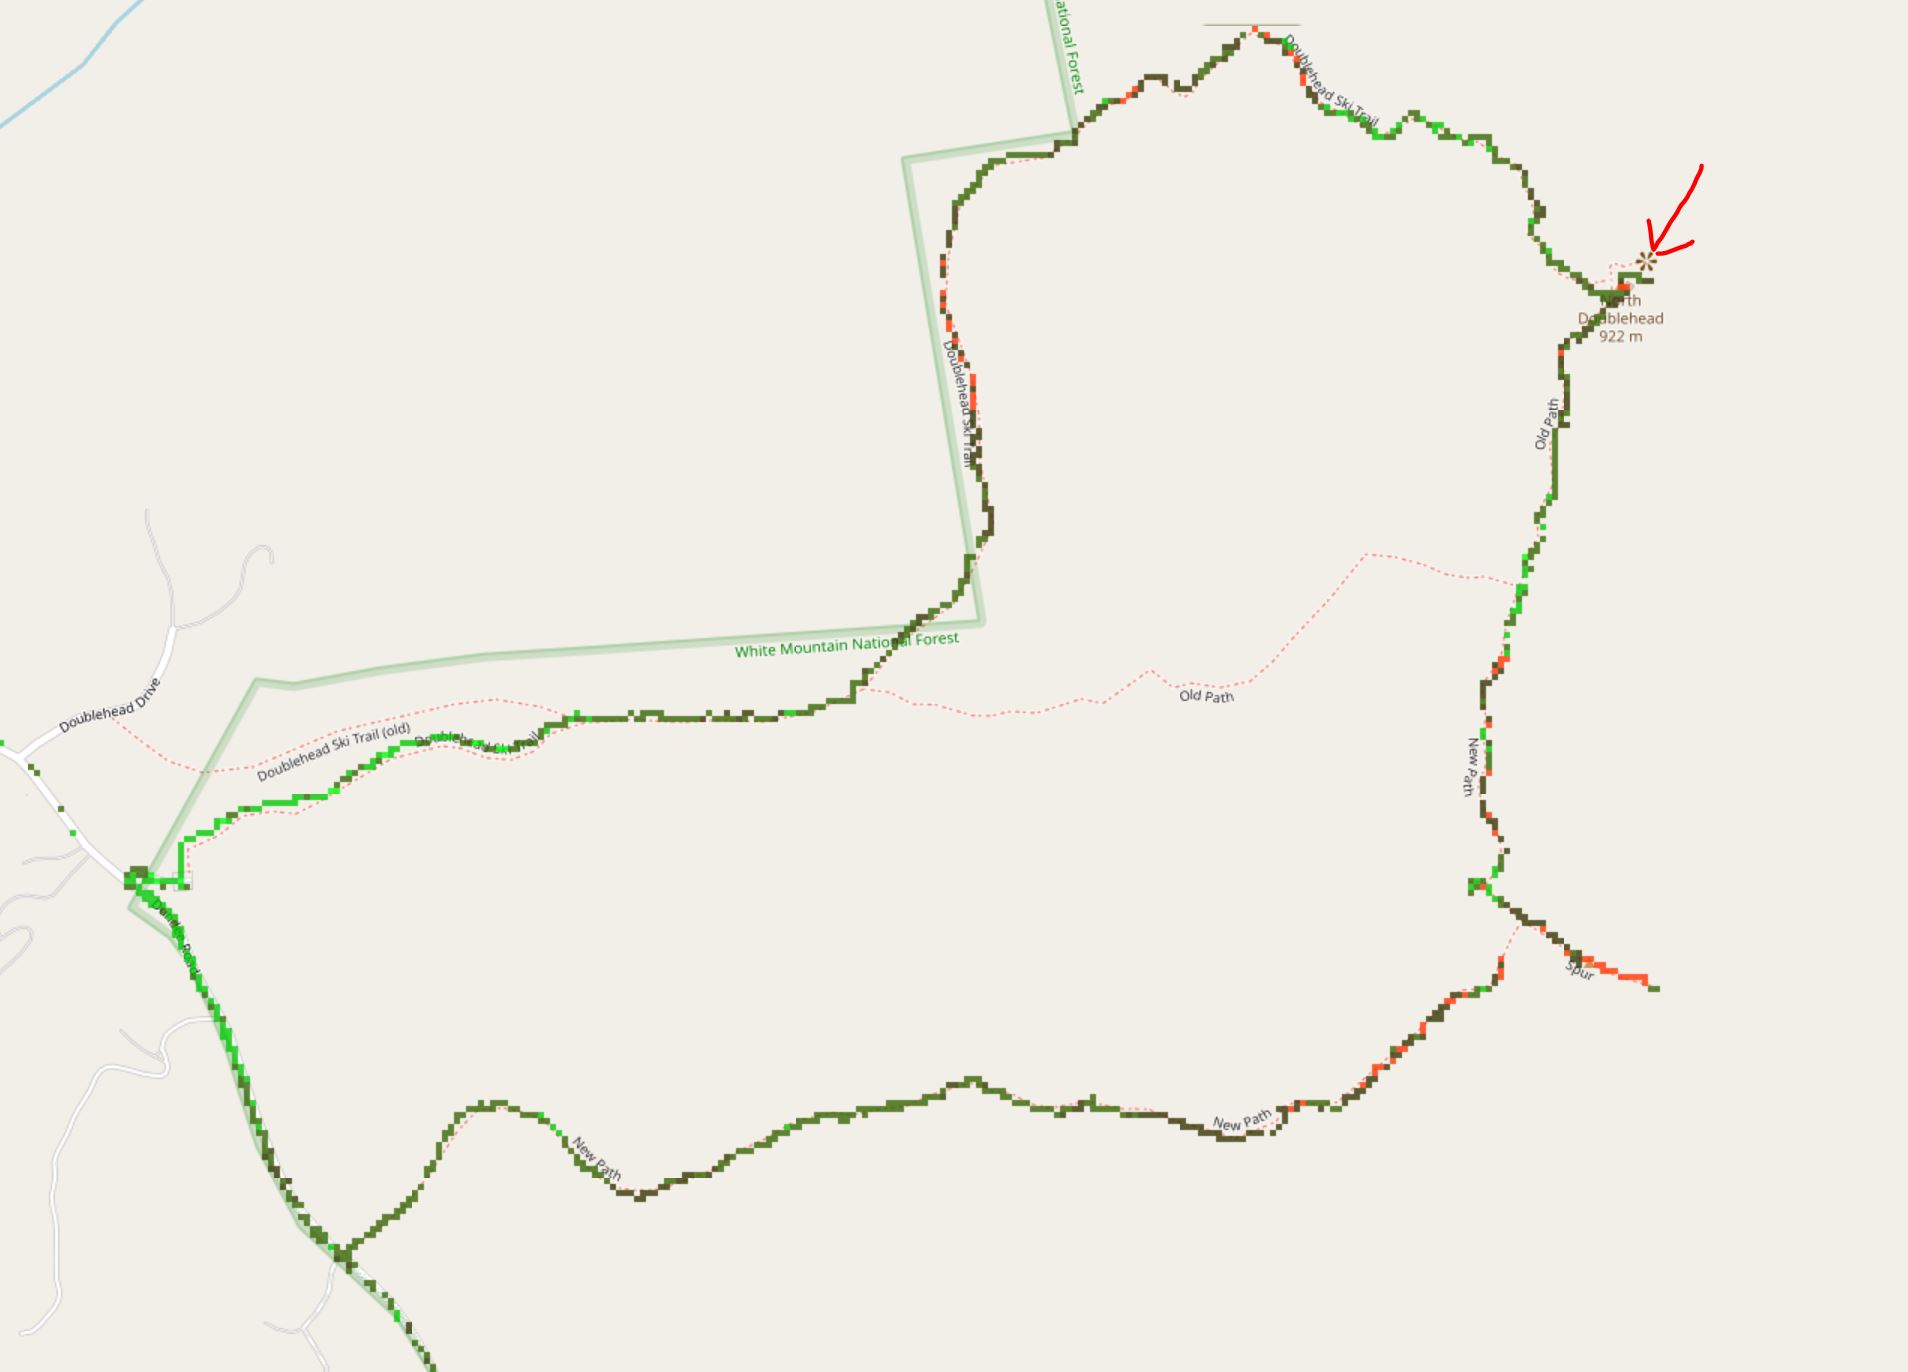
The "CELL 5" specific band details are shown below. Interestingly they list the average download speed as 14Mbps and average upload of 8 Mbps, operating on the 700 MHz band. It will be interesting to see what is actually available over a cellular connection for a speed test. 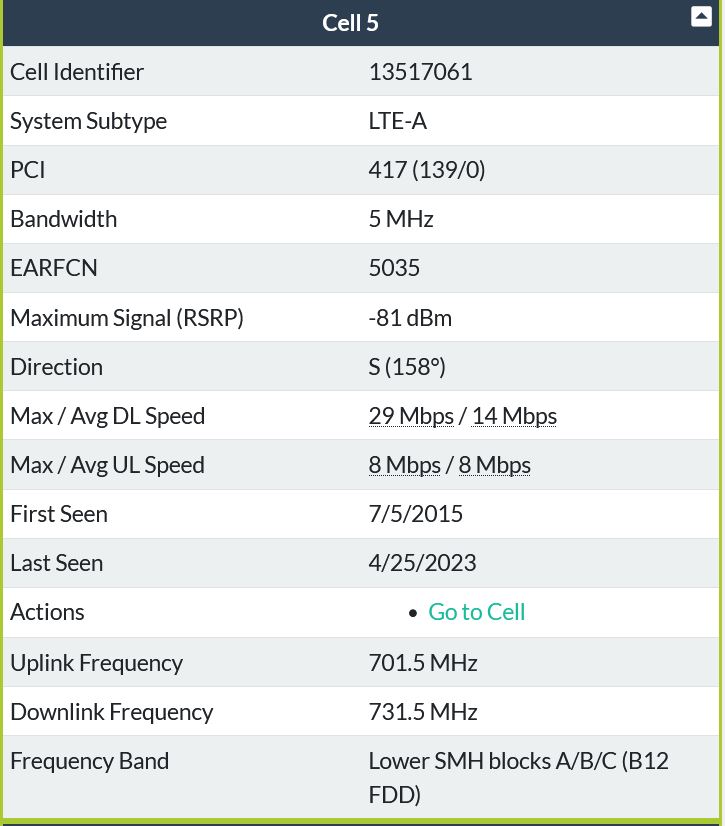
Where do you park?I was surprised to find a plowed gravel / dirt parking lot that could easily fit 6+ vehicles. There was even signage to indicate where the trail begins and some notes about the trail. The trail to the cabin is also used as a snow boarding trail, so How do you get in?After paying for the time at the cabin you get a confirmation code, a few days before heading up you call the Saco county forestry folk and get the combination. The lock is a simple 4 digit spiny style combination lock. I think this is my one holdup, if the combination is wrong or the lock misbehaves (it is literally freezing out) you are somewhat stuck, as the hike up is fairly time consuming, it would also be on the way back down. Reconnaissance mission: A Quick overnight tripWith my research in hand it was time for a subzero overnight. My goal was to be able to not freeze, but also evaluate how well certain things worked. Would solar actually work in the winter on a mountain. Can you actually get cell service up there? Is boiling fresh-ish snow a good idea? Hiking GearThe external framed backpack of yesteryearI end up generally using gear longer than it was intended to be used, and as such I still have a like 1990's era Jansport hiking backpack. The switchover to internal frames happened ages ago and I kept chugging along with my external frame thing from my boy scout days. It did need some TLC, like some new shoulder straps and some replaced zippers, but I still love the big guy. One of the big bonus's that external frame packs have is they keep your back off of the actual bag itself, allowing ventilation. 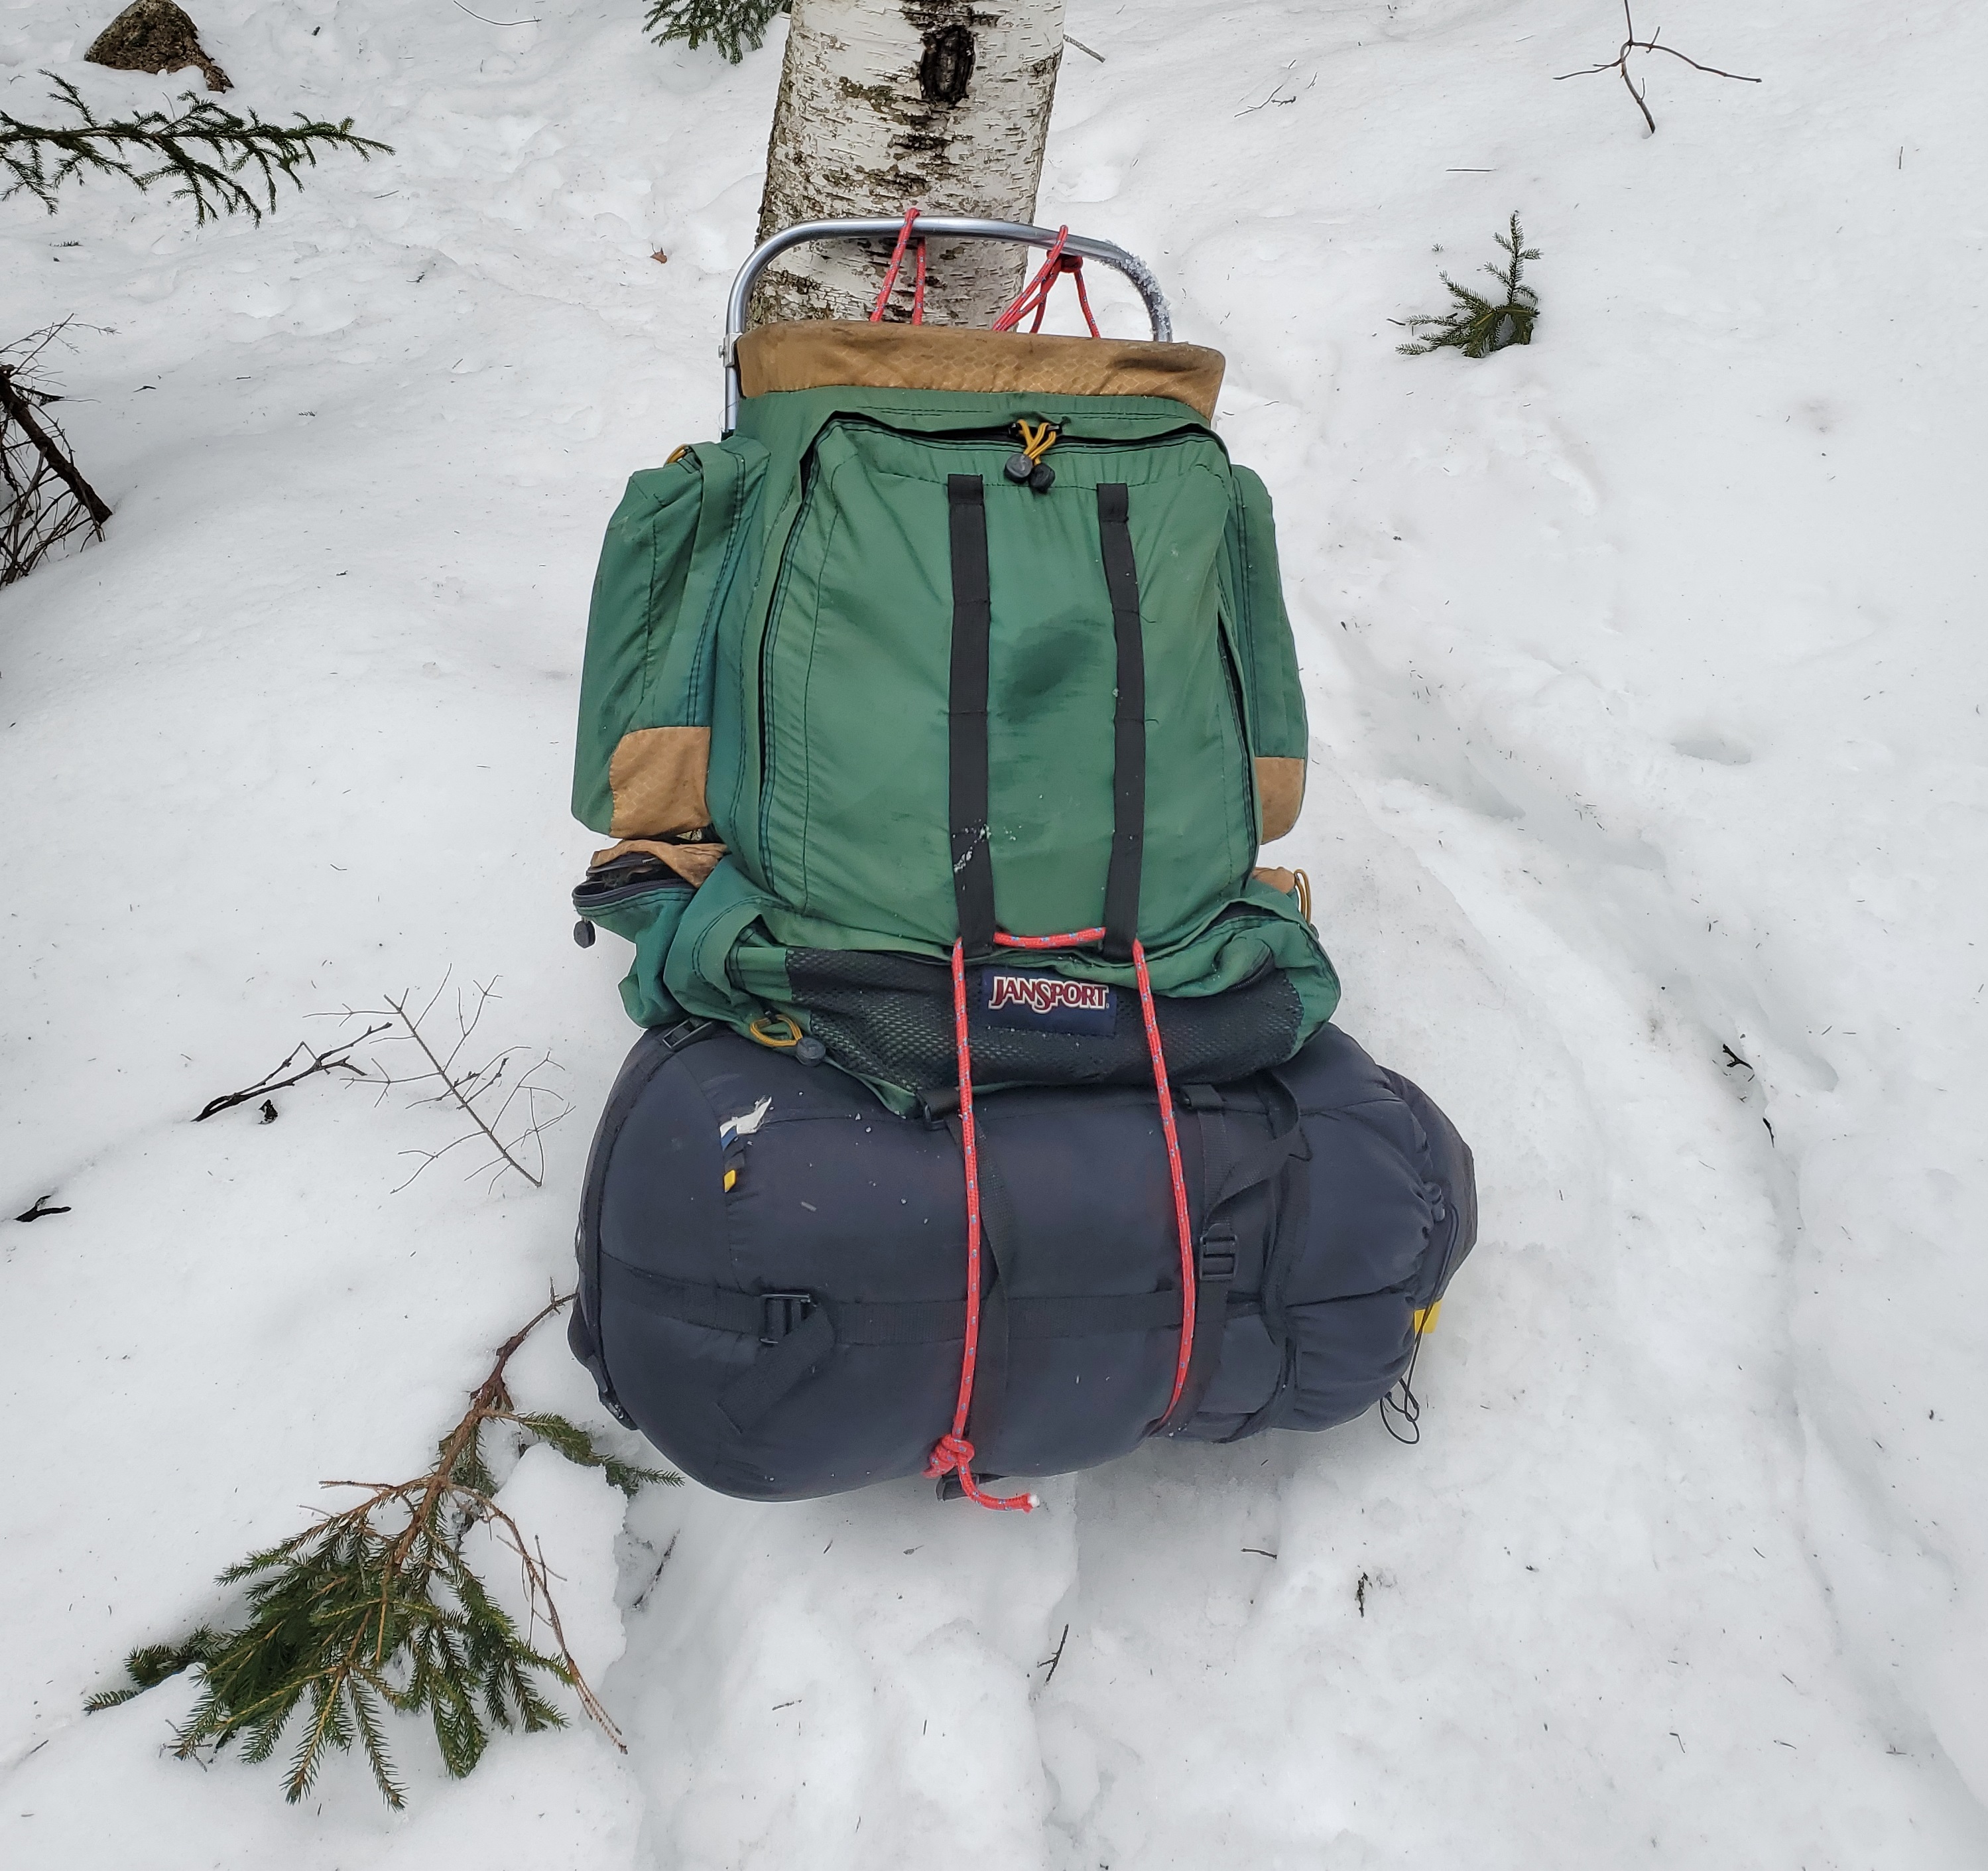
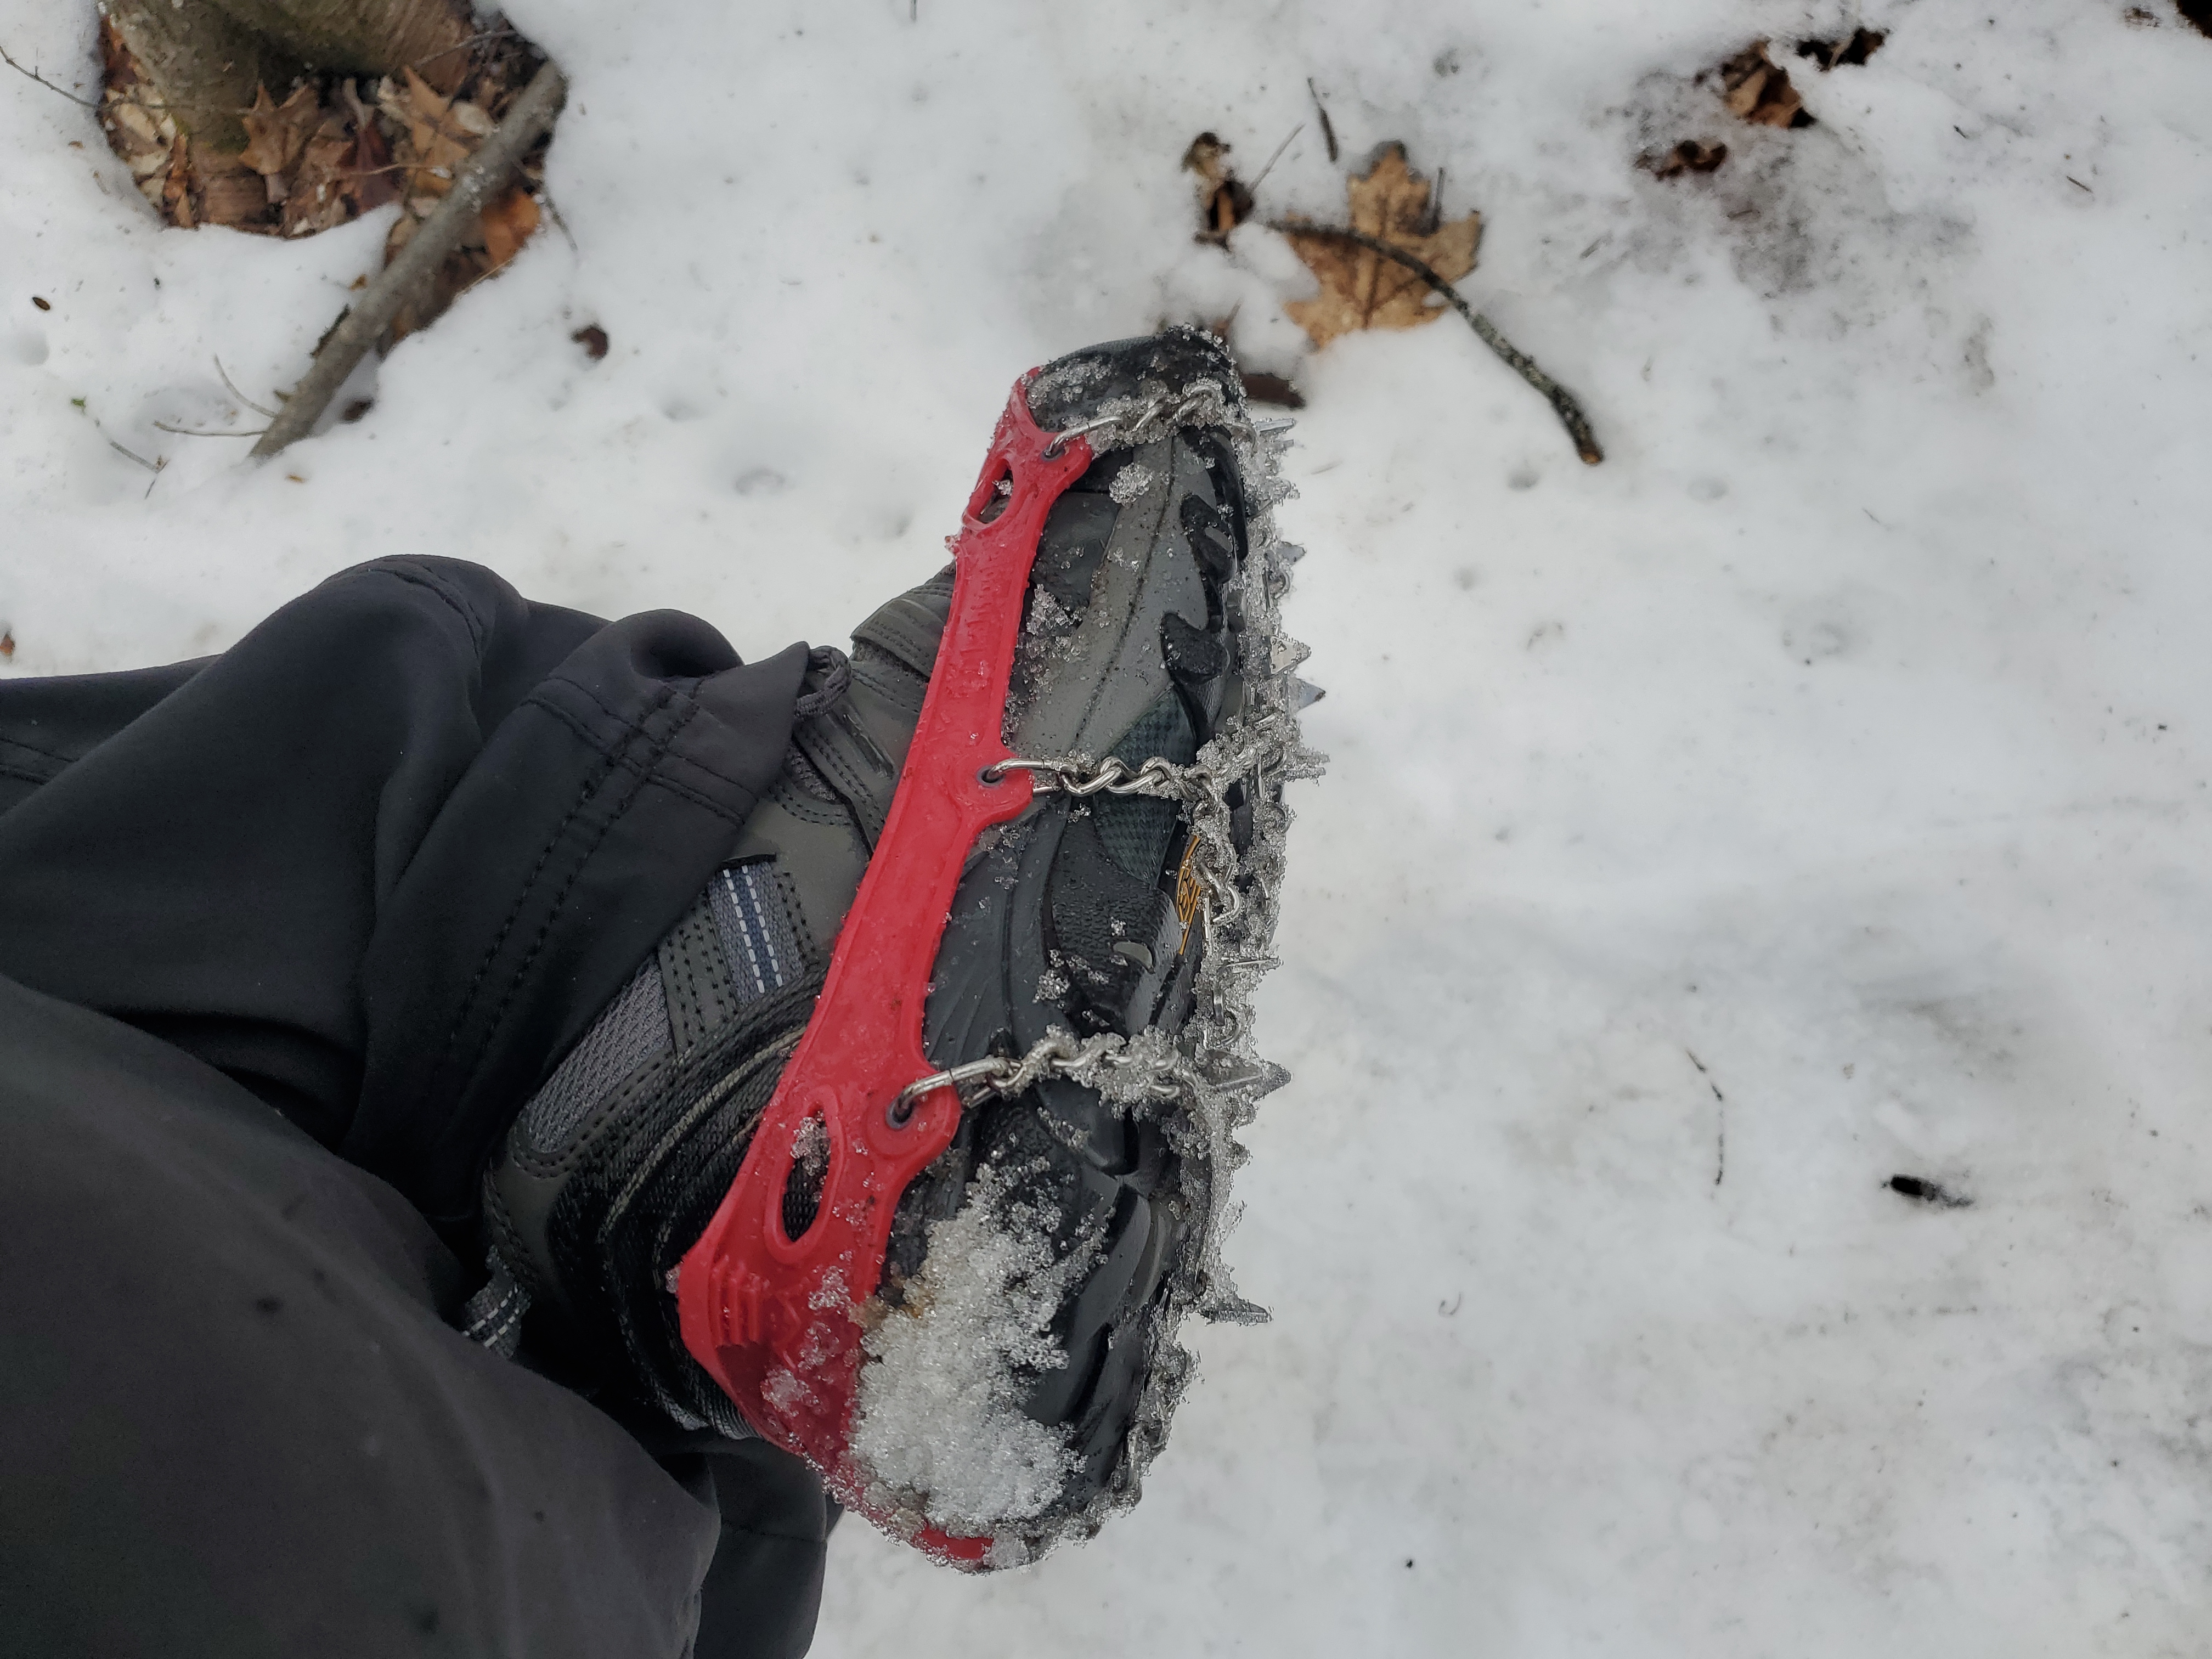
Sleeping MatI did end up getting a modern inflatable sleeping mat. I opted for a ~30$ inflatable mat with a built in pump contraption. It was so cheap but it worked so well. I was concerned with it puncturing and being stuck on a wood plank for a while evening, so I brought along a patch kit. I think if this mattress existed in like 5 mil material not 3 mil It would be perfect, as it was it worked great for a few evenings and packs remarkably lightly. On the hike up I had it lashed to the top rail where a conventional pad would go, but for the hike down I ended up packing it internally. This Matt was incredibly comfortable to sleep on. The model of this camping mat is [link] and was 30 USD. Crampon'sI did a summit of mount Monadnock with some friends and they have a daily rental of these really excellent, durable crampon's. While they are pricey, they are remarkably durable and really make rough terrain a lot more manageable. The specific model is "Kahtoola MICROspikes", which I purchased from [ebay], a size medium for 60 USD. 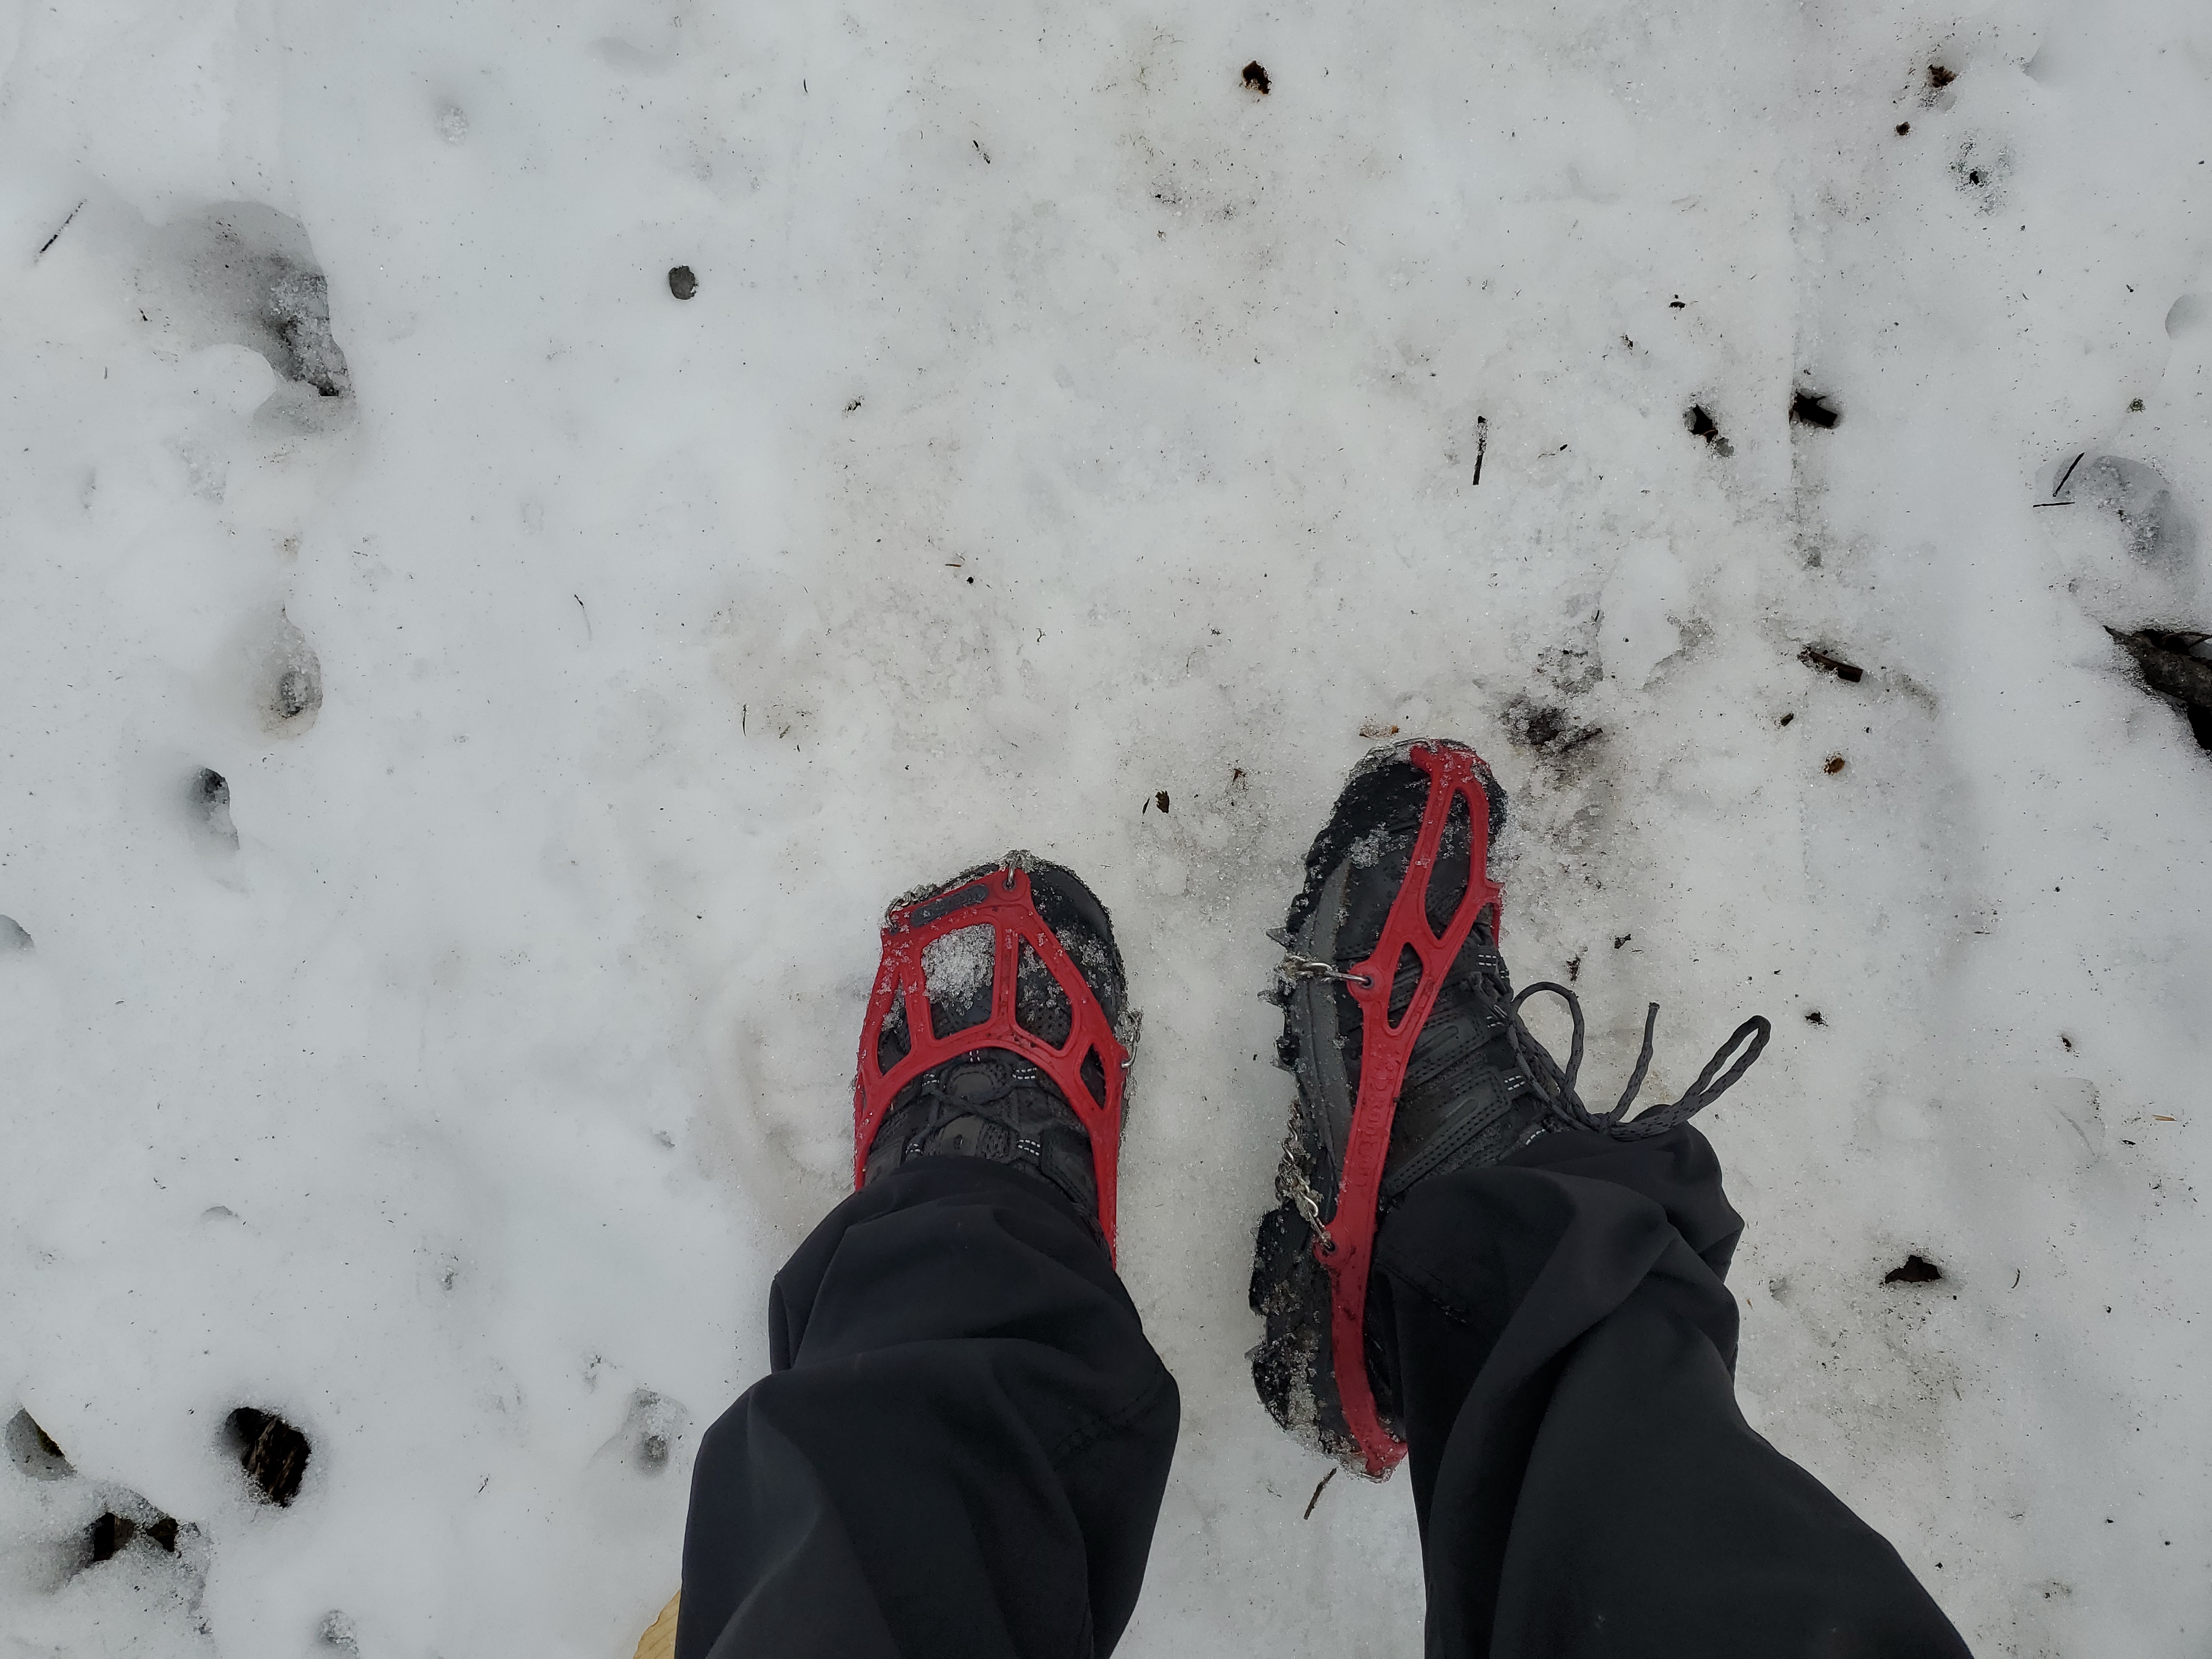
LightingI figured lighting inside the cabin would be fairly dark, especially at night. I wanted something with an internal battery that could run for a while, and wasn't like 5000k blue. I came across this thing, which is rechargeable, has multiple brightness settings and is supposedly waterproof. It's fairly light and overall I was impressed by how well it worked out. I kept it on overnight at one of the lower settings, nominally so if i needed to get up to refill the fireplace I wouldn't be stumbling about. This charges over USB-C which is also convenient. It's not intensely bright in comparison to daylight but it would have worked out fine in a tent for a reading light and is surprisingly durable so far. I highly recommend it. I forgot to bring my tiny headlamp on this adventure and while it would have been helpful on a late afternoon hike down, I was fine without it. The model of this light is [link] and was 20 USD. 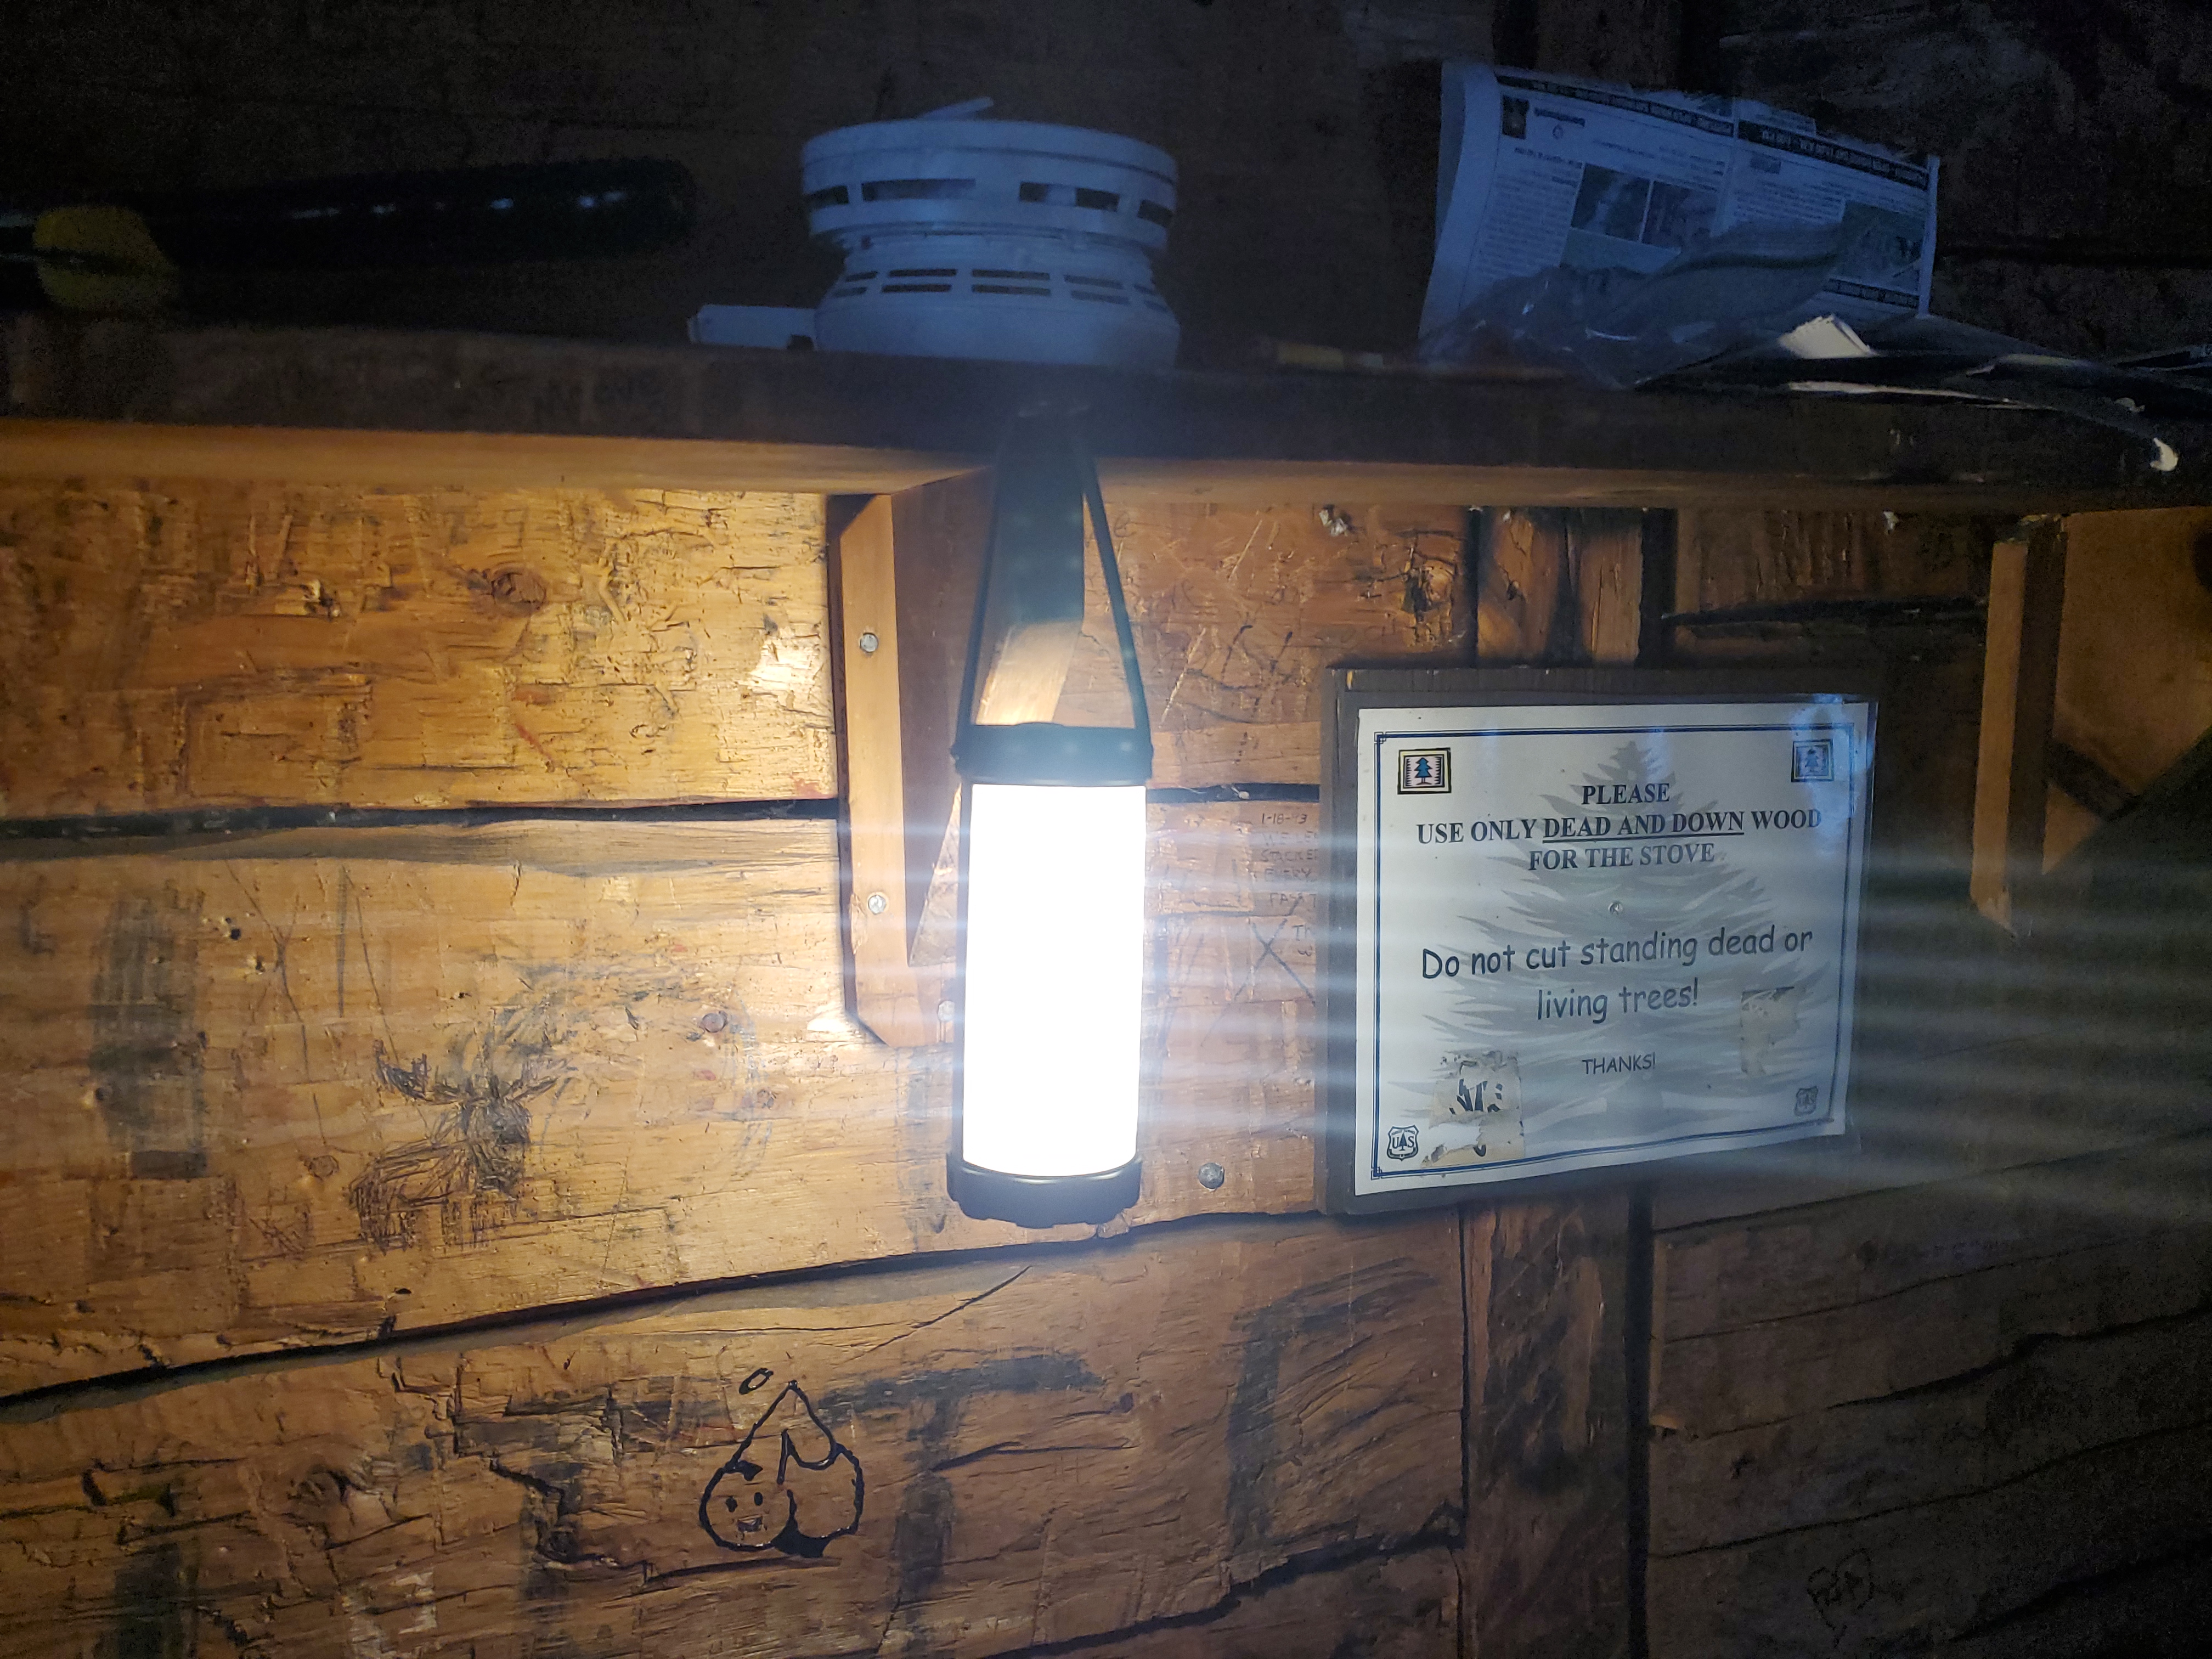
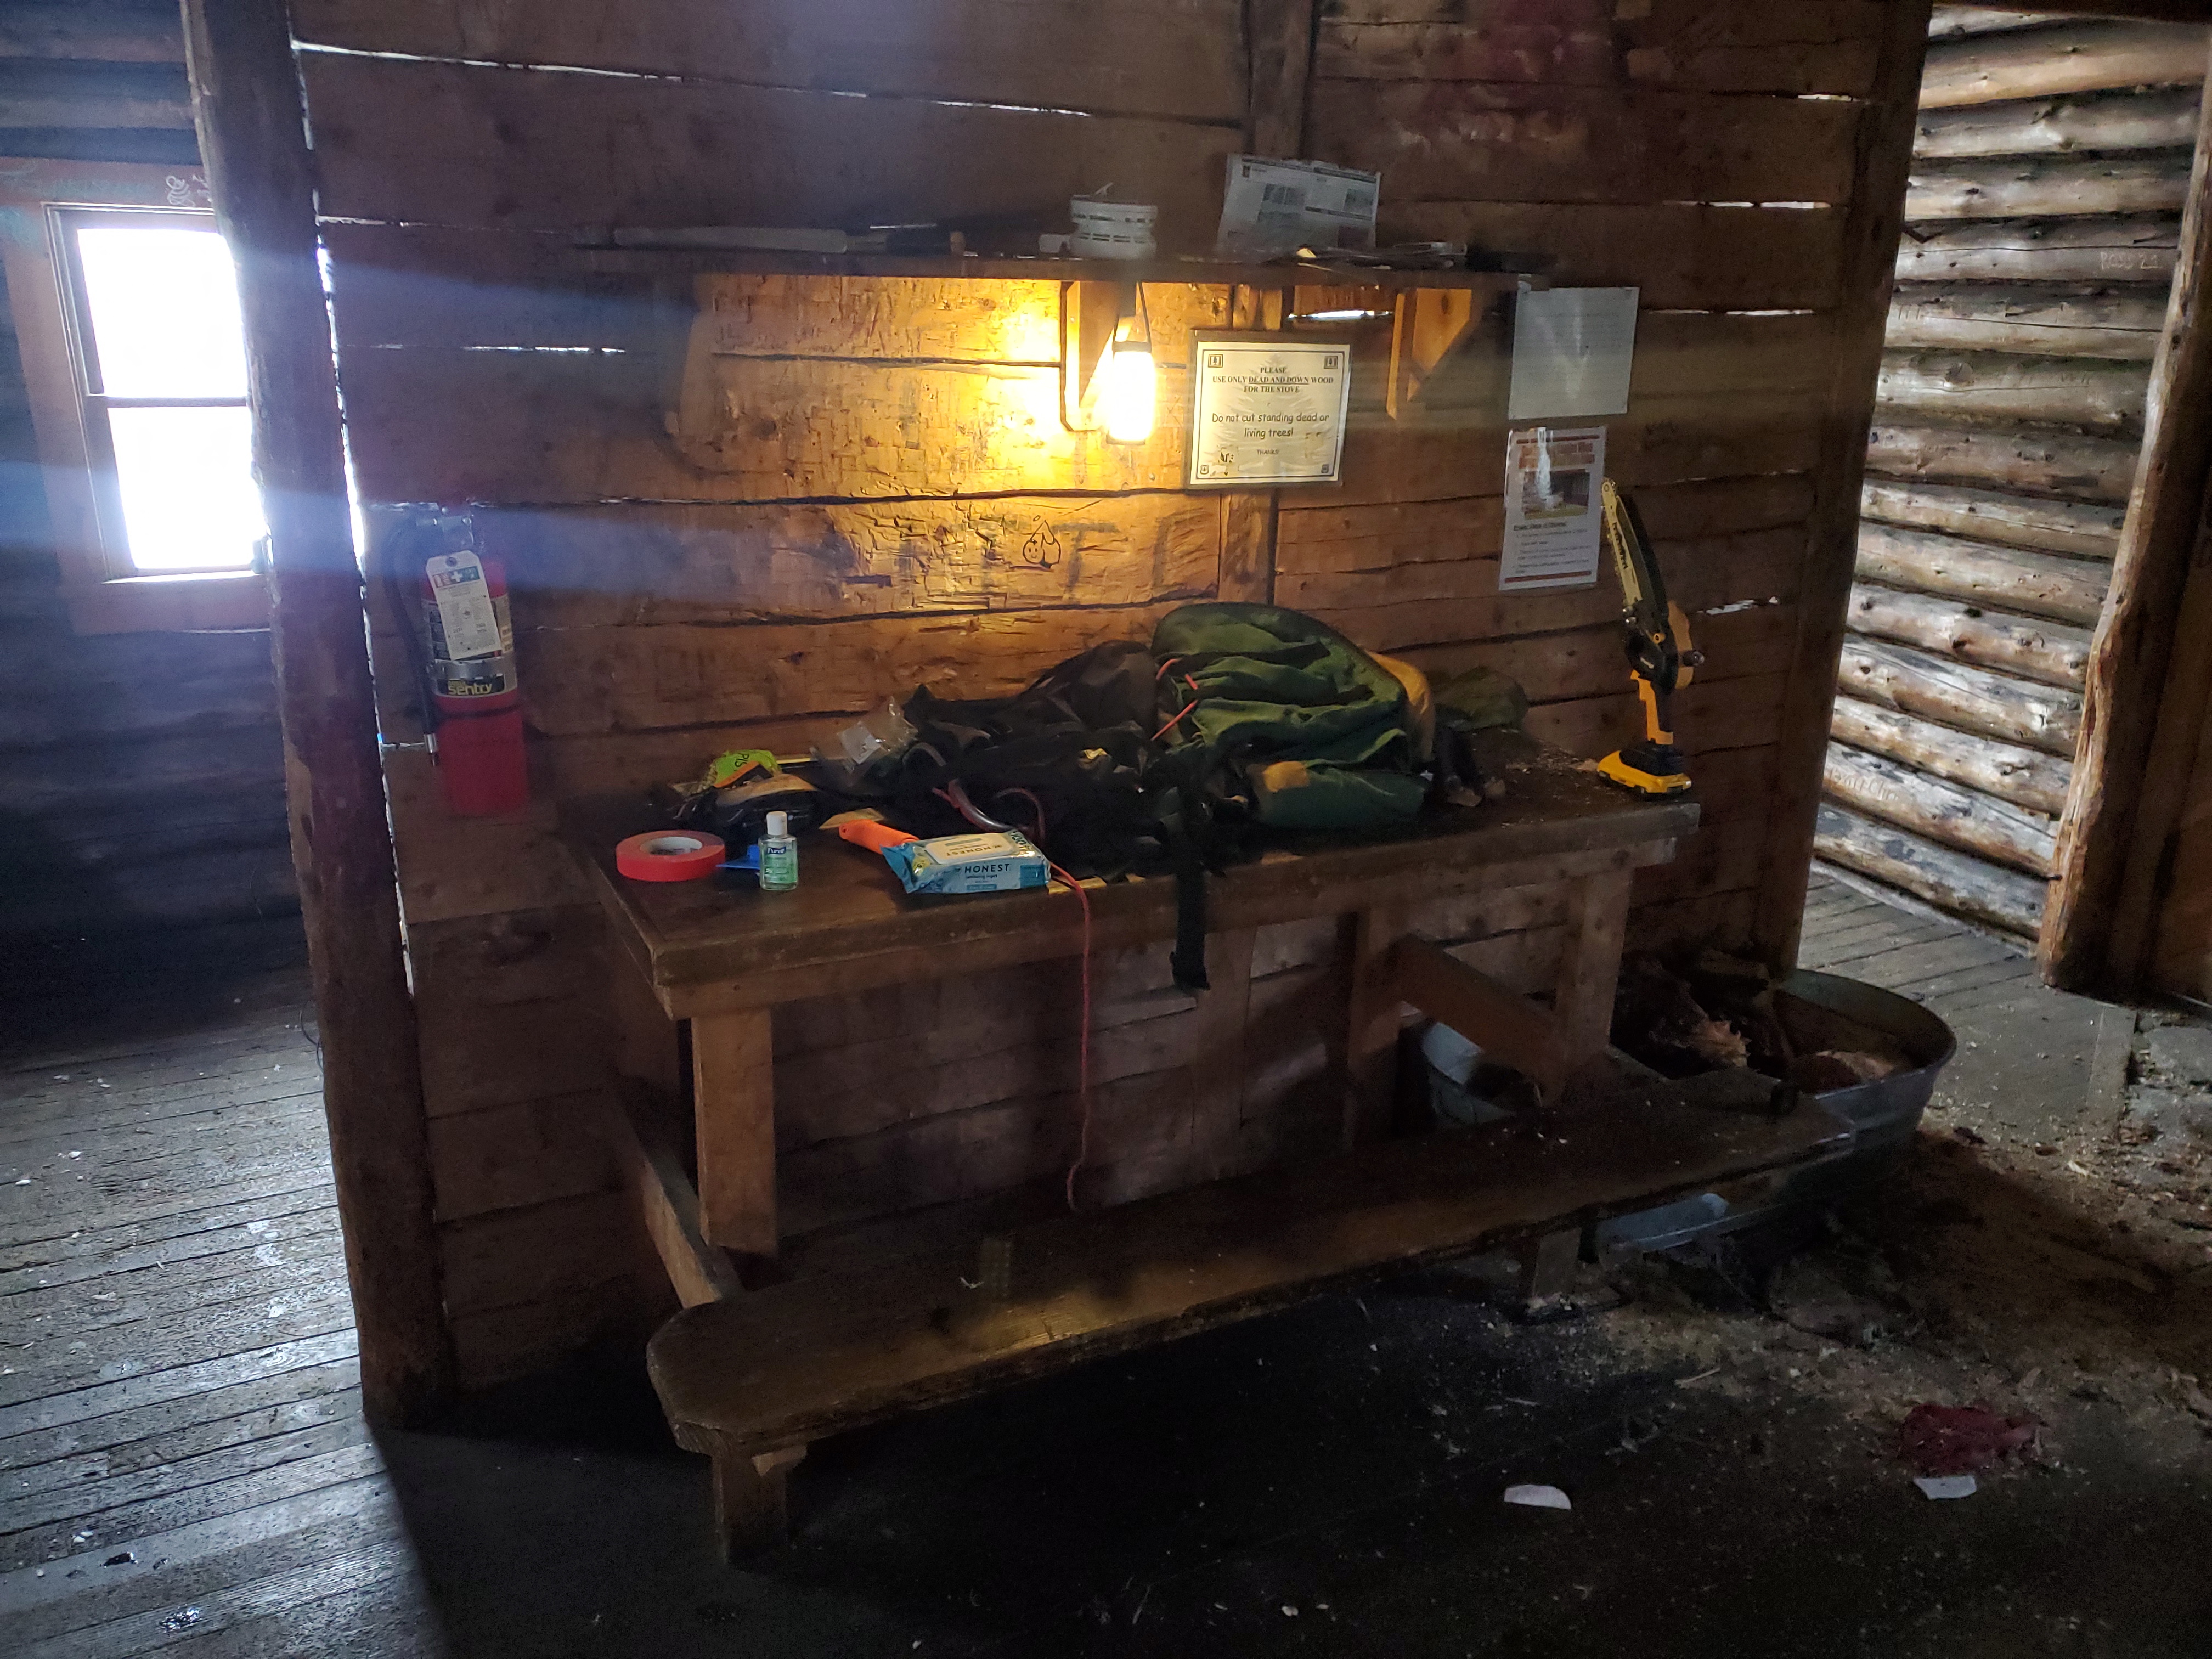
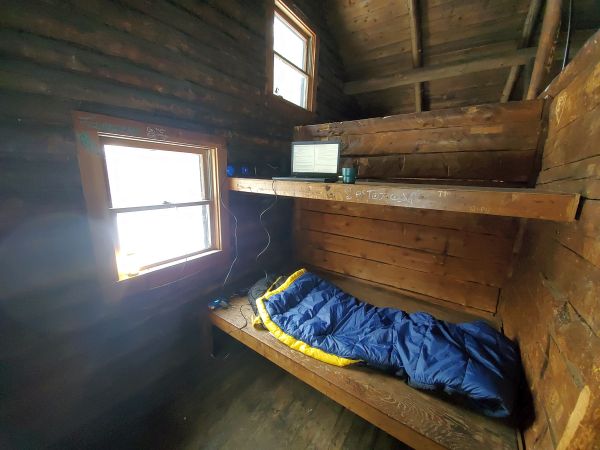
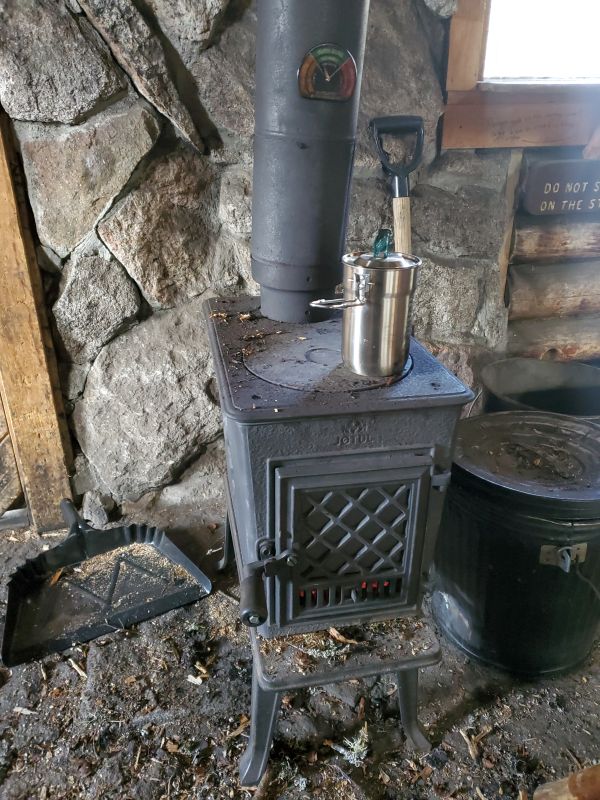
Sleeping BagI re-used an older re-use sleeping bag and while it was warm, the stuck zipper, weight and bulk was a real downer. For subsequent trips I ended up replacing the bag with a more modern Kelty variant that was a bit more mummy-style. ThermalsI was greeted by someone kind enough to leave some sticks and logs by the fireplace in a bin. The wood stove in the cabin is flat-out way too small to do anything but warm up a single person hovering over it. I tried door open / fiddling with the damper, alas the internal cabin temperature was always only a few degrees F warmer than the outside. The stove is small and the cabin has a lot of thermal mass . It is possible to warm up the cabin internals but it takes a day of firewood to do so. 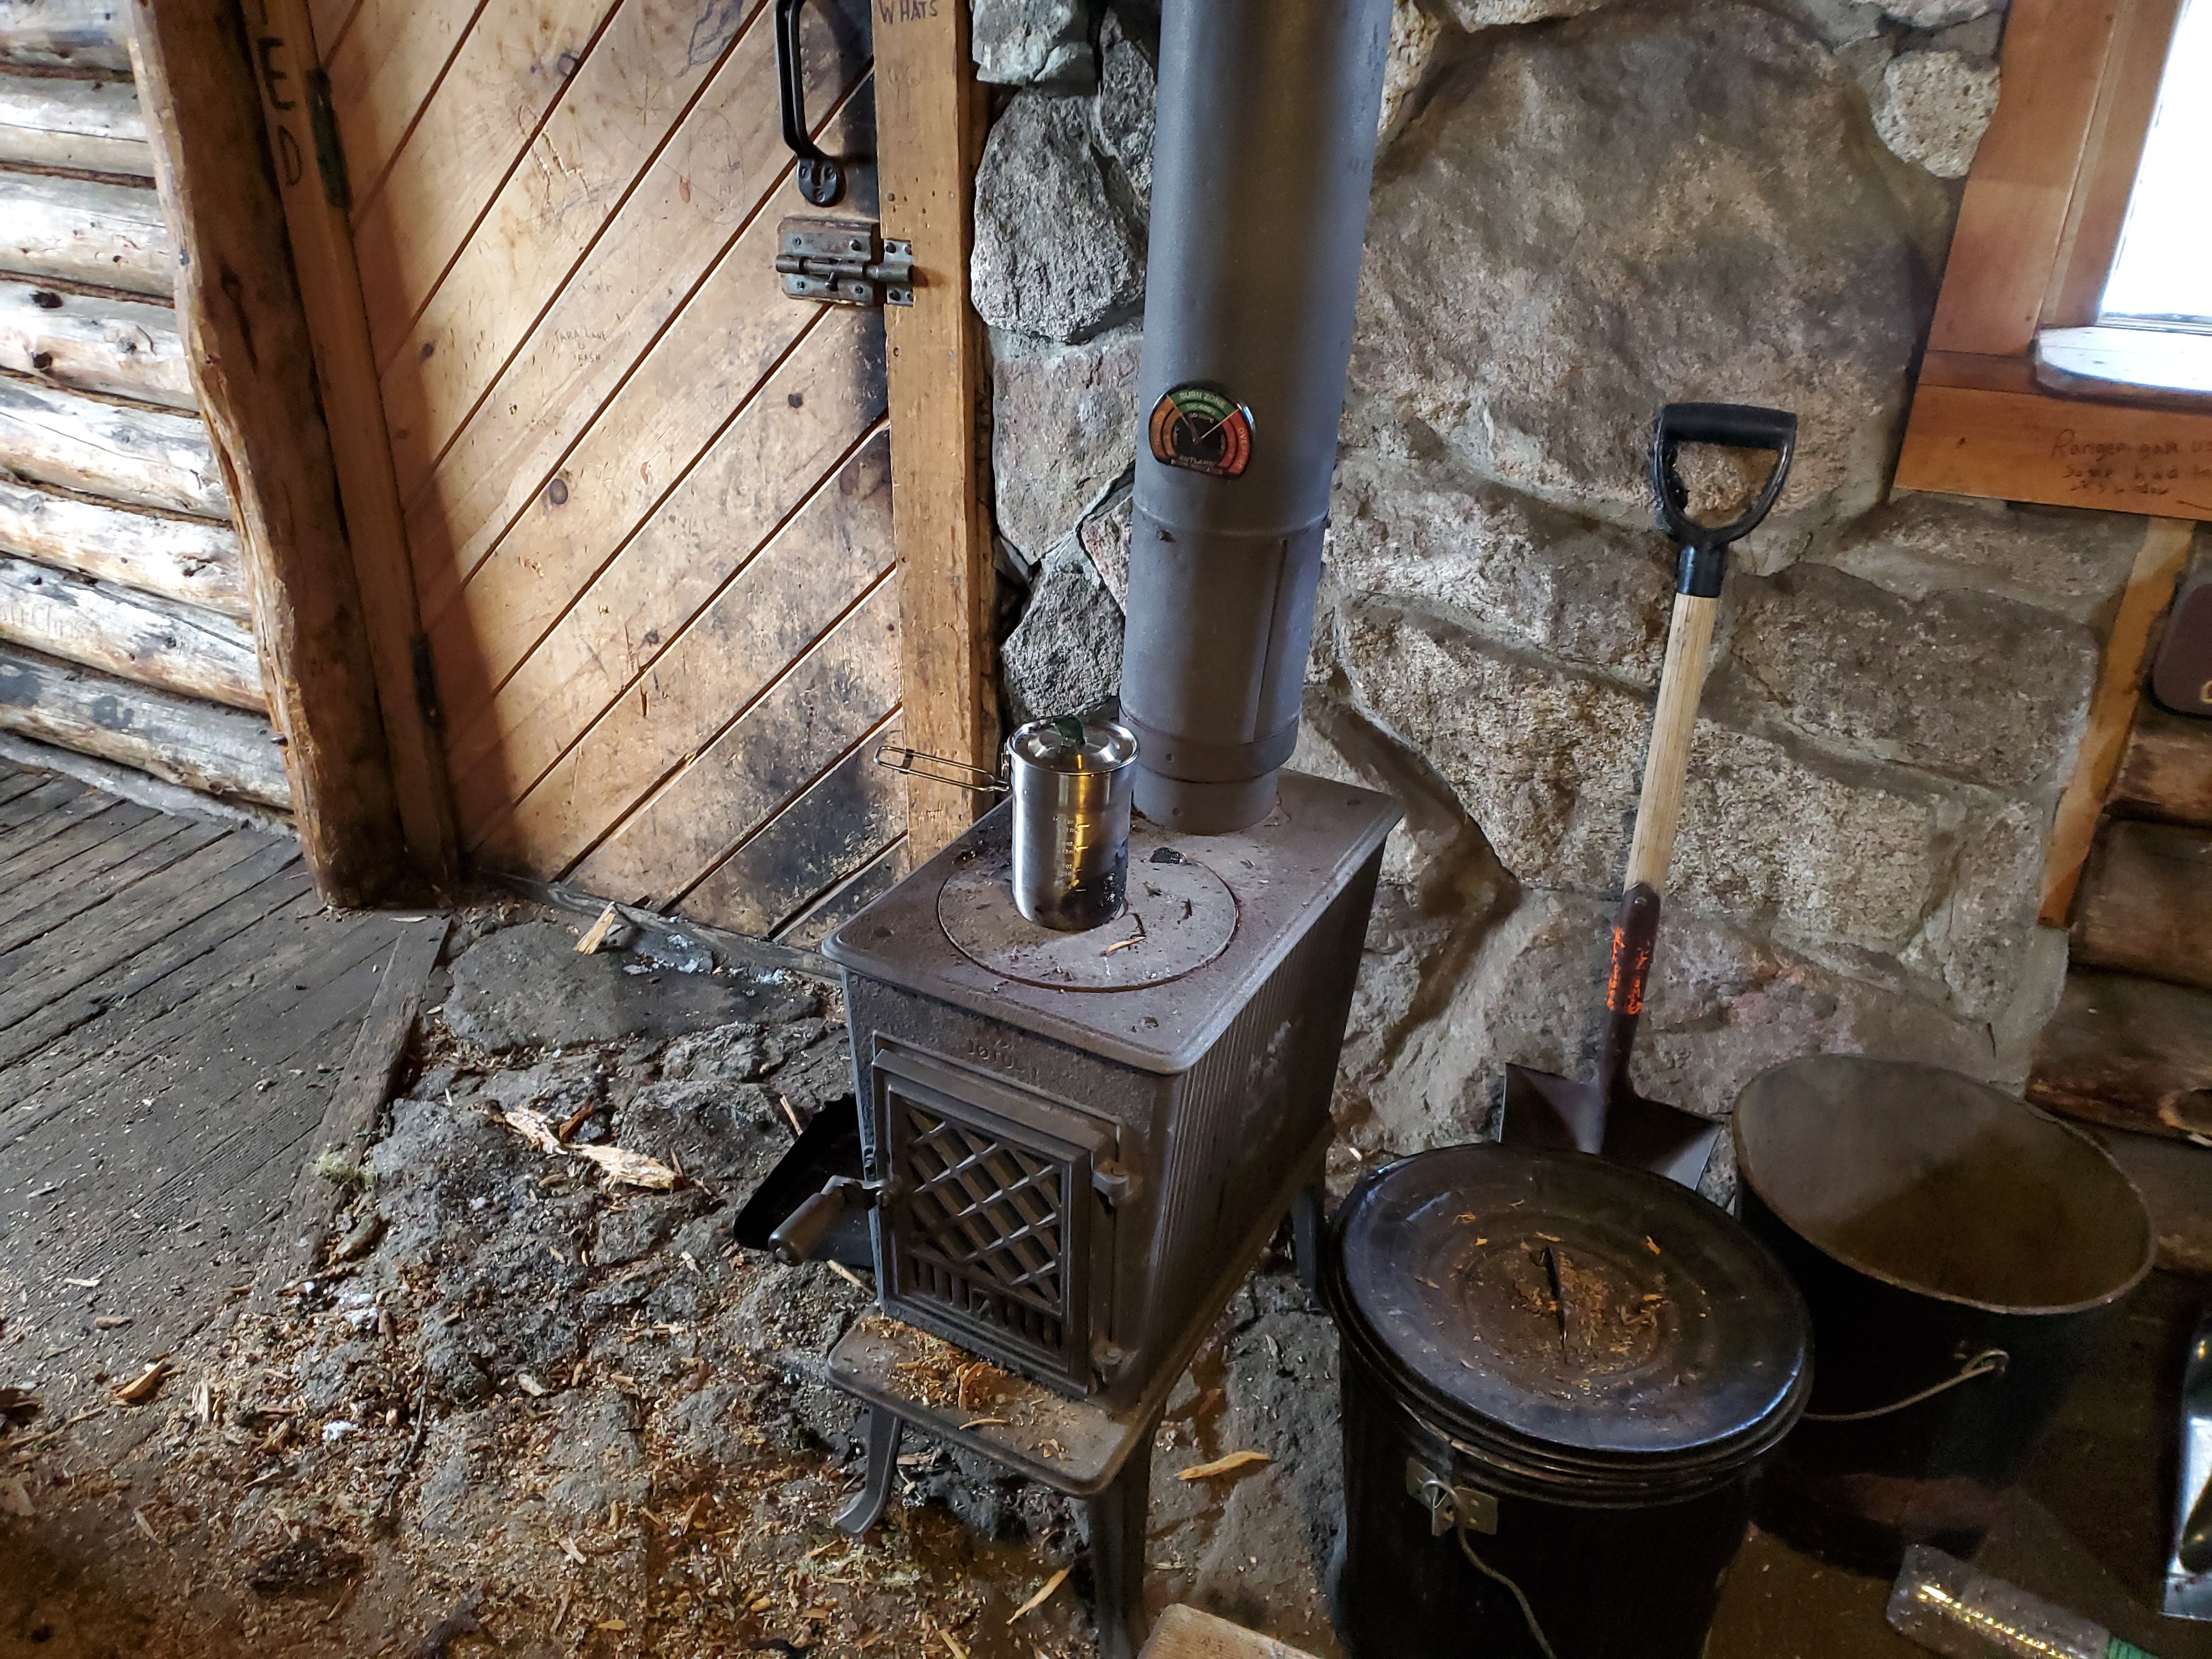
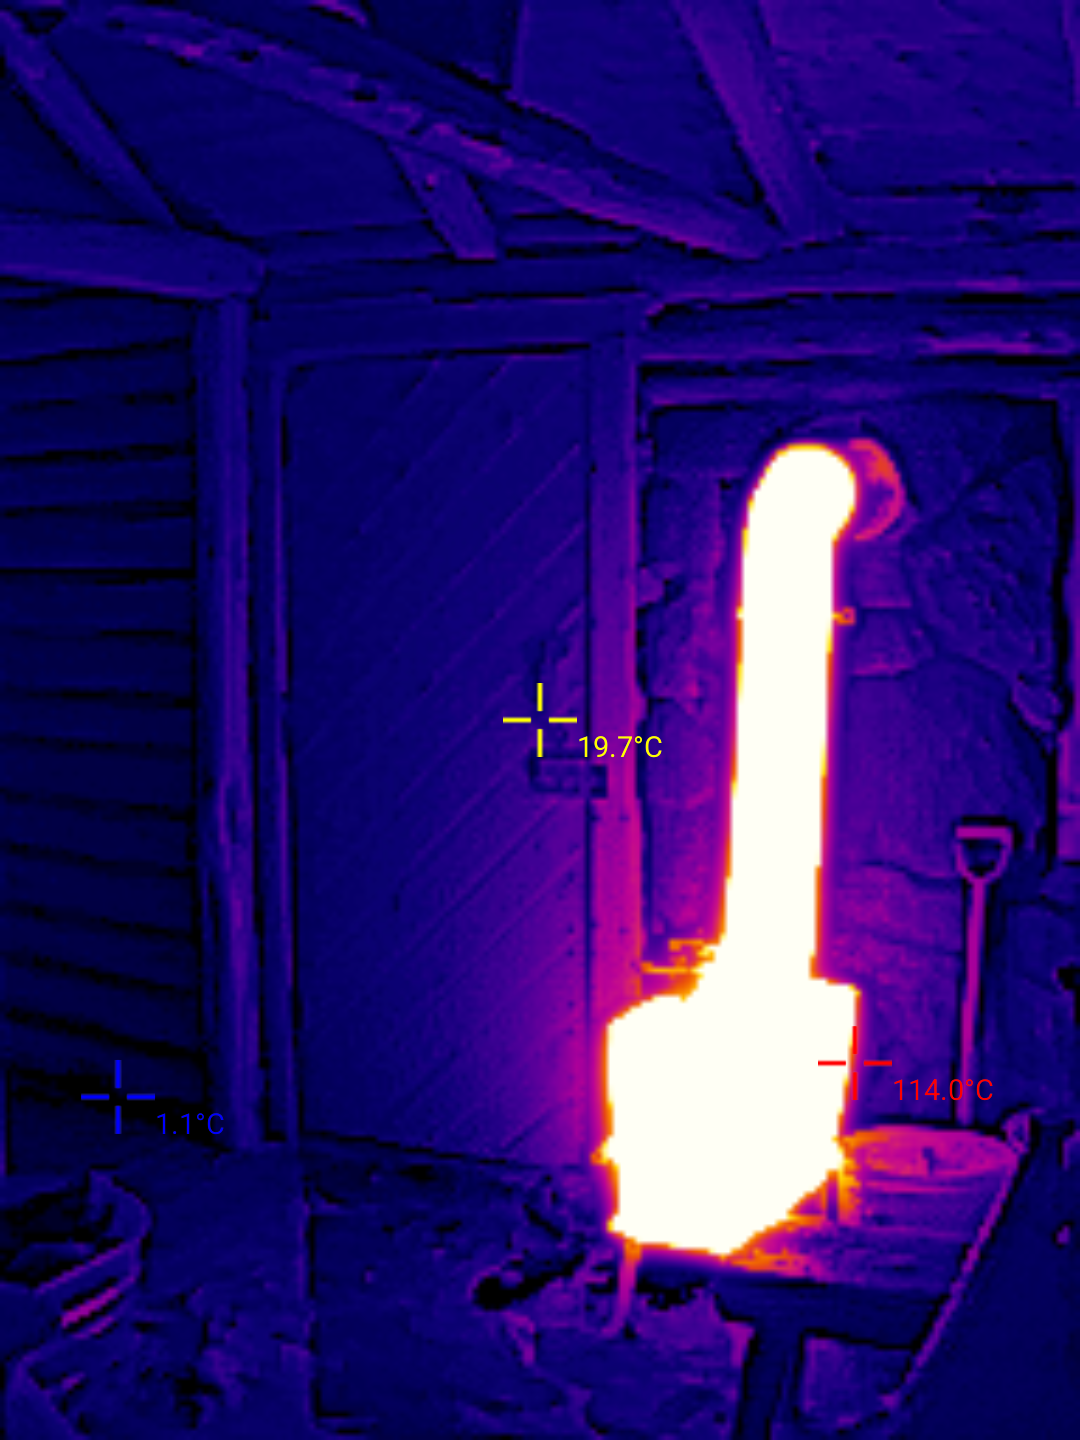
I brought up two tiny thermometers and left one outside of the window and one in the cabin main area, ~6ft from the stove. I think that while the cabin is very structural there is no insulation on the roof, so thermally there are plenty of places for the heat to go. How do I know this? I brought a thermal camera long for the ride. The walls behind the wood stove is made of rock and mortar and does act as a large heat sink, this is kind of visible in the thermal image. 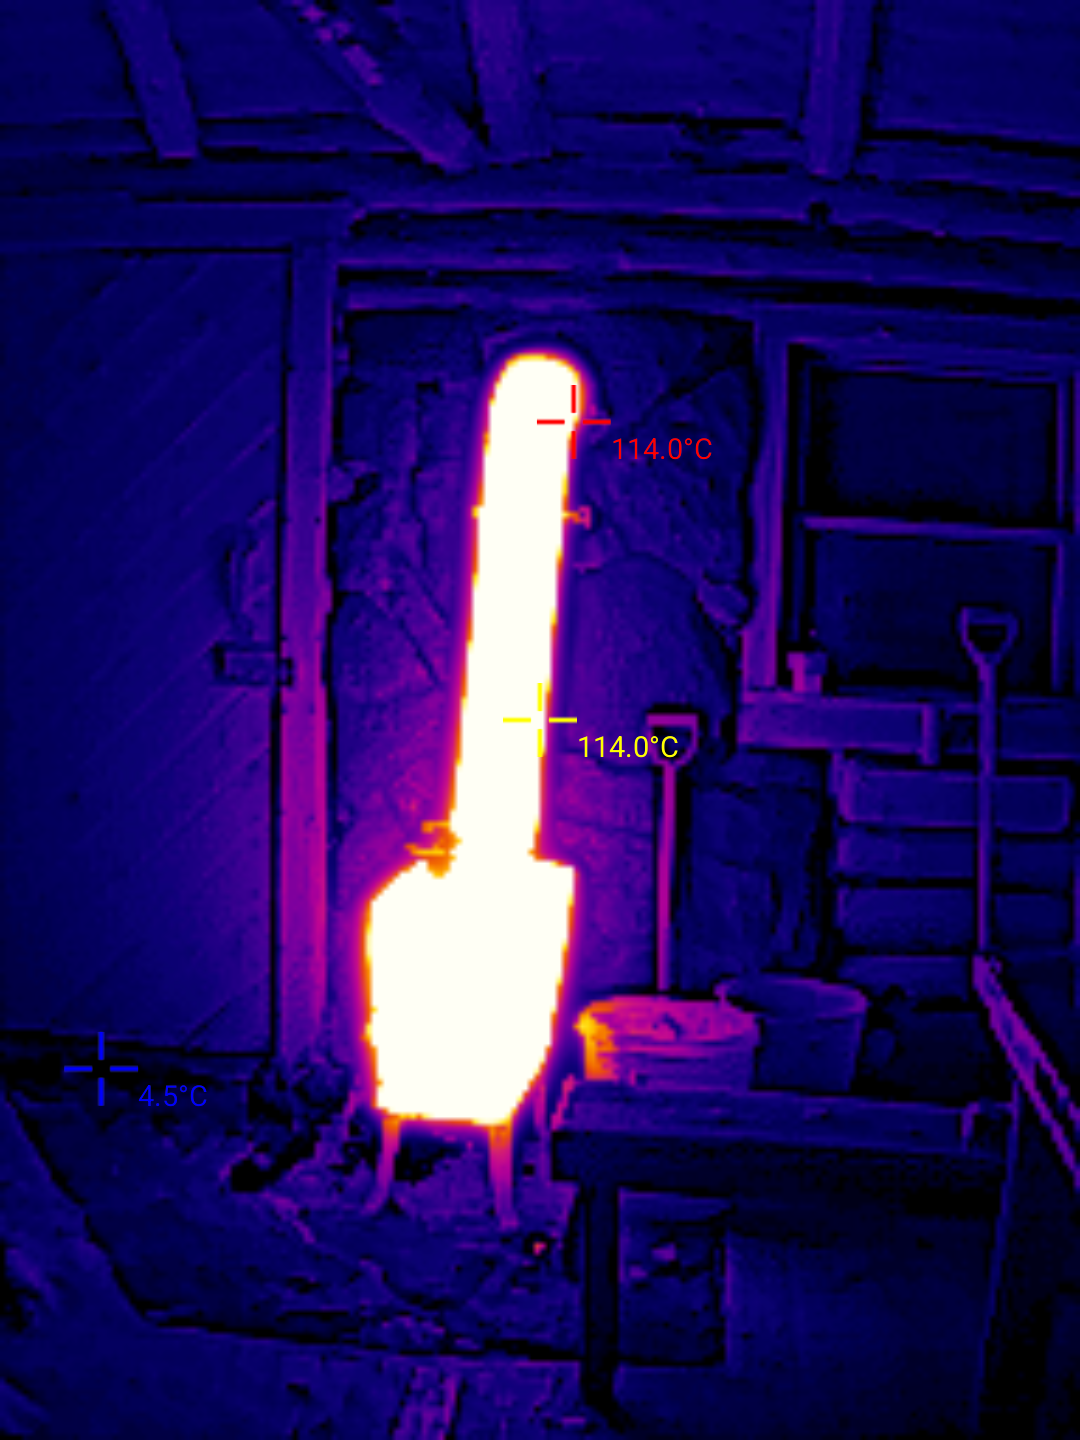
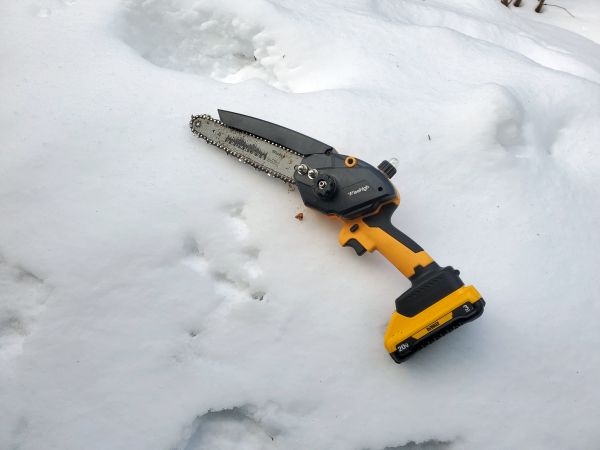
One of the best ideas I had for this trip was to try out one of these brushless tiny-saws. This particular one [link] does work with the DeWalt series batteries, which I have a few of. I've been trying to avoid supporting 'many brands of tools with many batteries' and for some reason settled on the 20V DeWalt series. This thing rips. I brought up a lightweight 3Ah pack and it was able to go for about a day of firewood between charging. It's remarkably great, and 'the closest thing to minecraft' in the real world. You are permitted to cut fallen trees around the cabin, so this is totally kosher. I did bring up a handsaw as a backup plan but this thing was too much fun. The logs I cut were somewhat snow-logged and required pre-warming under the stove before they made their way into the wood stove. The stove itself is small which is why these small cuttings are tiny.
Video has audio
This thing was worth carrying up a mountain. It does have a screw-on handle but to keep mass down I just opted to go with this as-is. It is worth bringing up the small multi-tool to tighten and adjust the chain tension, as if it is too tight it will not spool up. 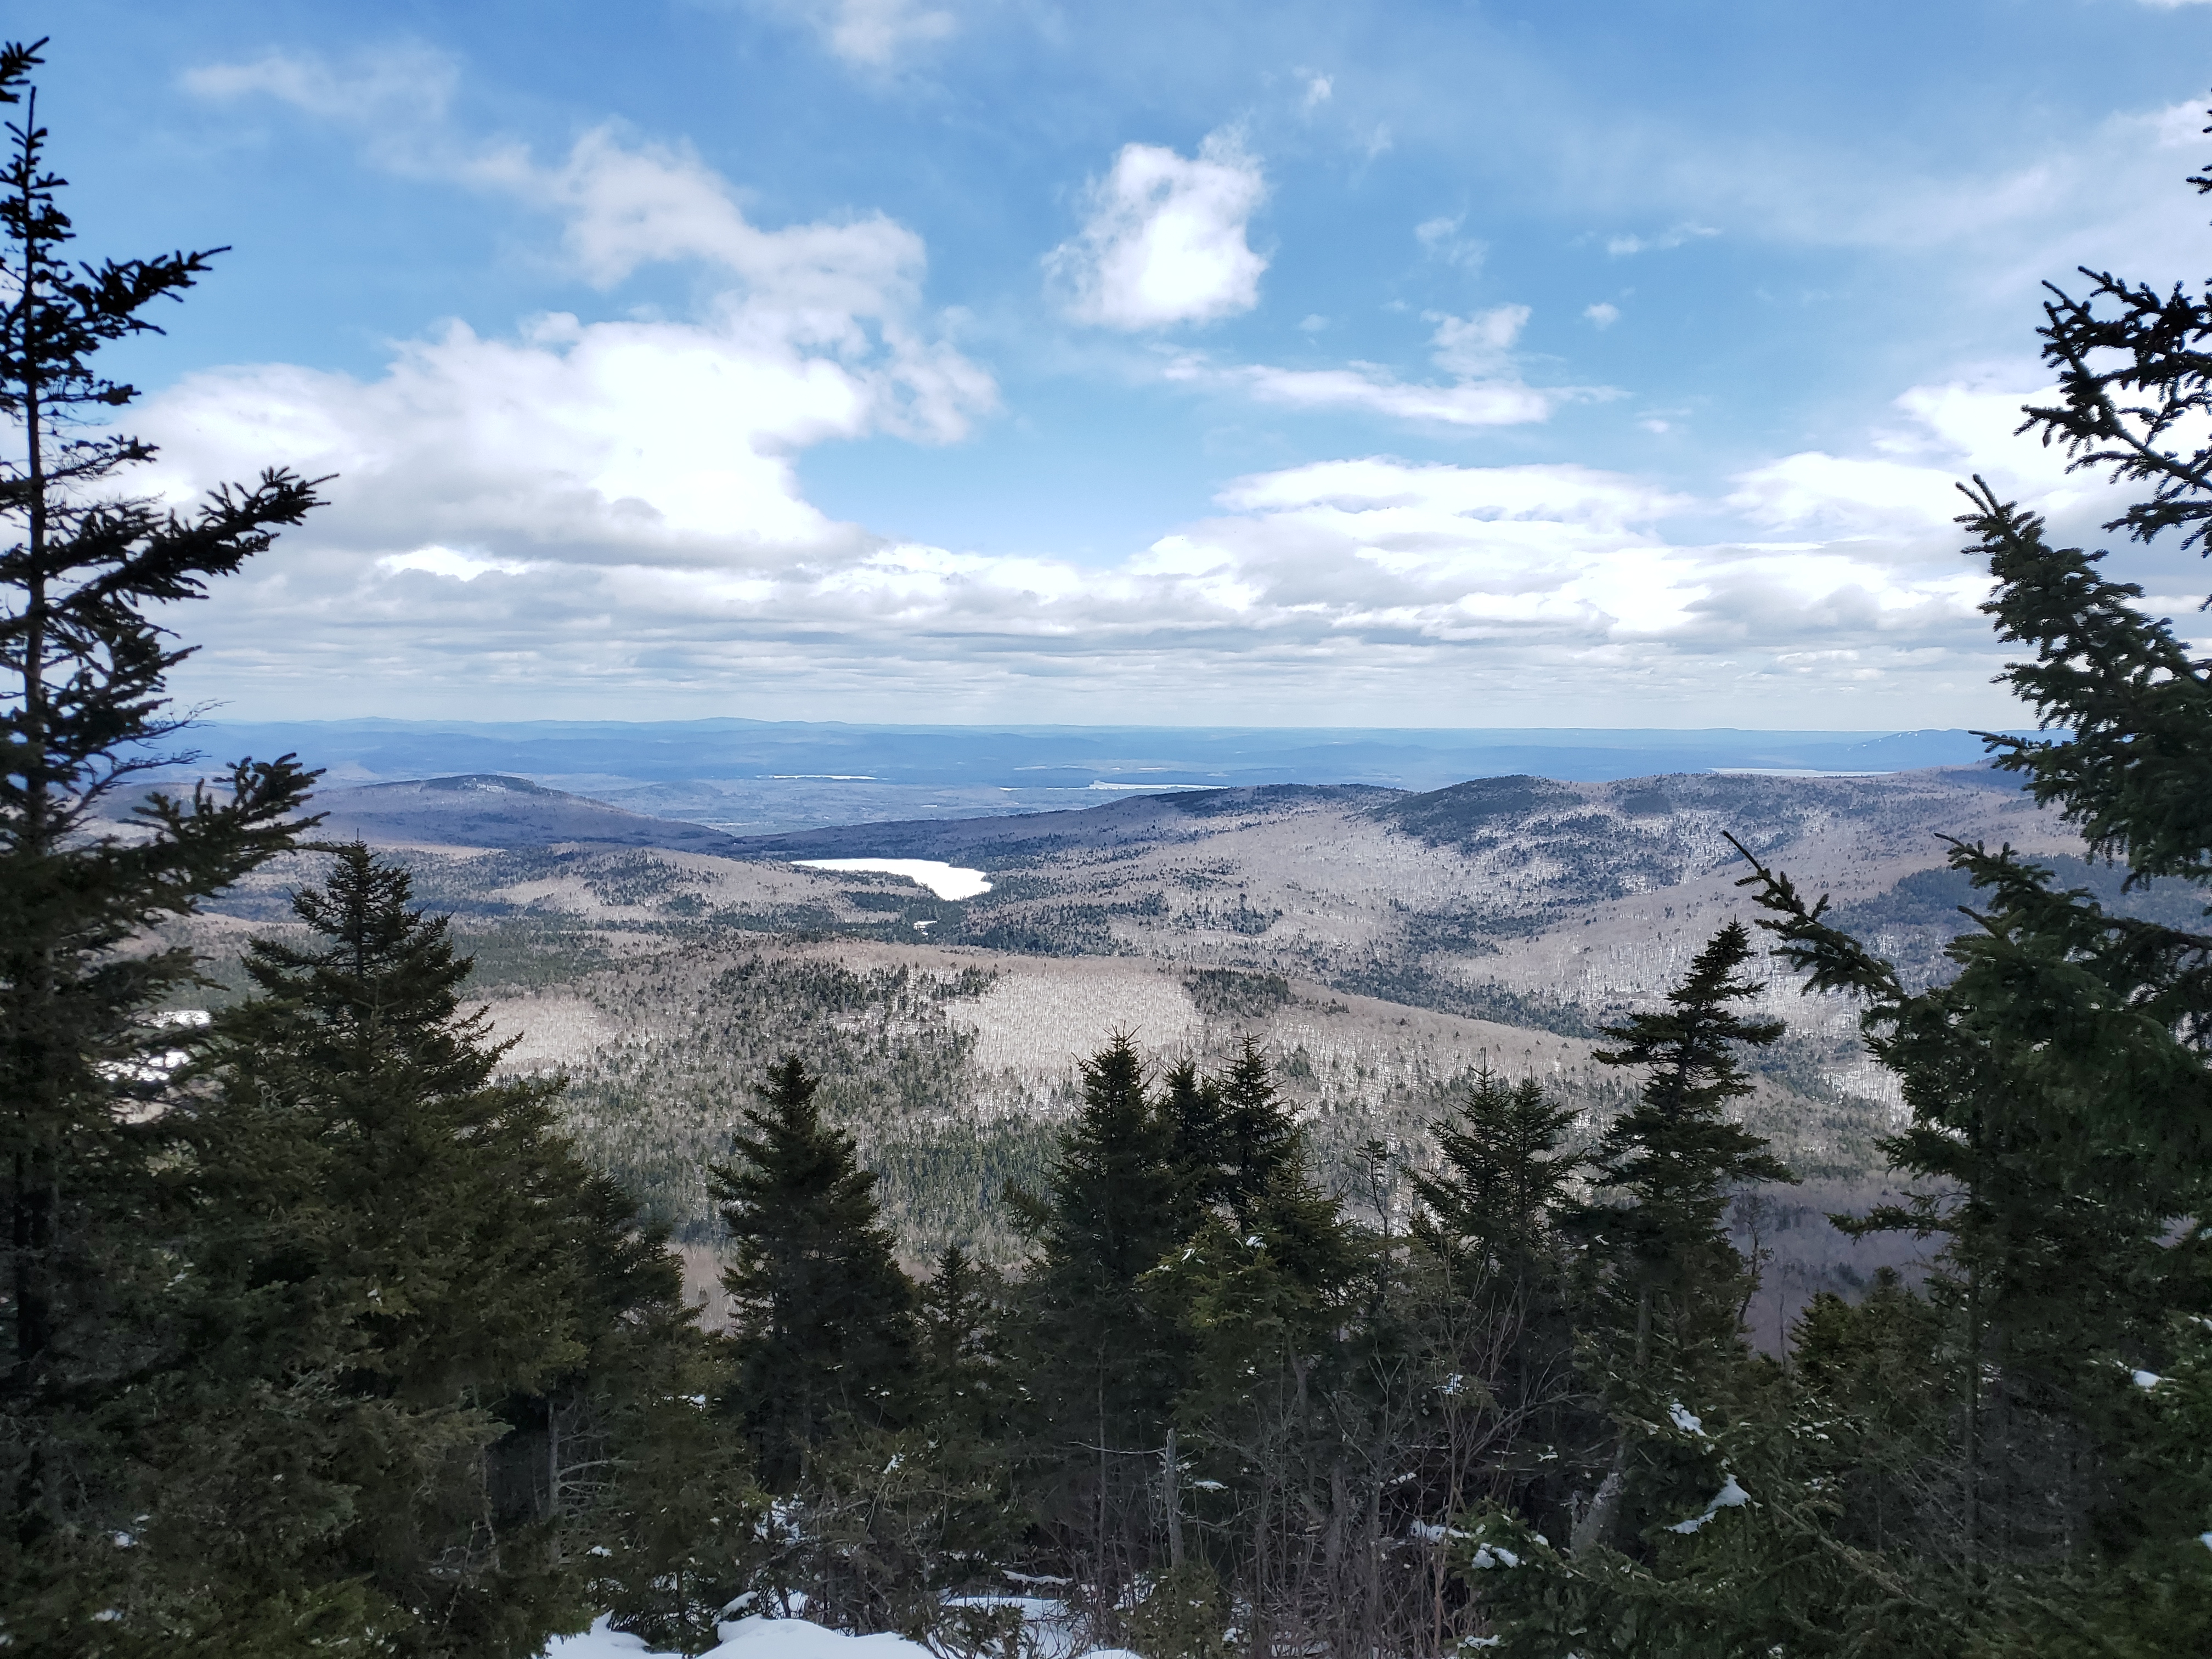
Testing Out Solar PowerIt's late winter / early spring so sun is hit and miss. Curiously on the mountaintop there were a lot of clouds crowding up and only small snippets of sun. The setup for this trip was somewhat elaborate, consisting of a portable solar panel, an MPPT boost charger and a 300wh scooter pack from an M365 scooter and a battery coulomb counter display. This is way too much kit to hike up a mountain and, all things considered could be simplified a lot. Either way here's the panel with a cable sneaking through the small gap in insulation in one of the cabin walls. Camera phones really struggle to expose well when the ground is white but the panel survived the trek north and 'just worked'. I ended up using p-cord to tie it to wayward logs and sticks to help prevent it from blowing around but it was a bit of effort keeping it both in the path of the sun, not covered in snow dust and also not flying away. 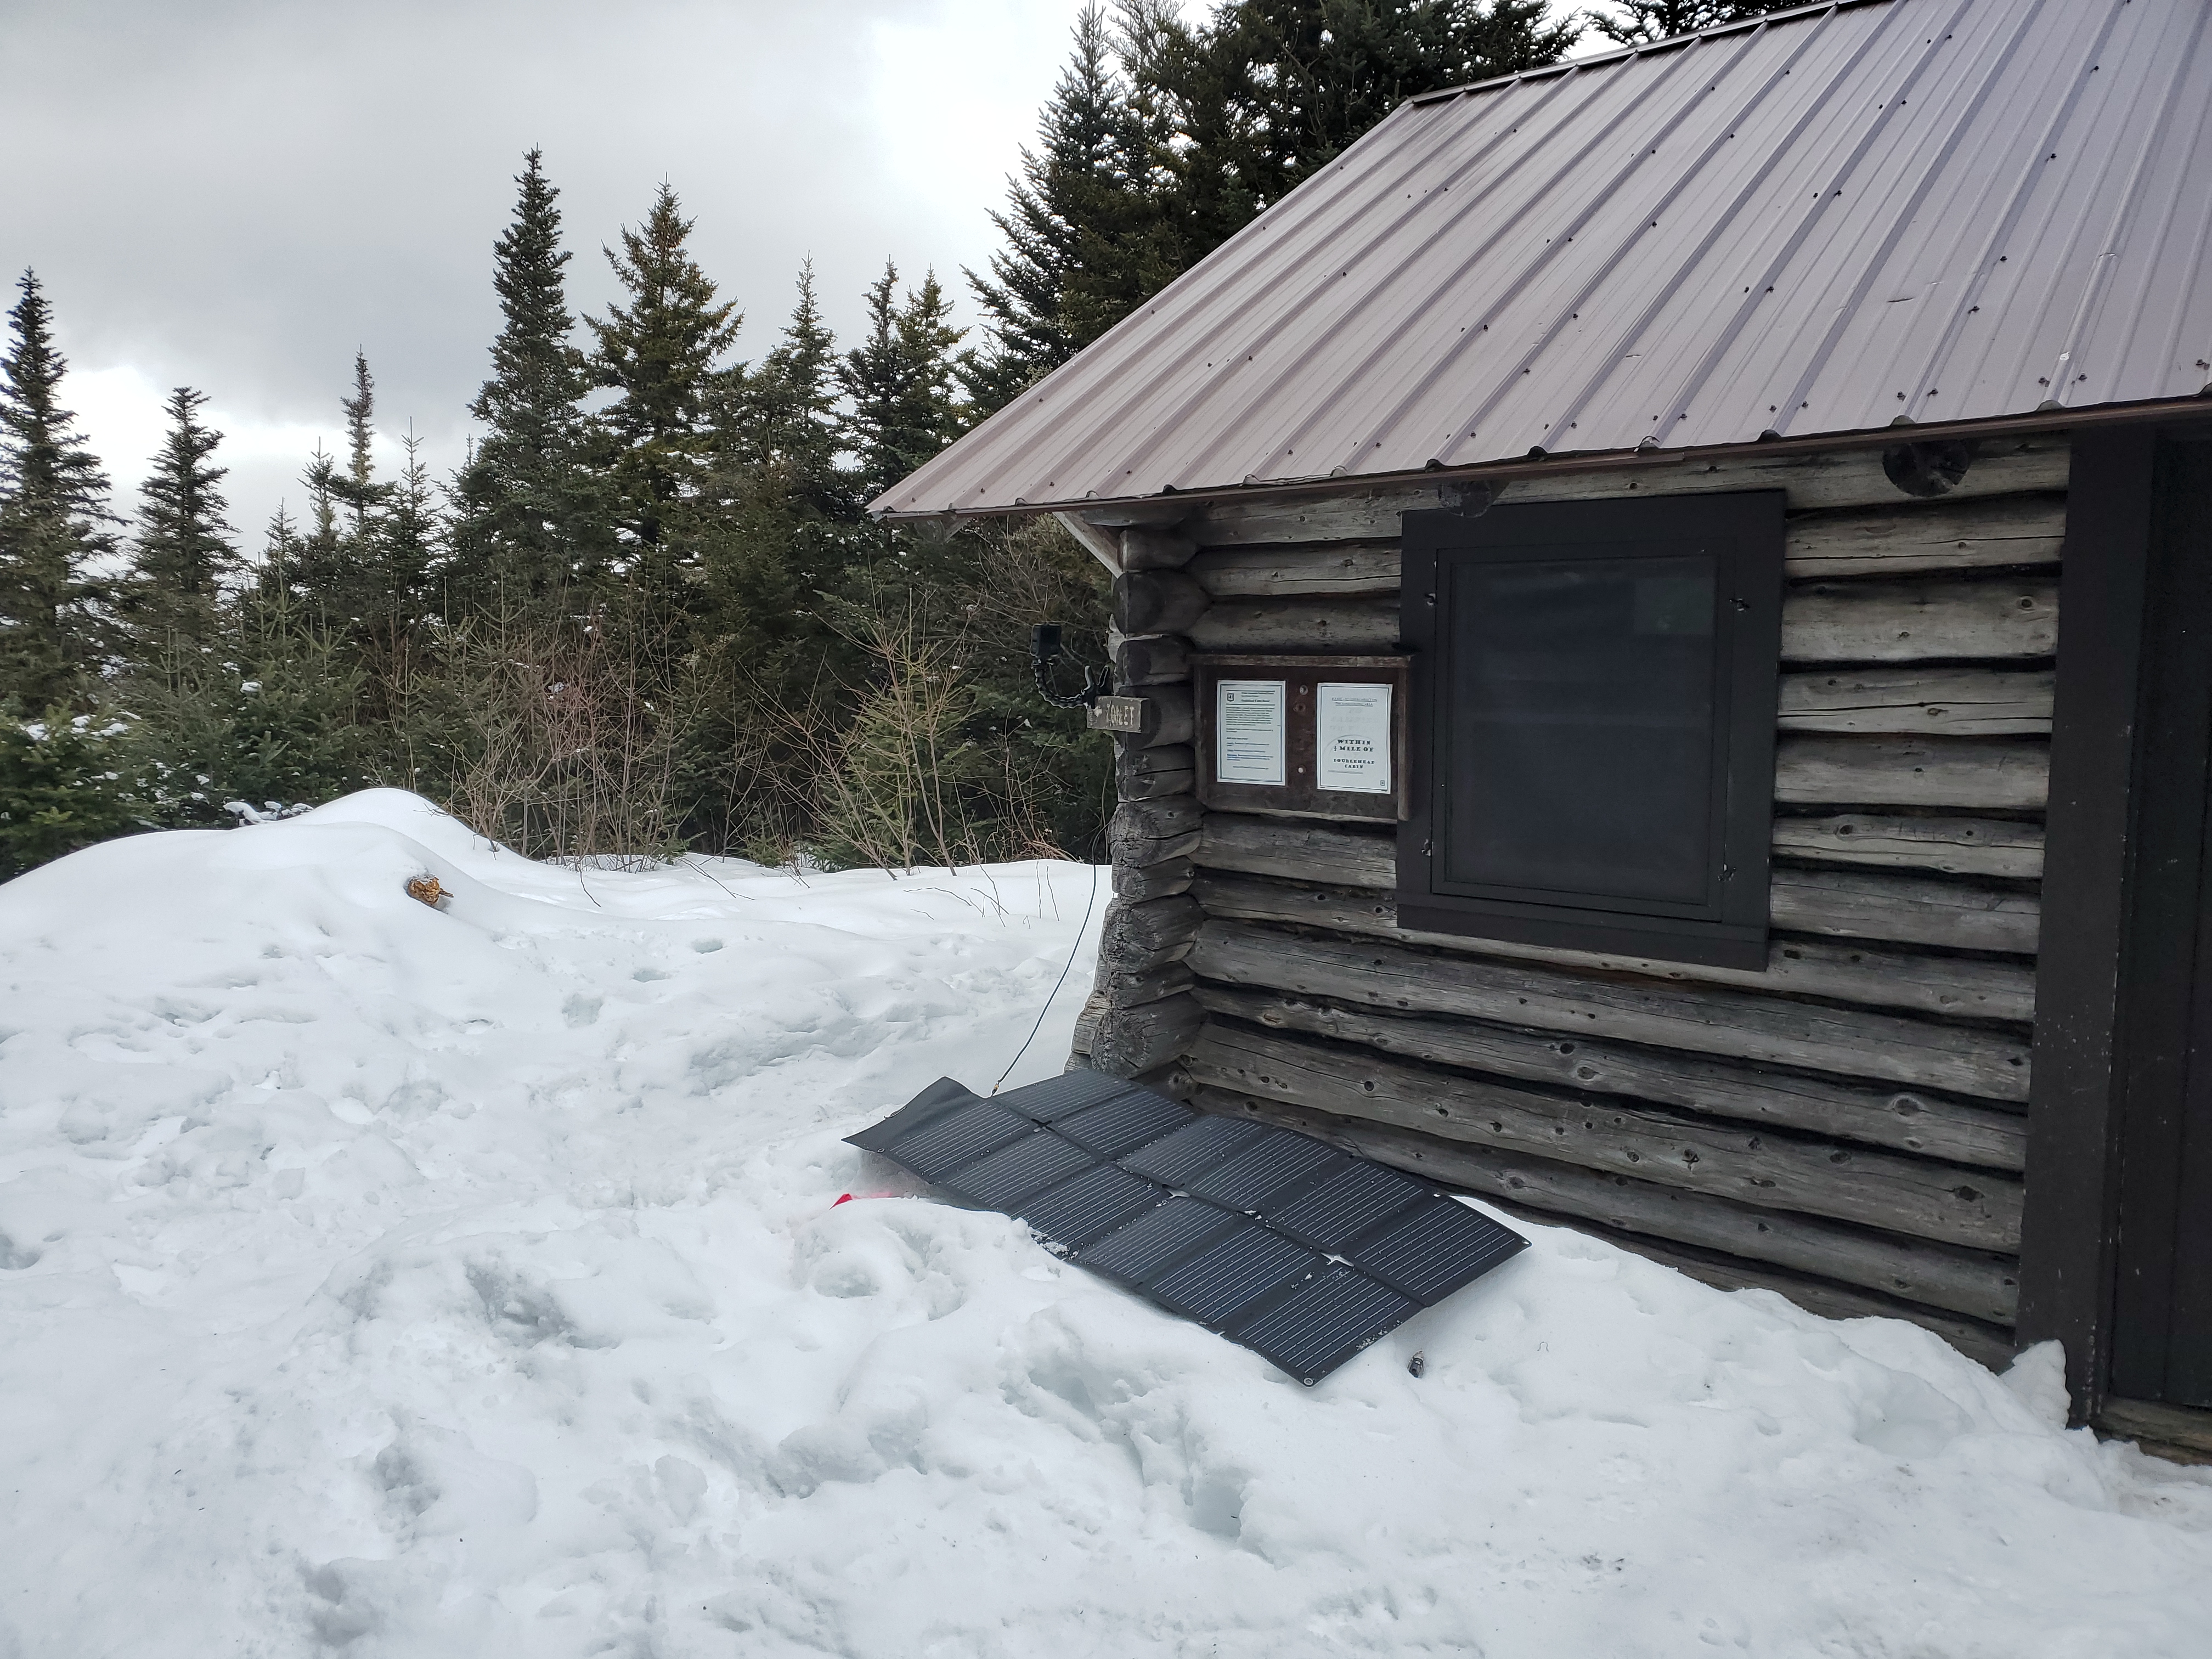
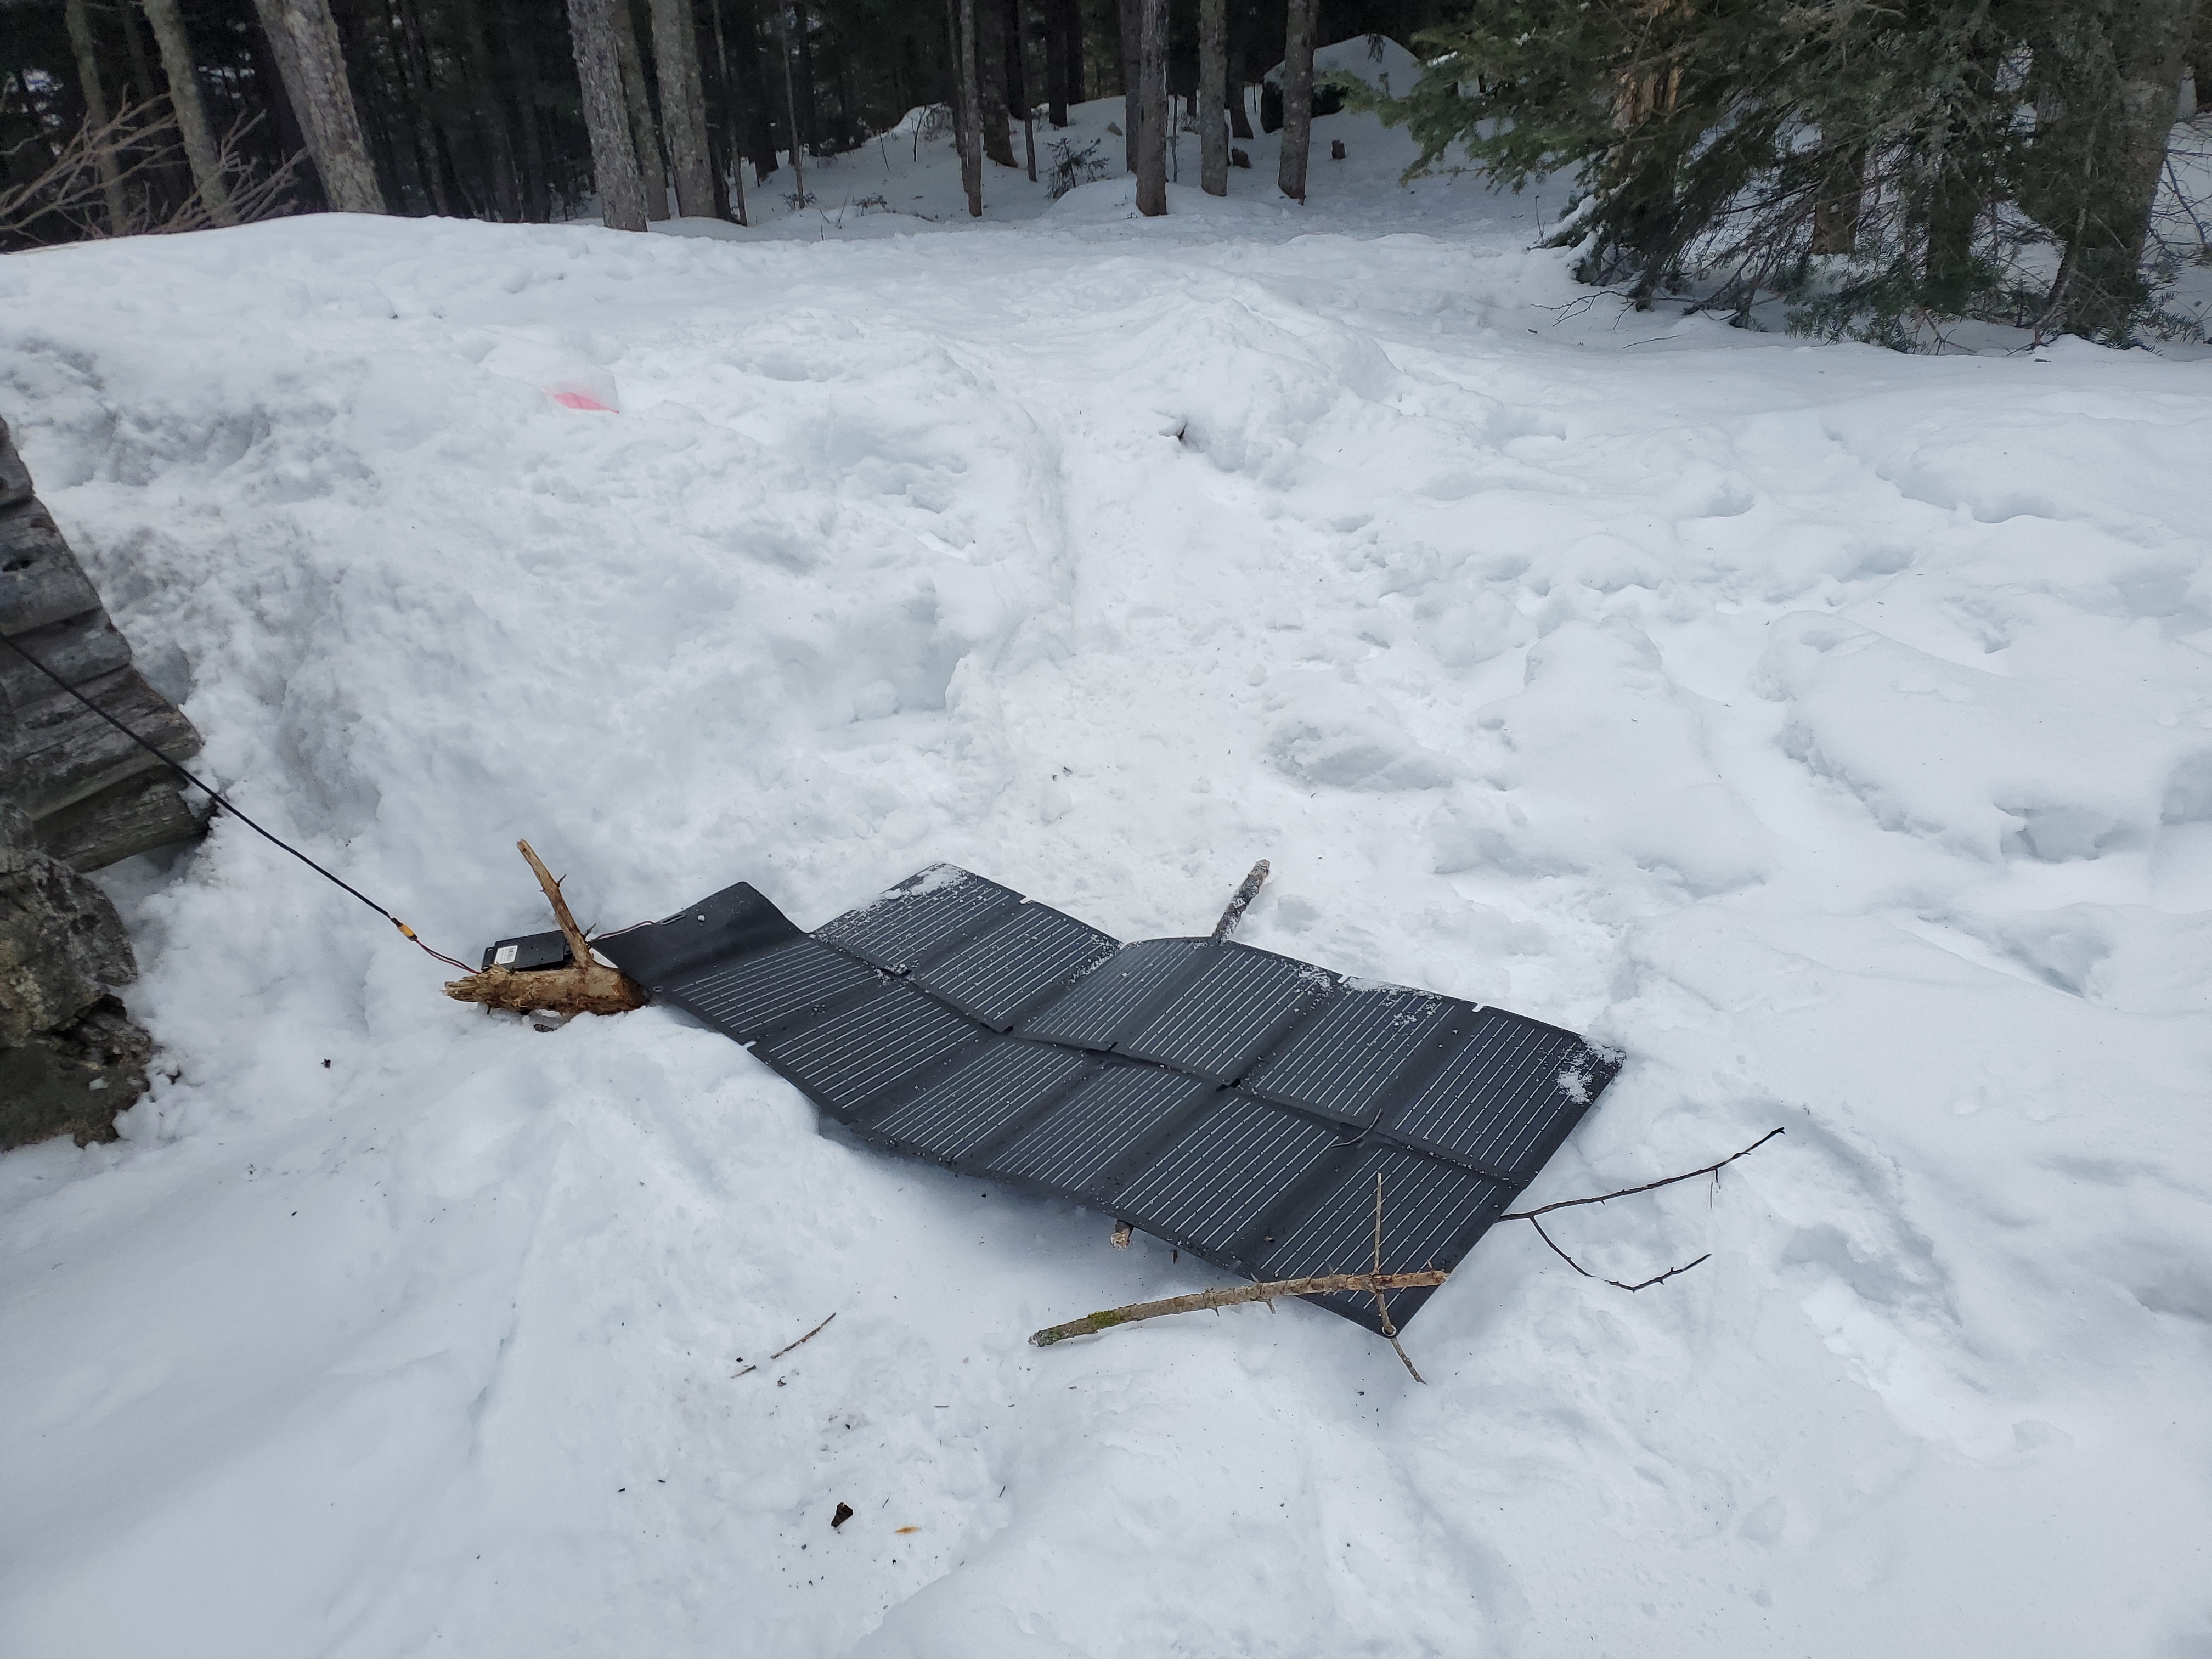
I really love this particular foldable solar panel, as it's compact and durable, and exposes the panel output on an XT30 / XT60 (depending on which version). It packs remarkably small and for reference survived the hike up and down without its poofy carrying case. A great little gadget. The model of this solar panel is the "Nicesolar Foldable Solar Panel 100W: PSP-100" It's available on amazon just make sure its not the flat pack bulky one. [link] and was 120 USD. The sun is very happenstanceWhen there was a direct line of sun, I was able to absorb close to 75W peak, which is phenomenal. This however was damped by the duty-cycle of sun to clouds, somewhat shown below. For this adventure I used a 300W MPPT solar dc/dc boost charger (yes that is a mouthful) to boost the panel voltage (18V) to the portable battery voltage (40V). A dc/dc would then bring the battery voltage down to 20V to charge my laptop and charge USB devices like a phone and GoPro. With the cyclical clouds shown above i ended up really putting my MPPT to work! These clips are not lined up in time, but are a reasonable representation of what i was seeing. On a partly cloudy day you do have a baseline of at least 8W with a 100W panel, and peaks of 75W. On average this is ~18W for this particular day, including the periodic repositioning. 18W is pretty good, but I did basically keep the watt-meter next to my laptop to keep an eye on if it was showing <8W as that was a good indication the wind took it for a walk. The MPPT lived outside next to the panel and boosted the panel voltage to ~42V, or enough to charge a 10S Lithium pack. For this trip I made the mistake of bringing a 300wh electric scooter pack, which is fairly large. My electric setup was a bit too much but this was just a test run. I also brought up a P53 laptop, which is 'desktop replacement' class. This is a power hungry monster and not particularly lightweight. While the cabin was slowly coming up to a livable temperature I sat upright in a sleeping bag on a bunk writing and editing photos / videos. On average the laptop + electrical loads were more than the solar was bringing in without effort. Because of my nifty little portable Lenovo DC/DC, with an ahem excellent little write up here: [link] I was able to see how many watts i was pulling, and by throttling down the P53 and dimming the screen I was able to stretch out the runtime. 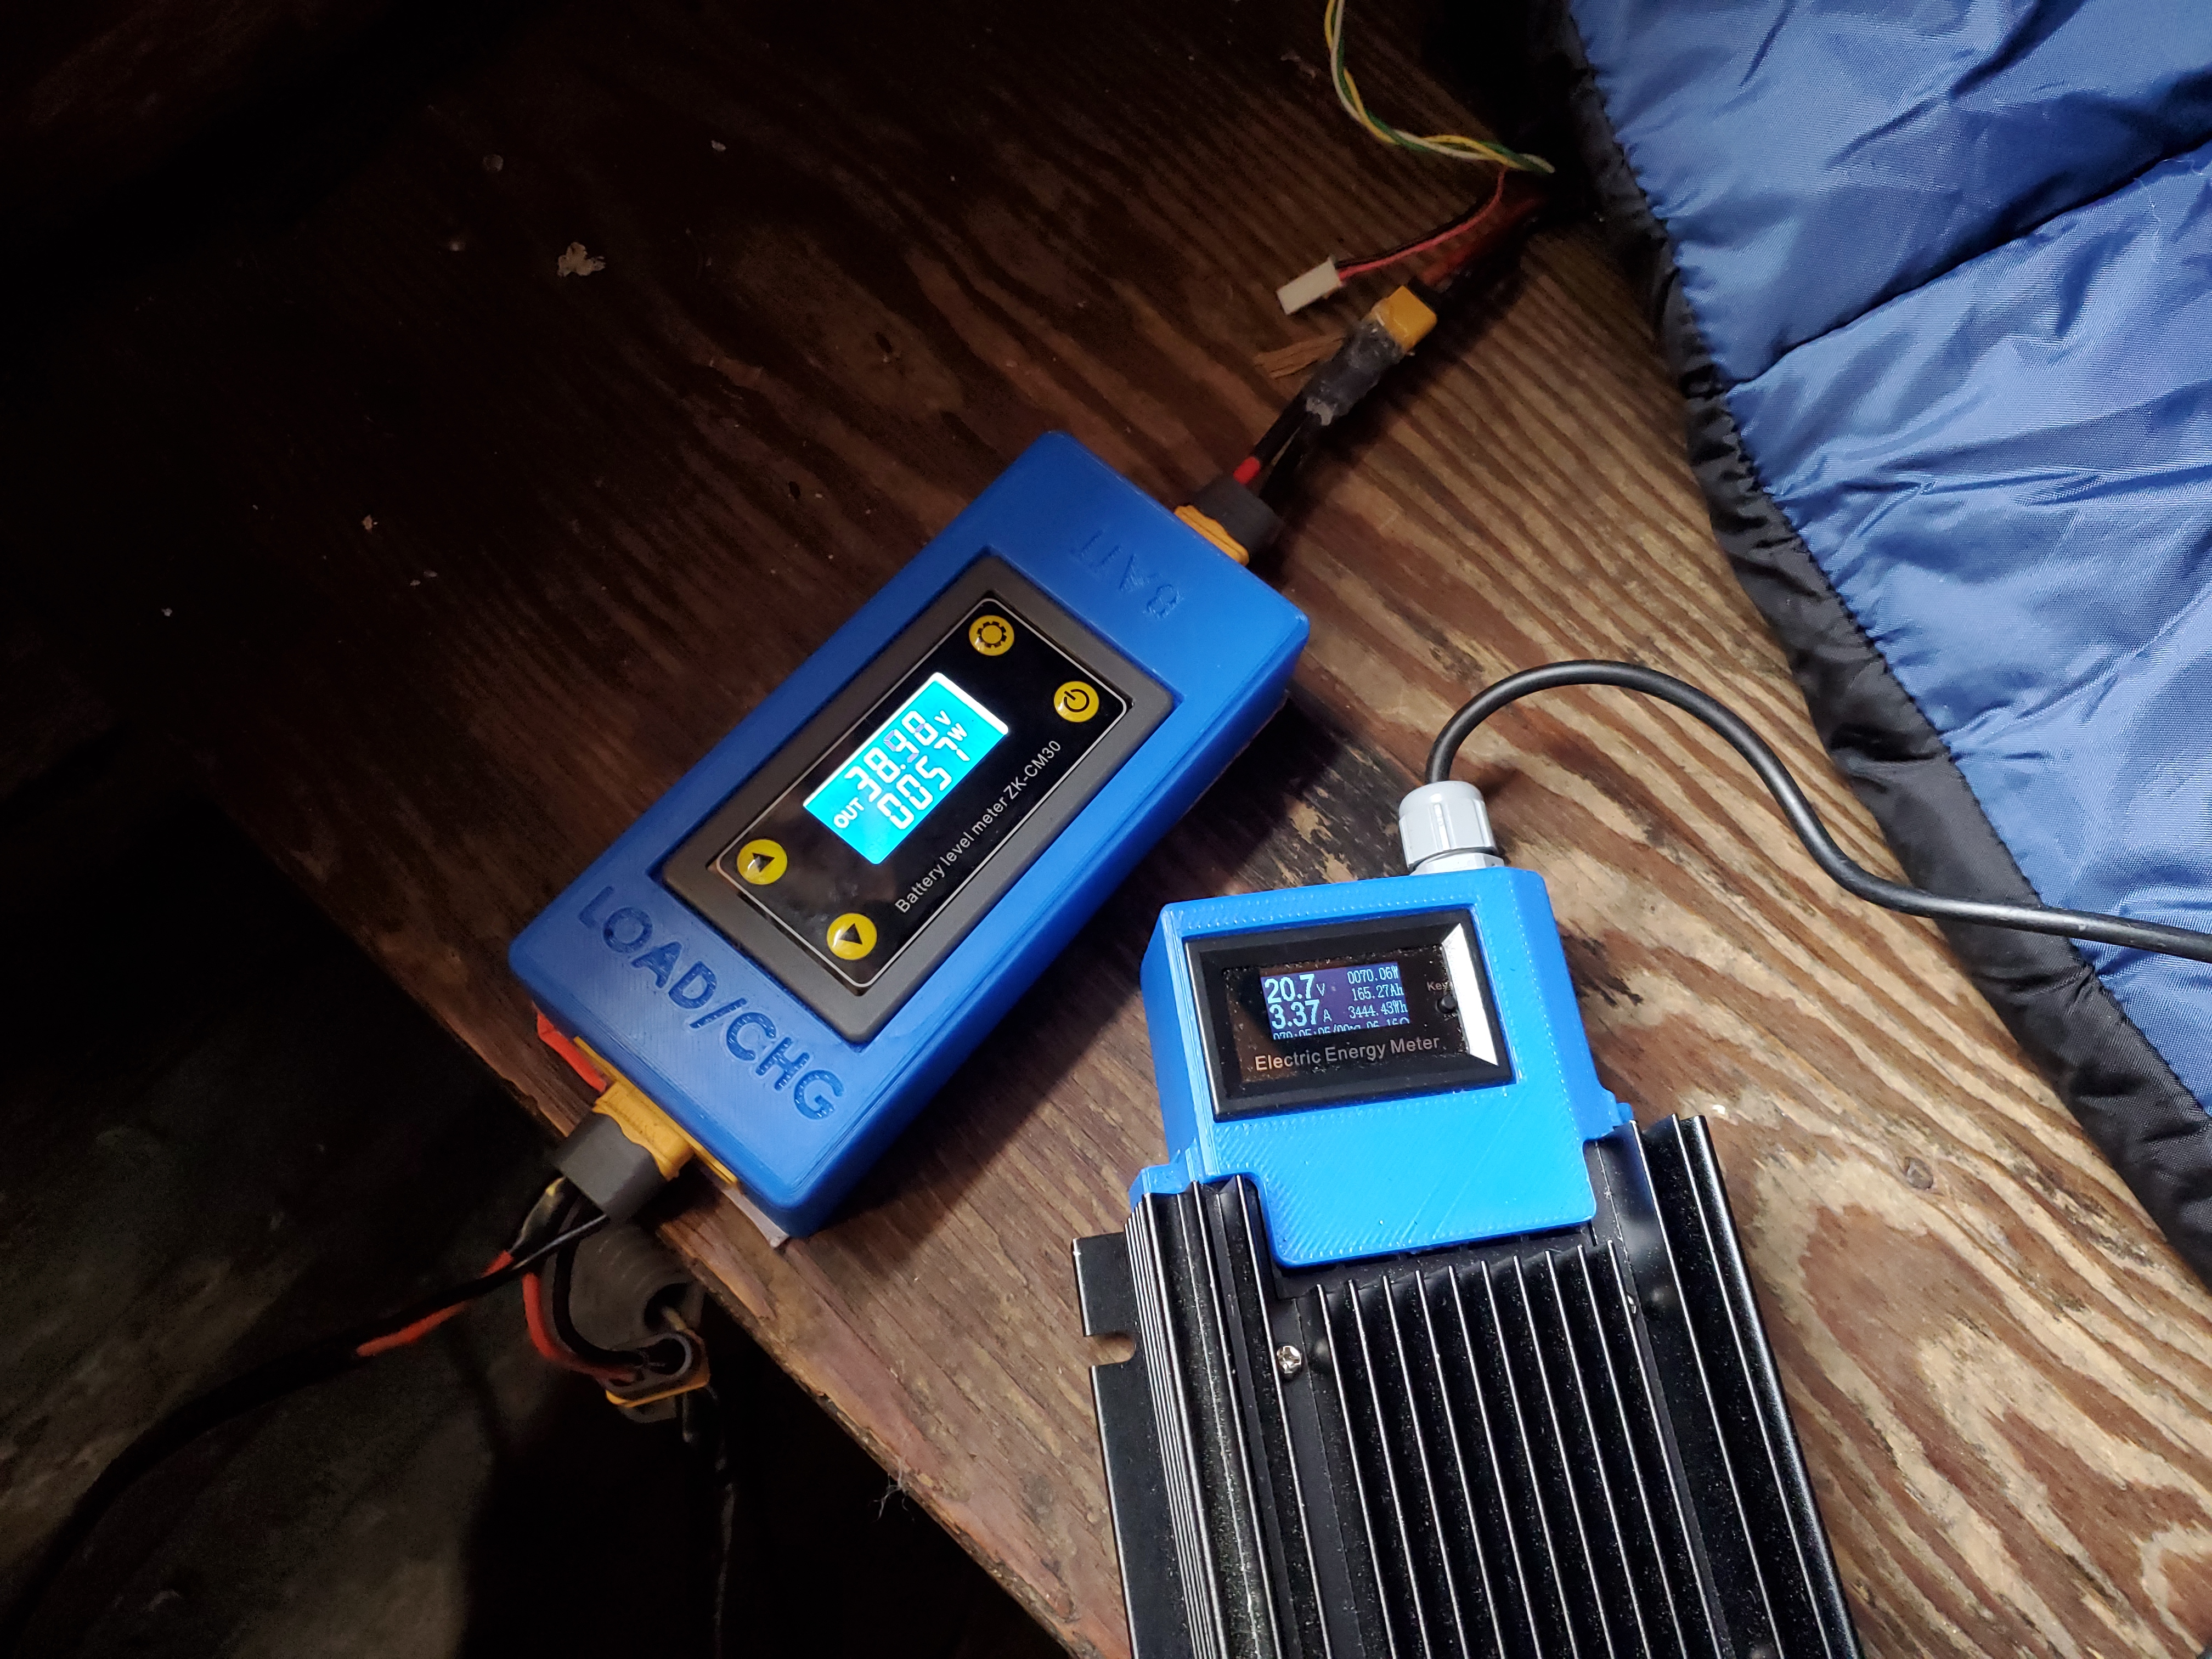

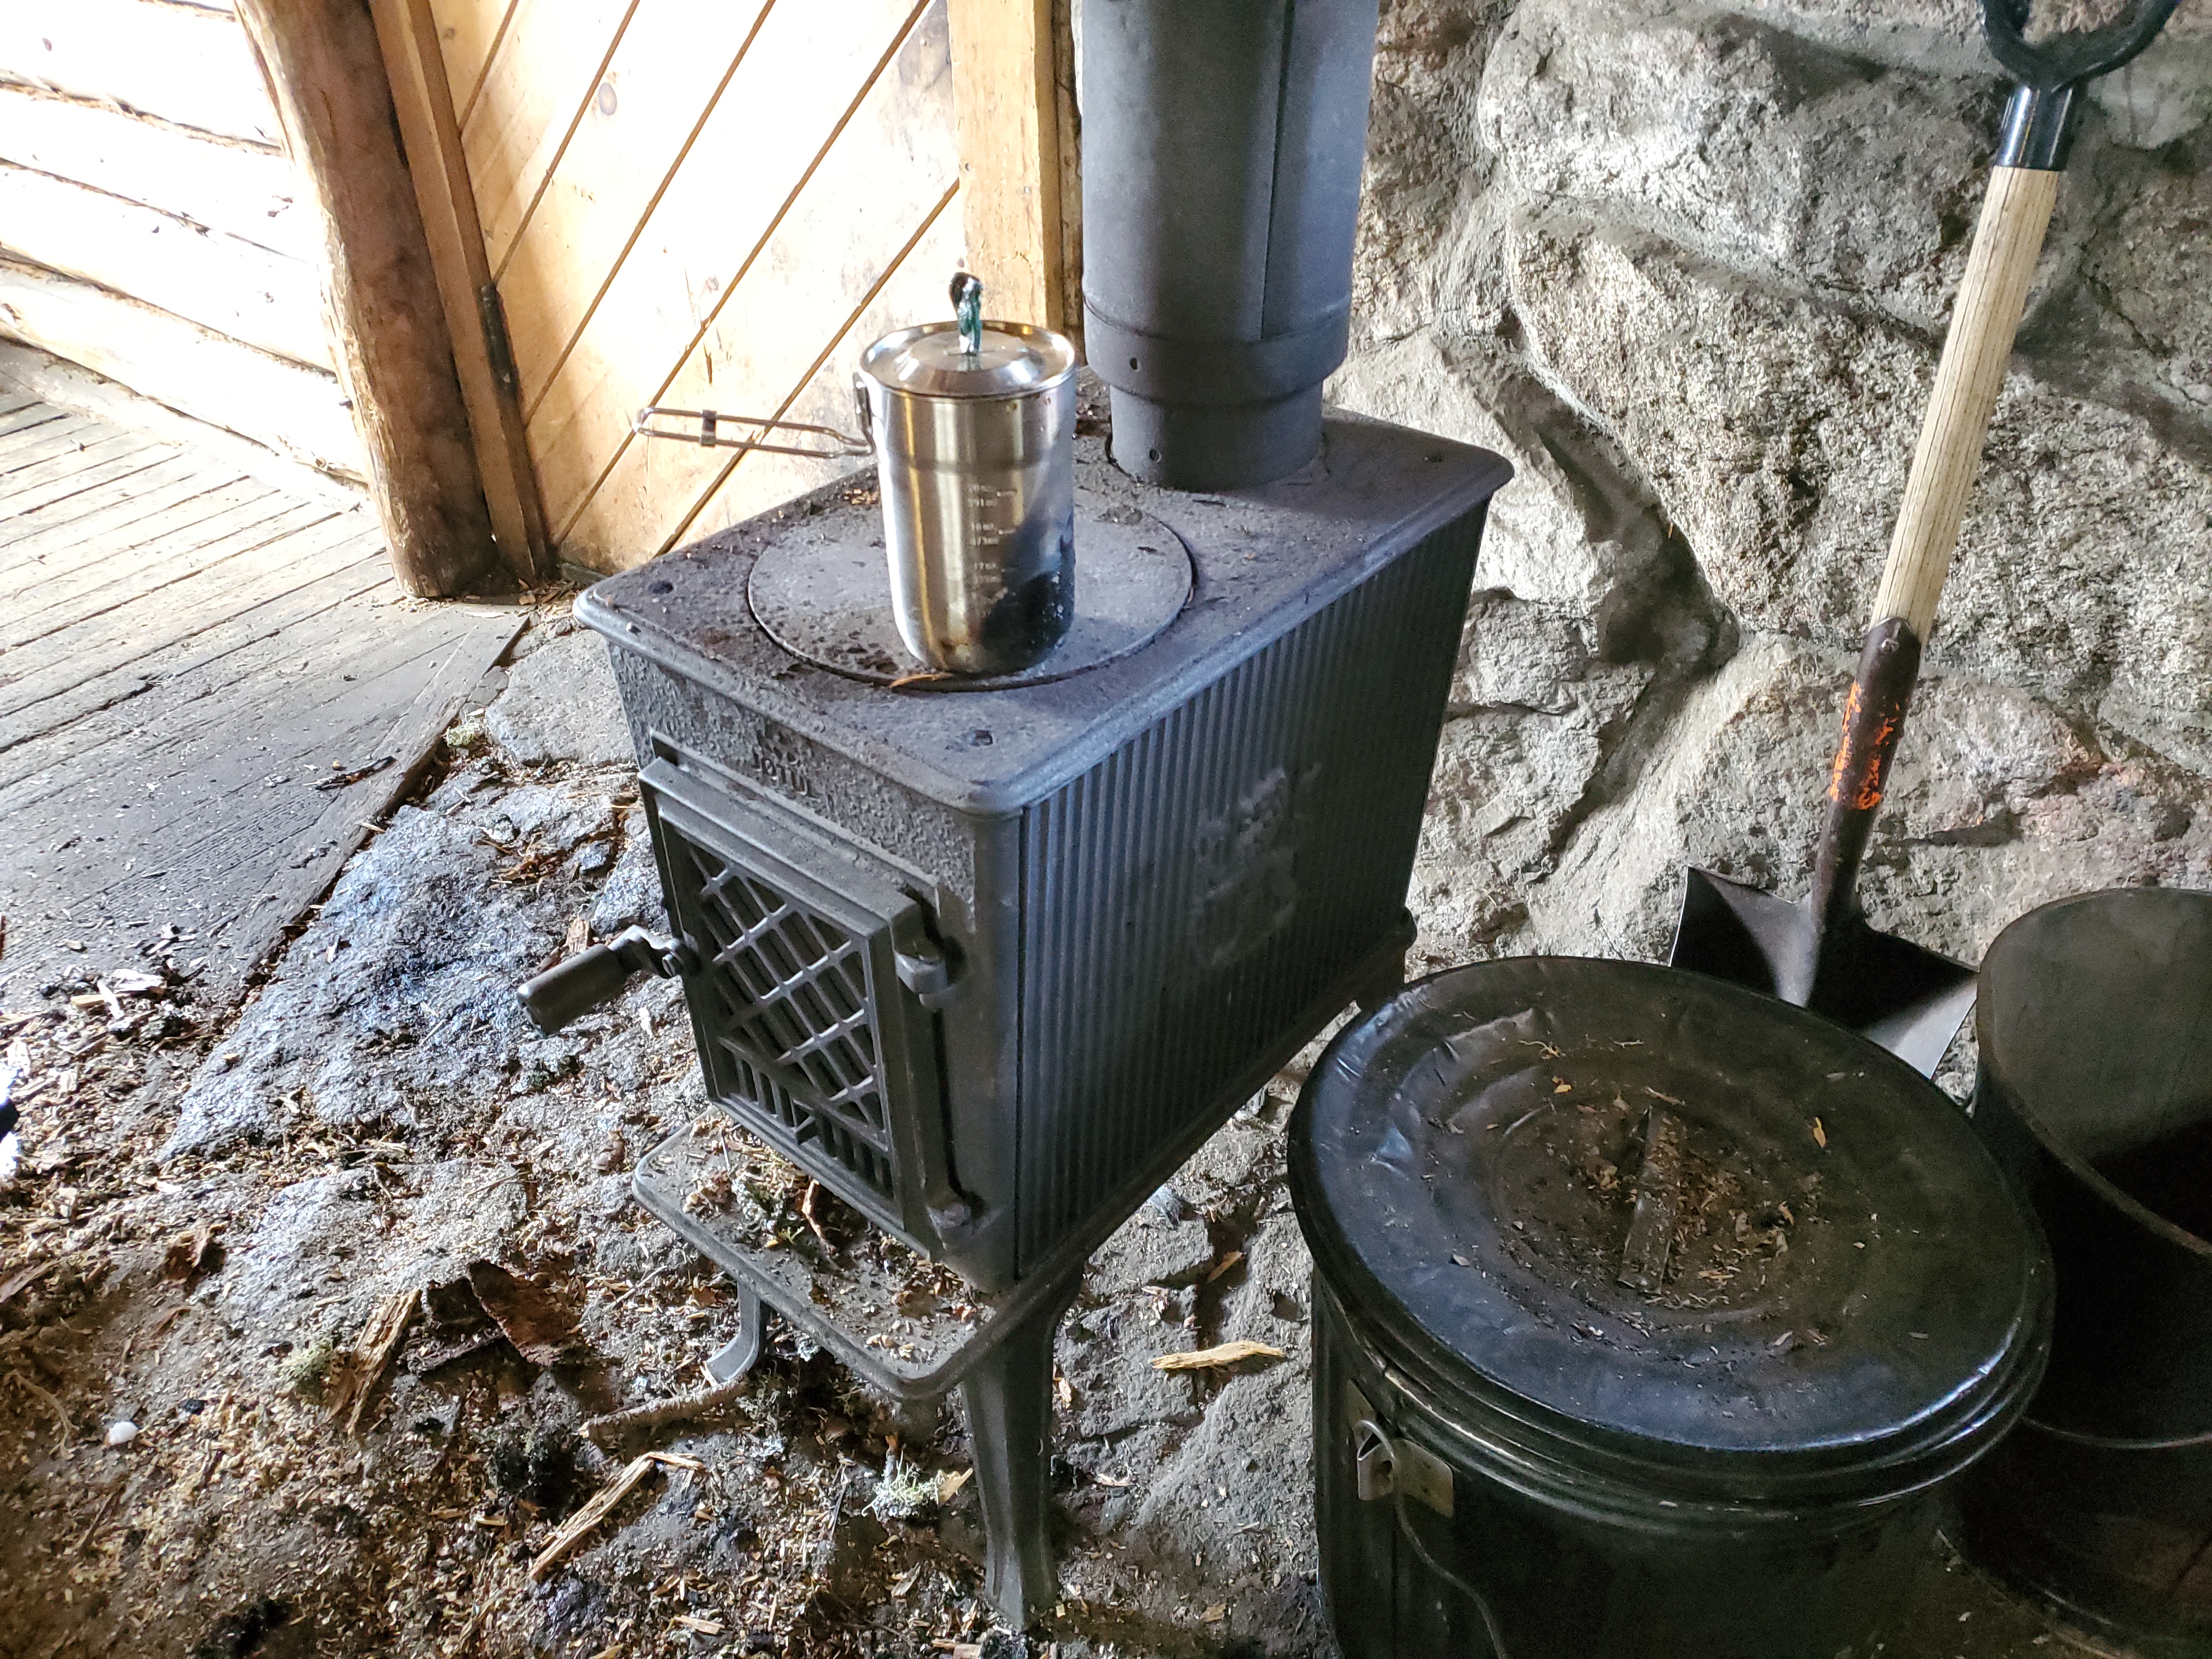
Thoughts on PowerThinking further, I noticed the 'America Truck Problem' really ringing loudly here. Because the laptop was on the more power-hungry side of things, I needed a larger DC/DC converter, and a larger battery pack (300wh) and even then was barely scraping by for power. If I could scale back a bit to something with a similar function set but 1/2 of the power consumption I could skate by on solar. Moreover, I should have thought out my power budget more reasonably. I had two incompatible battery systems, a 20V DeWalt battery for the tiny saw and a 40V energy storage pack for laptop dorkery. If I could use the 20V pack as energy storage and for the tiny saw I would be golden, completely skipping out on 4 lbs of extra battery. If I could knock down the power consumption requirements of the laptop I could shrink away the 150W DC/DC brick for something lighter, maybe even USB-C. Integrating really would save some space and make the hike easier. Time to find a crufty lightweight Lenovo for hikes. Is there a way I could extract 15W+ from the wood-stove?The solar panel did 'just work' but it was heavily winter-weather dependent and required repositioning. I did find out that I could squeeze by on ~15W if it was continuous, which in the scheme of things really wouldn't be too hard to extract from the tiny wood stove. The cabin temperature slowly crept from 30F [-1C] to 55F [12C] over the course of two days, while the stove side radiated 150-250C from our thermal camera. Is there something not terribly heavy that I could hike up the hill and generate power in this frozen cabin? Thermal electrics are a curious one. The cheapest modules are available ubiquitously on amazon and eBay, but they are fundamentally terrible, approaching 4% efficiency, with a maximum temperature of 80-100C. We actually want something that can survive higher temperatures, and moreover higher differential temperatures. We know we ideally want 15W electrical, and the more the merrier. We have two routes we can take, some kind of fold-able fin heat-sink or a more elaborate radiator and coolant loop to keep the cold side cold. We do have the benefit of a very large cold side (the outside world) and a somewhat hot, somewhat flat surface on the sides of the wood stove. Both the solar panel and the wood stove required attention, and using the wood-stove to warm up the cabin was going to happen either way, if it was possible to just have to attend to the stove that would be pretty excellent. Having a fan and a heat sink on the 'cold side' of a thermal electric generator would also have the bonus side effect of stirring up the air in the cabin, hopefully allowing it to warm up quicker. Lets take a look at what would be required to extract some energy from this tiny stove. Attaching to the surfaceThe sides of the stove are sloped upwards and are a casting. Small ribs are probably intended to help with heat radiation. An emblem or insignia is in the middle which seems to be higher than the ribs in the casting. I didn't bring up any measurement gear (calipers) on the trip so some guessing is going to be required to make this work. Why the side and not the top? It's really hard to cool the cold side of the thermal generator if the hot surface is below it, just fundamentally difficult to pull cold into an area swamped with upwards traveling thermals from the source below. On the side of the wood stove however we have a hot surface and a cold source below and around the stove. We do know it's cast iron, so its magnetically conductive. We think that the surface does not exceed 300C, so we can use some higher temperature rated magnets to maintain contact with the somewhat bumpy surface. I think the main way to make a good contact with a rough surface is to just have the mount points be mechanically adjustable to compensate, and oversize the magnets such that the holding force works out. I think that while magnets have a curie temperature, it is somewhat stochastic, or it decays in strength with exposure to the integral of higher temperature, somewhat. Does the hot side need to make a great contact with the surface? the lower the impedance should be better but a small air gap shouldn't really cause too much of a problem, as the goal here is a meager 15W. 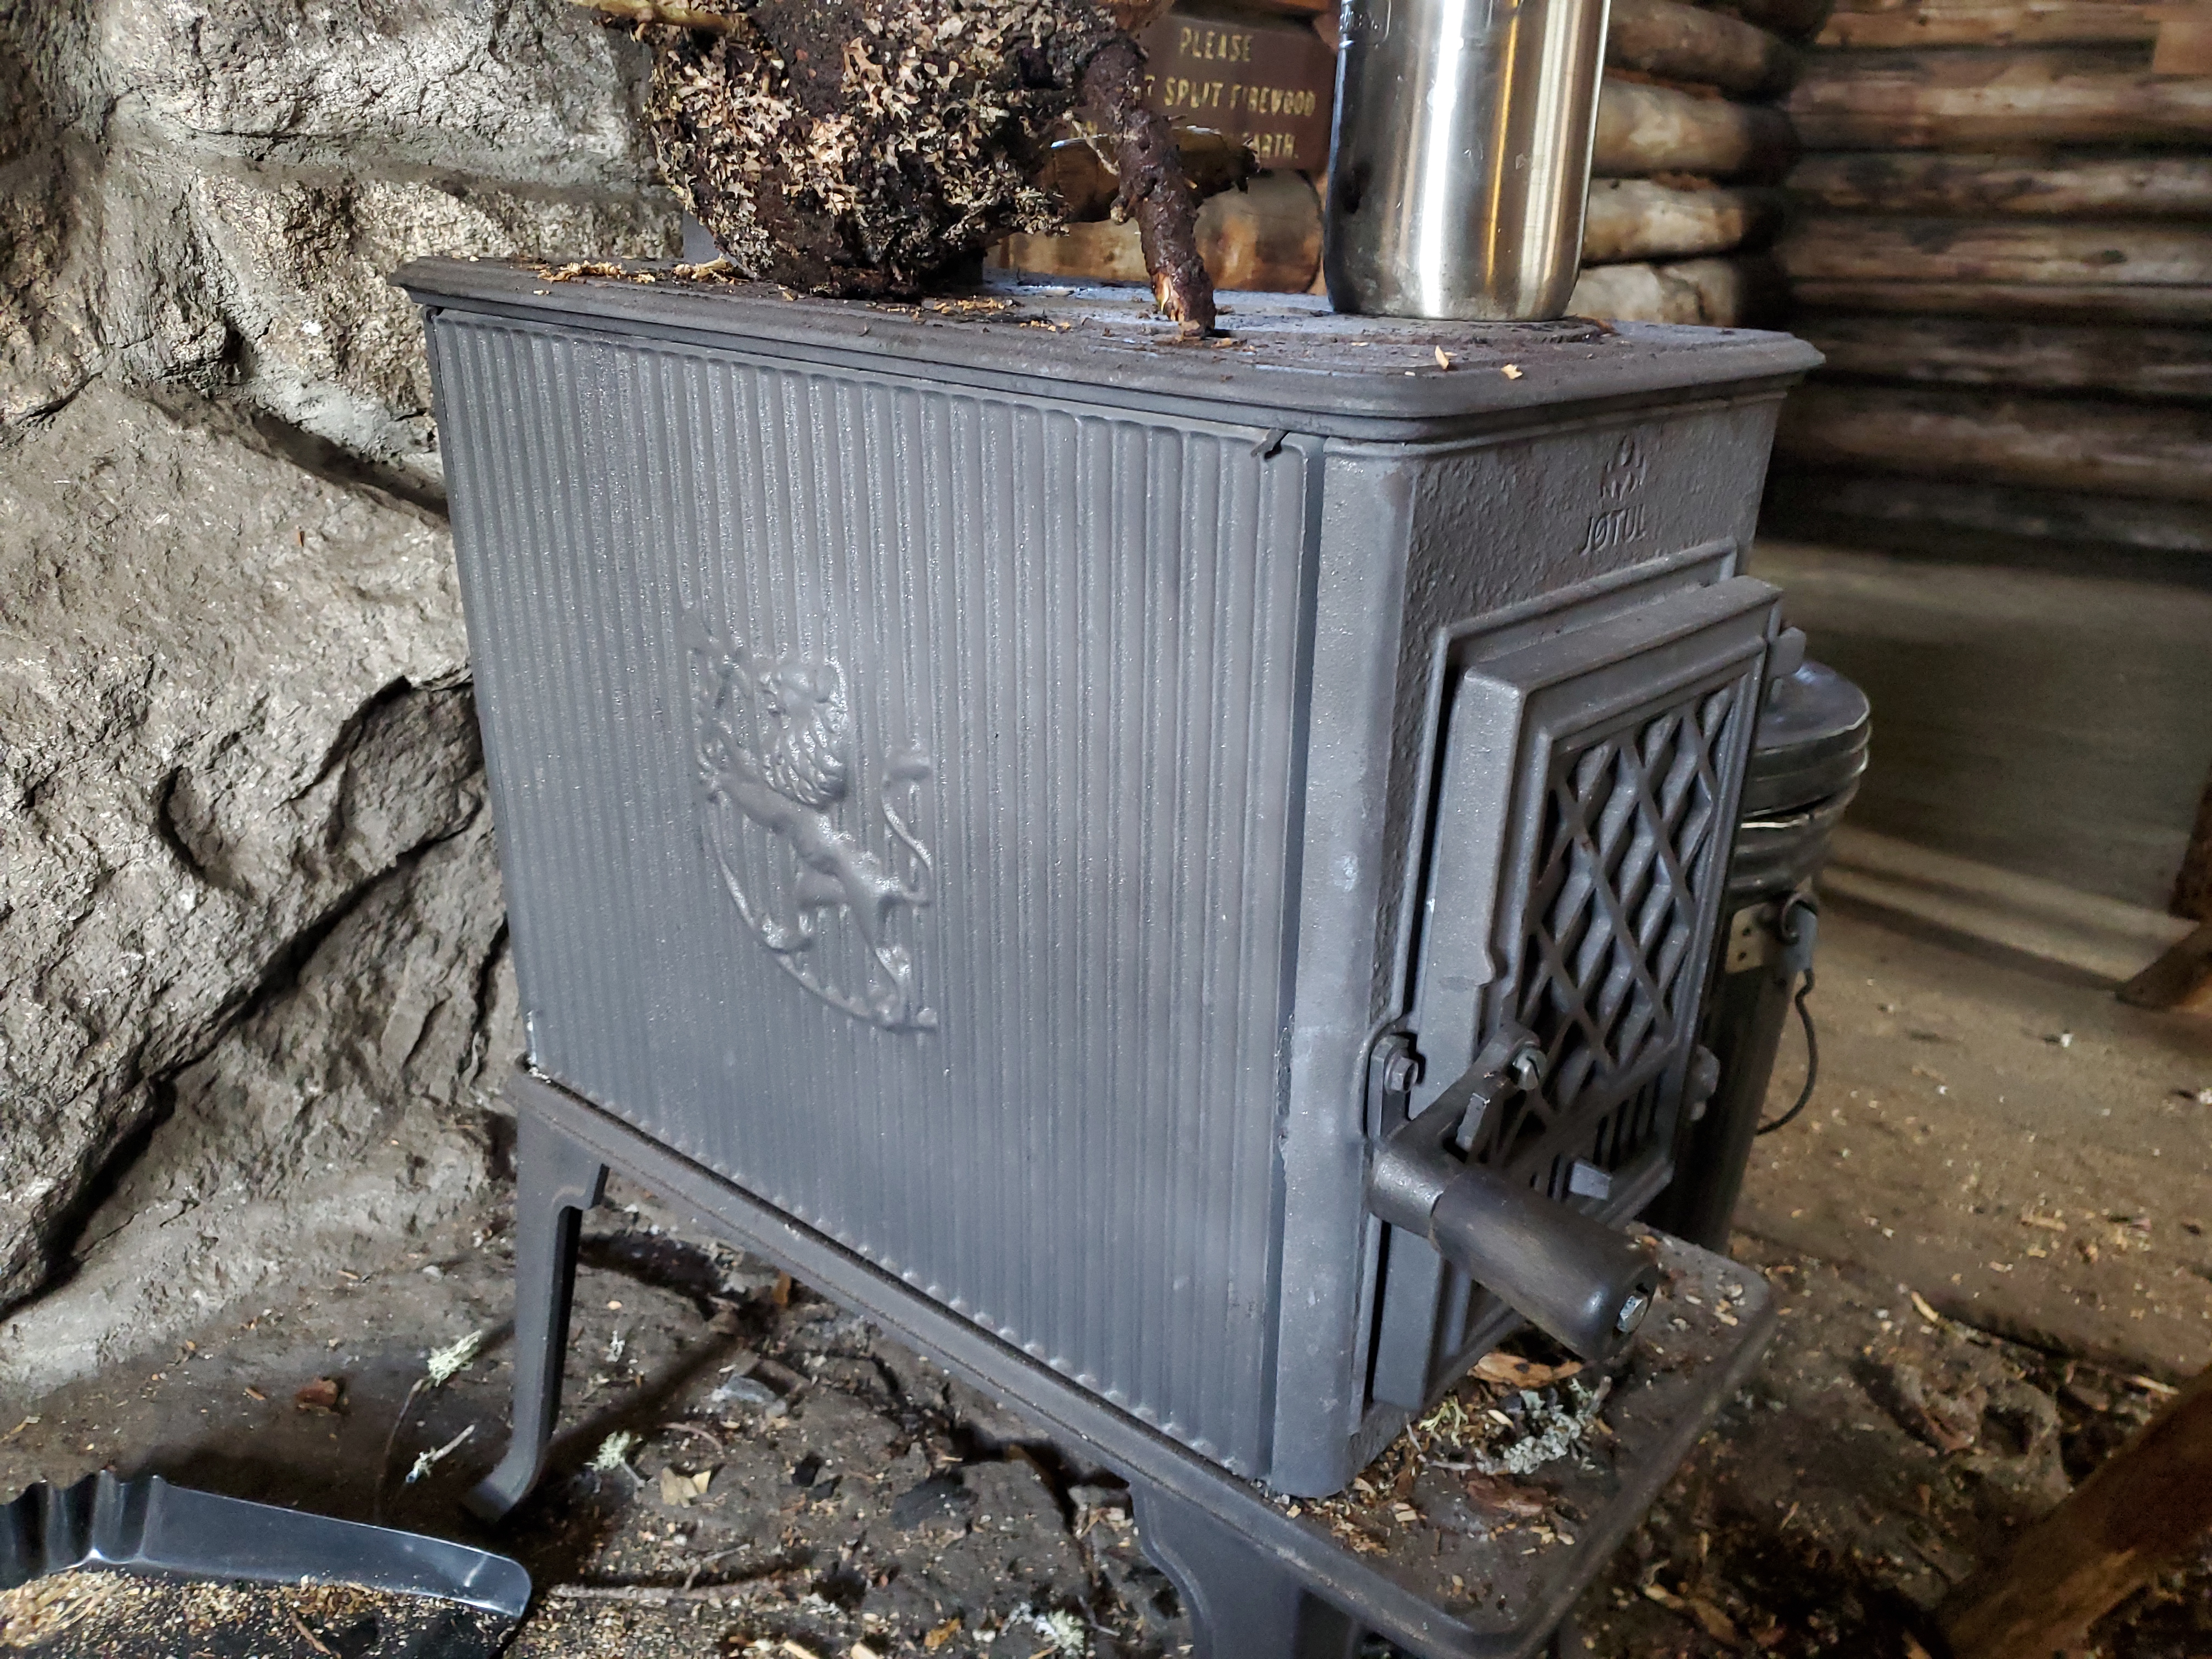
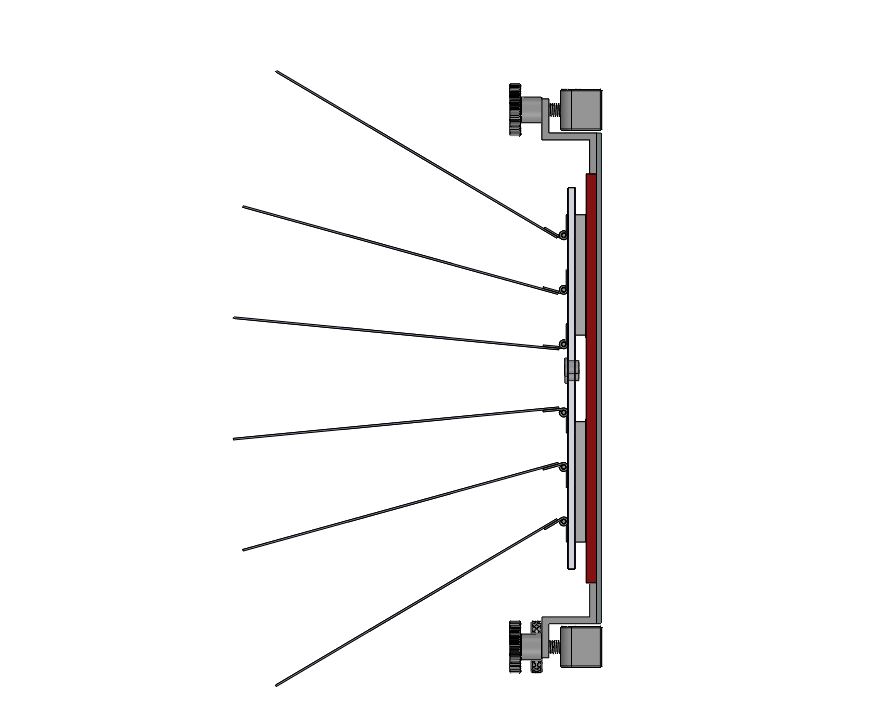
Guessing and sketchingSo here's my rough sketch from the first two day stay: It's rough but nominally its possible to make this fold-able, or at least disassemble-able. The goals are to keep the hot side thermally insulated from the cold side, and have the fan move a significant amount of air without being overly noisy. This generally means a low rpm large diameter fan. In the normal manufacturing sense, heat-sinks have a limit on the fin-size due to the skiving process used for manufacturing. The taller the fin the more effort required to make the process reproduce-able. What if the fins were instead just screwed on, with some way of assembling them on-site? Could they be interfaced over a thin aluminum hinge? Do hinges transfer heat effectively? What if the heat-sink fins folded up such that it was easier to transport (in a hiking backpack). I'm pretty sure none of these problems have been attacked as this use case is incredibly niche. 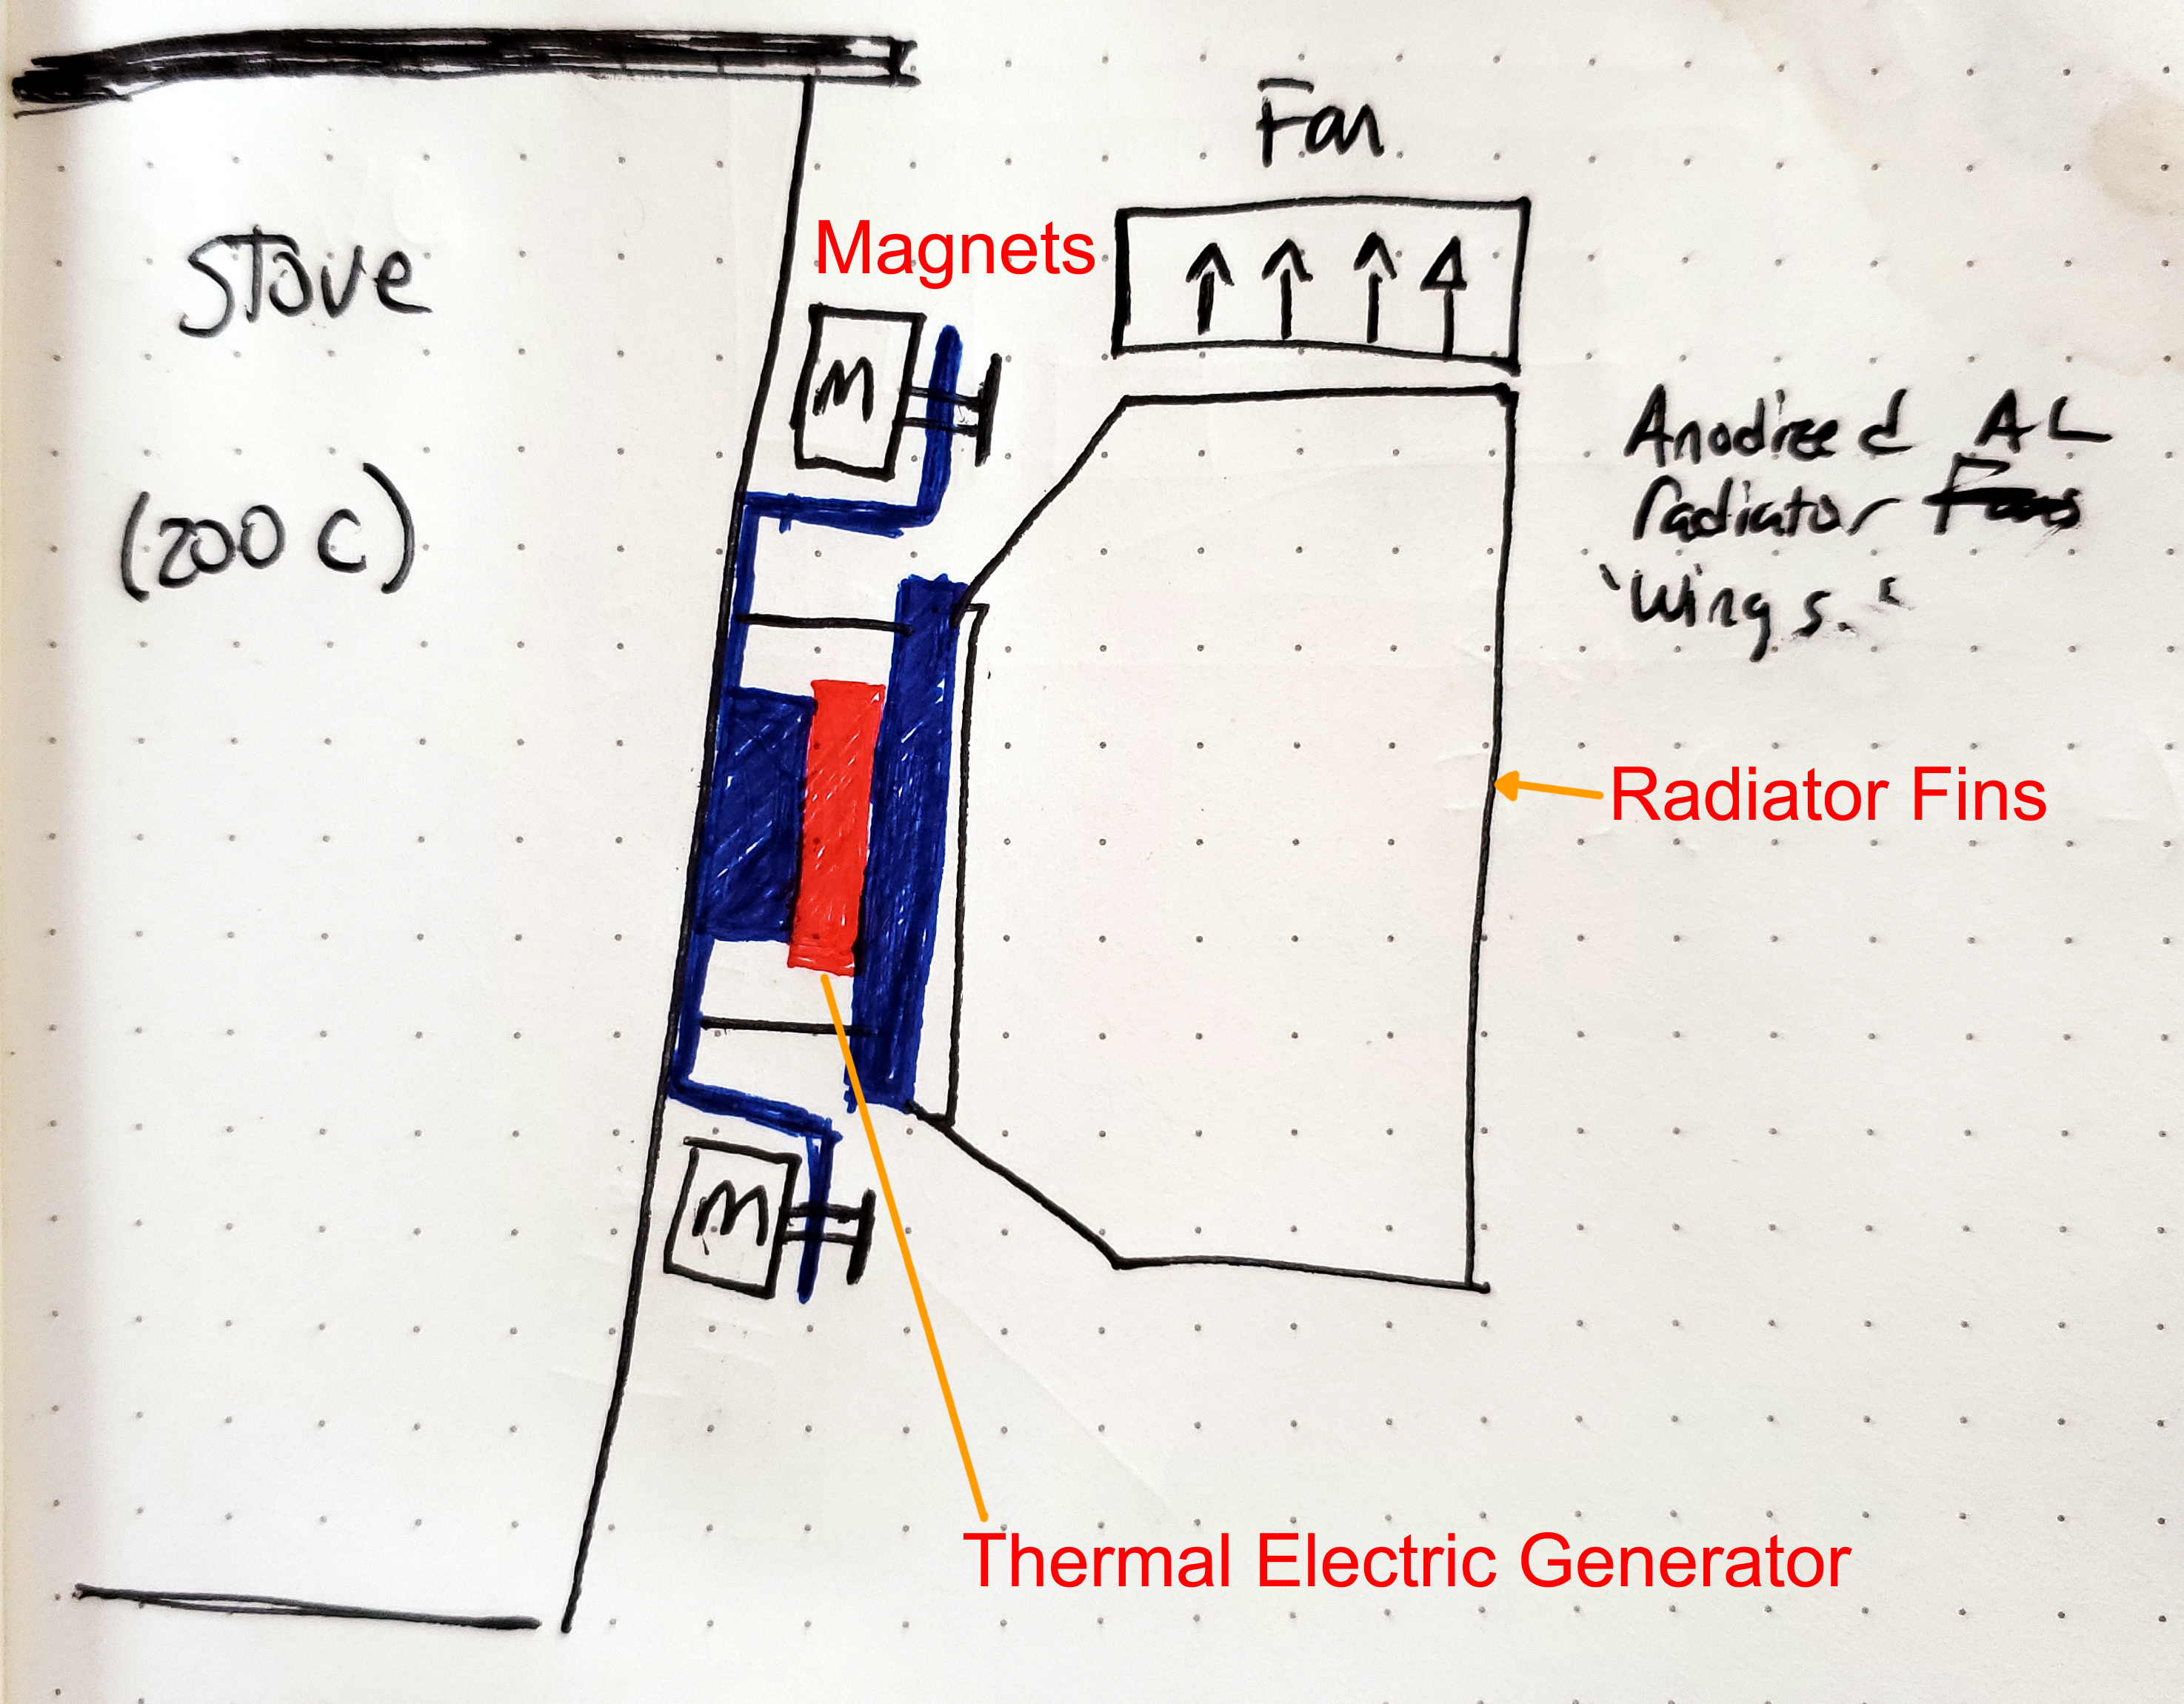
While it would be great if i could get away with a single TEG unit, the ones available only really exist for low voltages, lower than my MPPT really wants to boost from. Two 9V TEG's in series should appear the same way my 18V portable PV panel does. Now to start drafting in a CAD drawing. One of the places to start on something like this is whatever your hardware constraints are. For example I need high temperature magnets that can sit at 300C, from some brief mcmaster-carr searching these [link] seem to be perfect albeit pricey. The thermal electric modules are the second constraint, as they are a fixed size. To attach the plate to the stove and make a firm contact we're going to need at least three points to define the plane. Mechanically going for four, given the uncertainty seems fair. Devices exposed to large thermal differentials do have a significant amount of expansion and contraction, so it would probably be smart to compensate for this however the assembly is tied together. Here's the first draft, the fins are just 0.030 anodized aluminum 6 in x 6 in sheets with nuts pressed into them. I thought about ways to get the fins to fold down and make the whole thing flat pack, but assembling and disassembling is not too bad, assuming I can remember to bring a screwdriver. 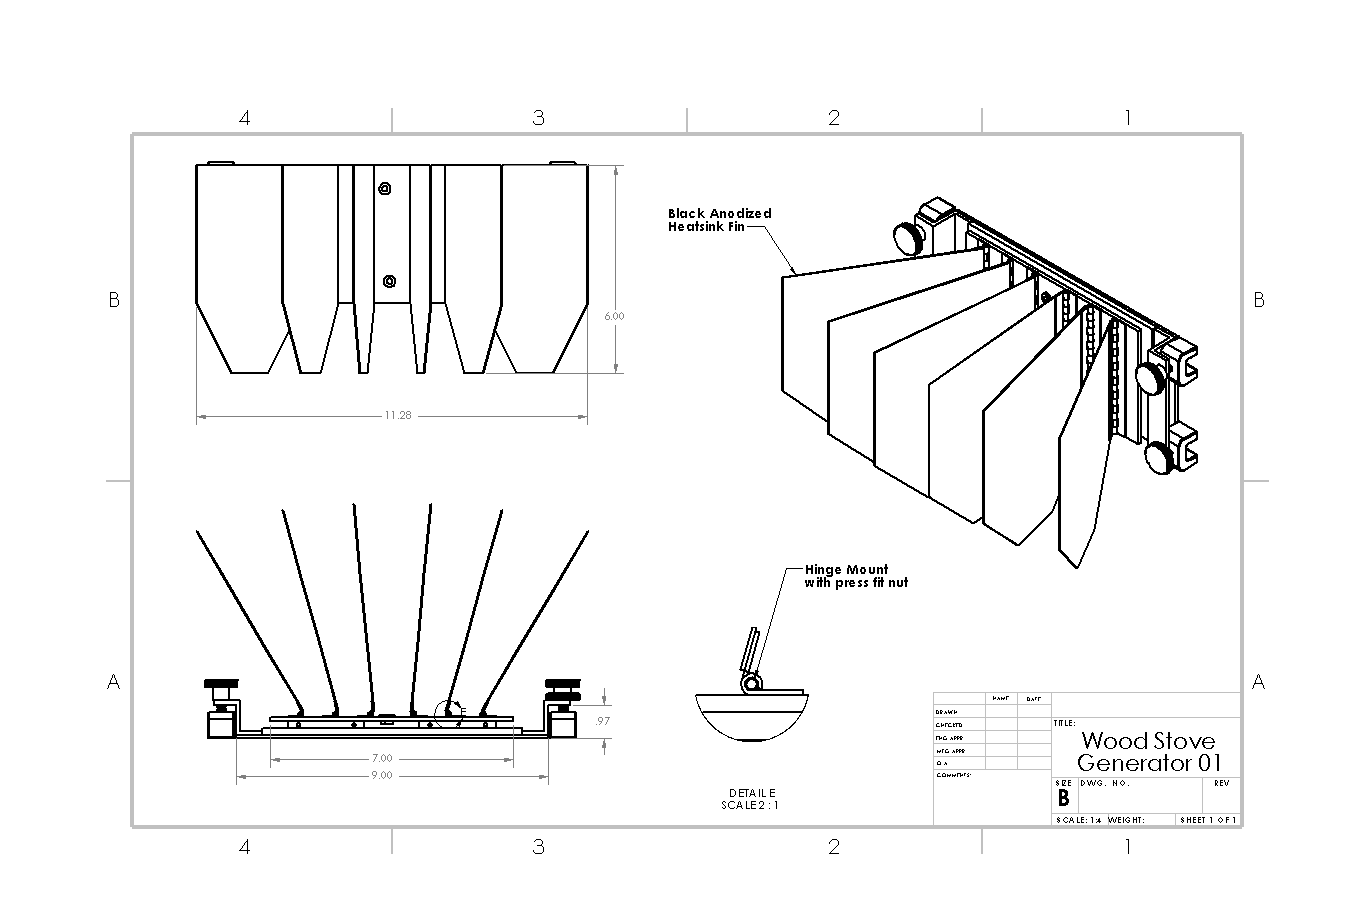
One of the benefits to this approach is the flat top can support a 120 mm diameter '12V' fan sitting on top. Ideally the fan supports the full output voltage swing of the TEC modules. It would be good to find a place where the output voltage from the modules can be tapped off to prevent any force on the TEC modules themselves. To get the profile on the sides of this, I'm opting to use "Z" profile extrusion attached to the main hot plate with some small M3 screws. Adding thermocouple test points would also be great to be able to interface to a datalogger to determine how the hotside / coldside performs. Does the cold side radiate enough heat? Is the hot side able to source enough thermal output? A dual temperature and power meter datalogger would be a great way to qualify how well this would work. 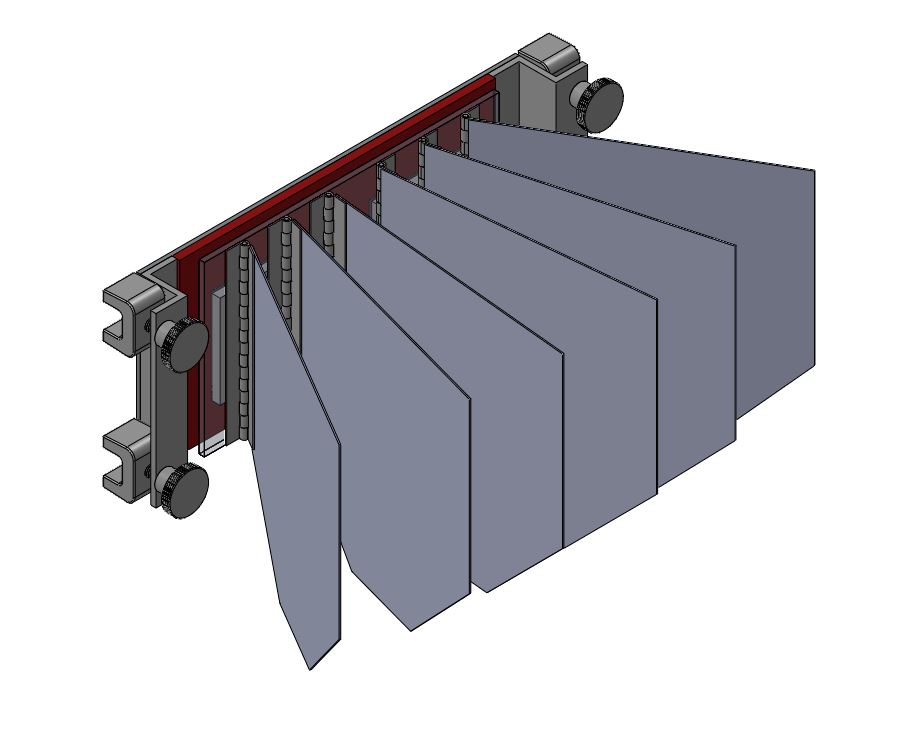
After some further CAD tweaking, here's the prototype: Testing without a wood stoveBack in the workshop, I have neither a wood stove or a freezing atmosphere, but i do have power resistors and plenty of electronics. Can we simulate fixed temperatures on the 'hot side' and observe performance with the fan and radiating fins? Cellular Tethering:I tethered from laptop to phone over a long USB cable, but as it turned out the USB cable itself was too long and would not actually work aside from charging my phone. I was able to tether by making a wifi hotspot to my laptop and obseved the following data rates from fast.com. This was sufficient to pull up things like mcmaster-carr and upload files over scp. I think with an external 4G modem up in a tree acting as a hardware tethering source it would be possible to get closer to the 14/8 Mbps, if that's even needed. 
Concluding Remarks:
Have you noticed that there are no
advertisements or ridiculous pop ups?
|

Post your comments! |
|
Comment Box loading
|